Hi Friends! In this how to crochet post I teach you how to identify the Right or Wrong side of an amigurumi project.

Check out my other crochet how to stitches and techniques!
Follow along with the video or scroll down for the written tutorial with step by step photos.
To Determine Right & Wrong Side of Project
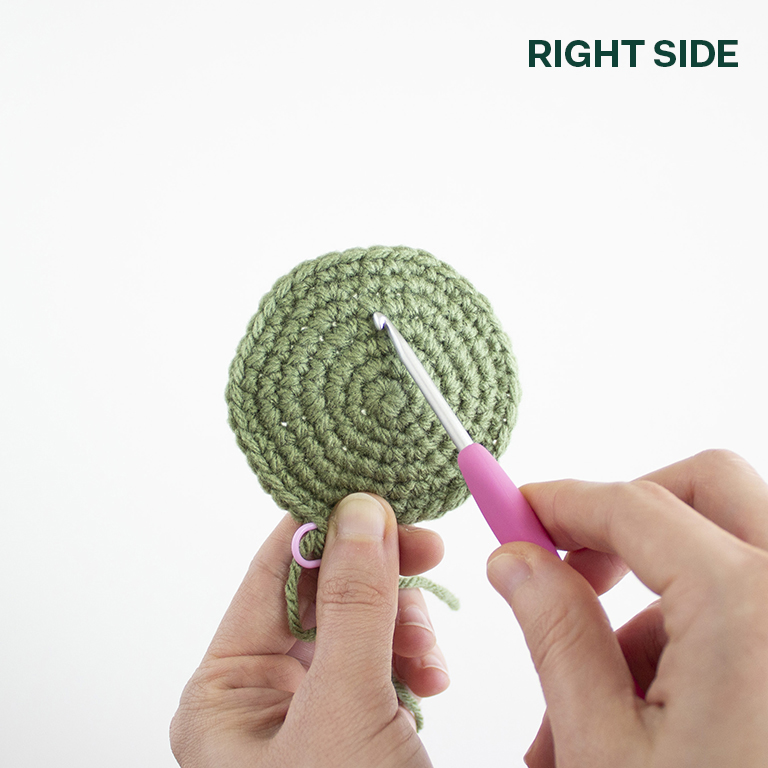
When working your pieces, you’ll notice that one side will always be facing you. This side is considered the “right” side of the work. The side facing away from you is the “wrong” side, or the back side of the work. One way to decipher which side is which, simply look at the side facing you and look for the “V”.

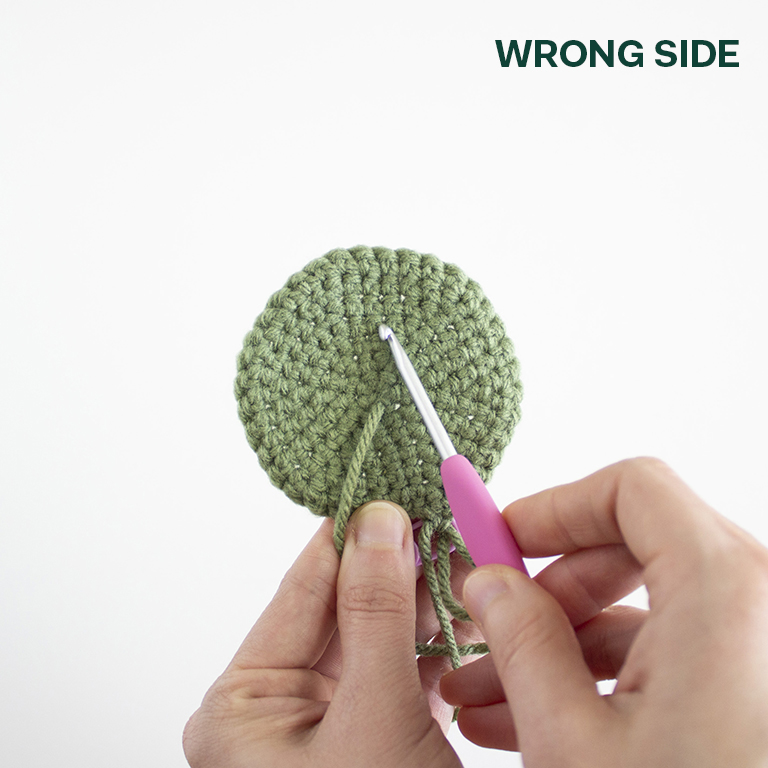
If you turn your work over to the back side, you’ll notice that there is a horizontal bar in between each row of “V’s”.

Sometimes the work will tend to curl in the opposite direction which causes the “wrong” side of the work to end up on the outside of the finished piece. If it does curl, just make sure to correct it so the “right” side is always facing you.
Make sure to check out all my free crochet patterns here!
And there you have it! You now know the difference between the right side of a project and the wrong side! If you’d like to learn more about crocheting, here are my other crochet how to stitches and techniques!
If you have any questions, please don’t hesitate to reach out!
Please be sure to tag me in your posts on Instagram @ameangerieofstitches and use the hashtag #amenagerieofstitches
Happy Crocheting!
Lauren
