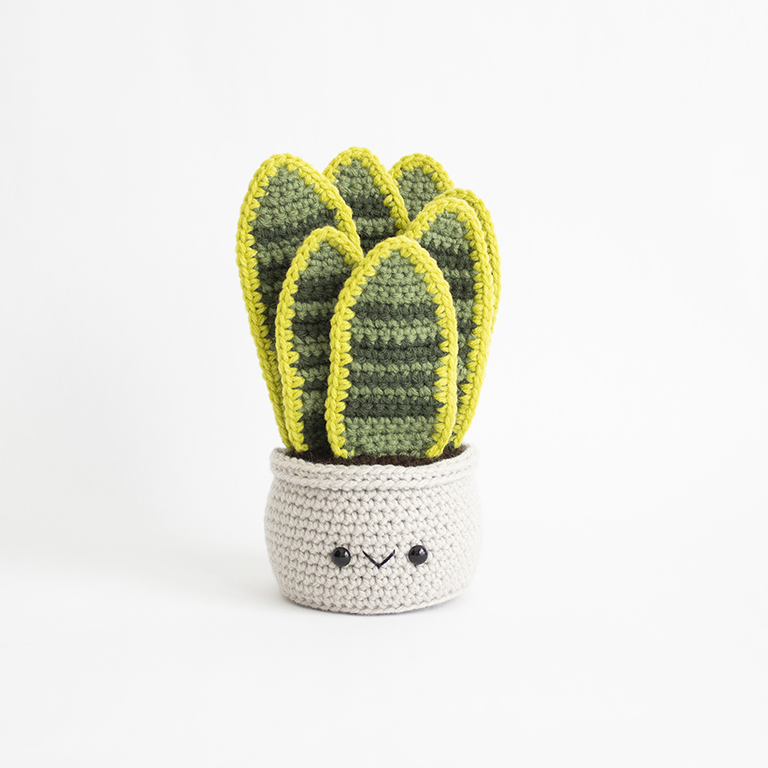
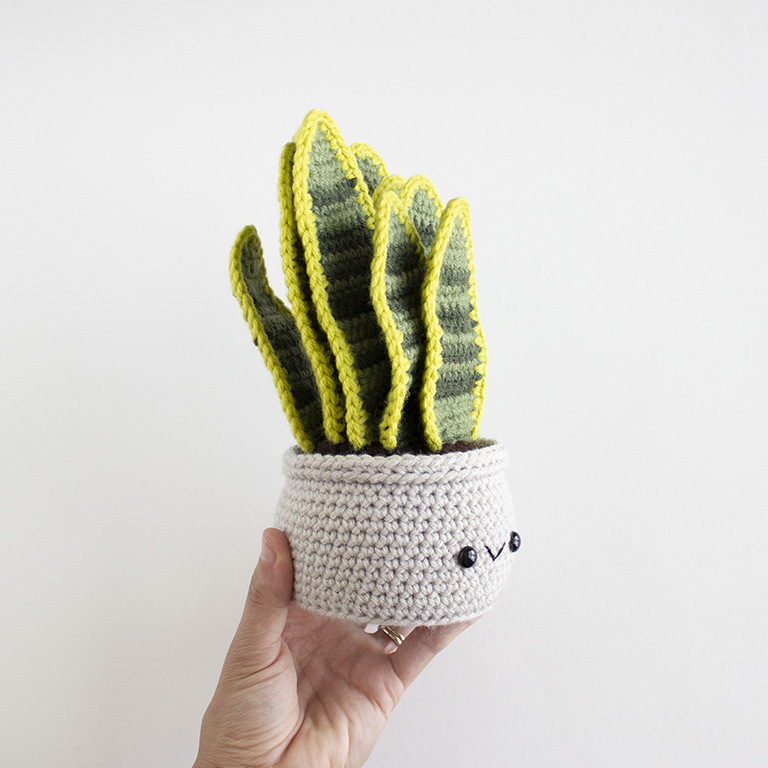
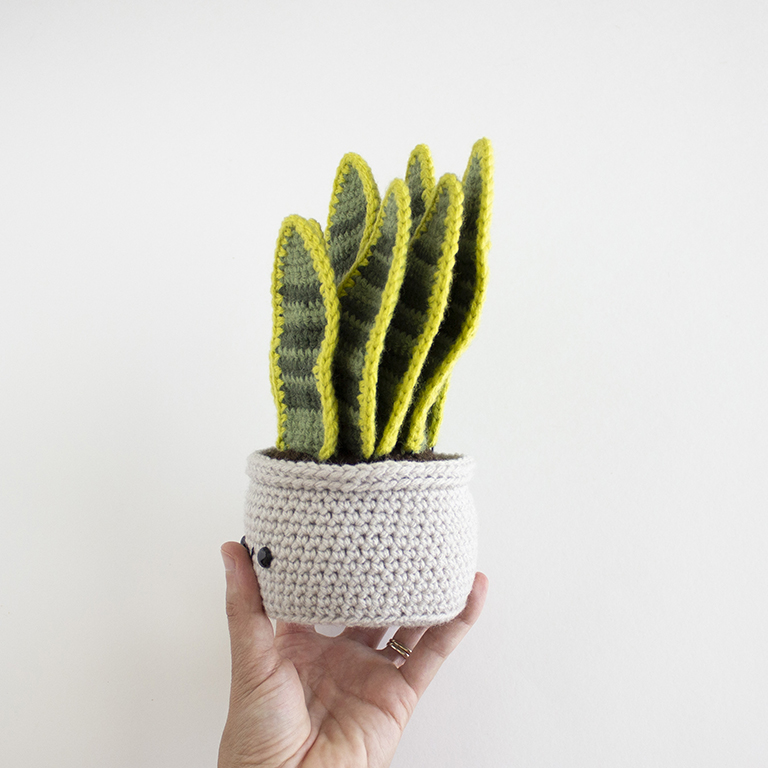
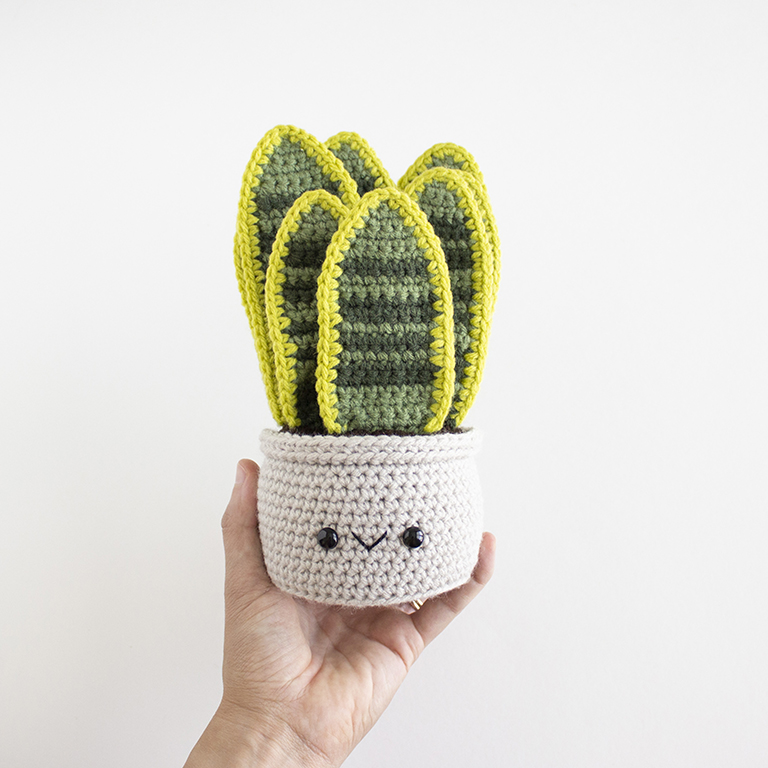
Amigurumi plants are easily one of my top 3 favorite things to make. And this crochet snake plant is no exception! I’m not the first to admit that I’m not very good at keeping plants alive. But crocheted versions, yes please! The more the merrier, unless you’re running out of space like I am!
The brilliant thing about snake plants is that they’re super resilient and used to living in less than ideal conditions. When you forget about watering them, they’re most likely thriving! They make a great plant for those of us who can’t keep plants alive. But, if you’ve truly given up all hope, an amigurumi snake plant is the next best thing!
If you’ve been around for a while, you have probably already seen this crocheted snake plant from me. I actually designed this amigurumi cutie a few years ago and after making many of them, have perfected this crochet pattern and knew it was time for an upgrade! This crochet snake plant pattern now includes two variations for the leaves, giving it more character and variety. It also now gives directions, which the old amigurumi pattern doesn’t for adding wire to your leaves. And better yet, this new and improved crochet snake plant pattern has step by step photos!
Without further ado, let’s get crocheting!
CLICK TO PIN THIS POST NOW!
Here’s what you’ll need:
- Worsted weight yarn: Light Taupe, Dark Brown, Olive Green, Dark Forest Green, Lime Green. I used Michaels Loops & Threads Impeccable in the colors Putty, Chocolate, Forest, Deep Forest and Grass.
- Size F/3.75mm crochet hook
- Black embroidery floss and needle
- One pair of 9mm safety eyes
- Polyester fiberfill stuffing
- Yarn needle
- Scissors
- Stitch marker
- Straight Pins
- 16 gauge craft wire- cut to various lengths (see leaf pattern for measurements)
- Optional – thin cardboard for base of pot
Abbreviations and Terms Used:
Crochet pattern is written using U.S. crochet terminology.
Crochet technique video & photo tutorials can be found here.
R- Round/Row
Mr- Magic Ring
Sc- Single Crochet
Inc- Increase
Dec- Decrease
Ch- Chain
BLO- Back Loops Only
FLO- Front Loops Only
St/s- Stitch/es
* – Repeat the directions in between * and * as many times as stated.
( ) – The number inside will indicate how many stitches you should have at the end of each round.
Finished Measurements:
Measures 8 inches tall and 4 inches wide
*Please note- Sizes will vary depending on your tension, hook and yarn used.
Pattern Notes:
- The pot and dirt crochet patterns are worked in continuous rounds. This means you do not join at the end of each round, and you simply continue onto the next round. Use a stitch marker to mark the end of the round.
- The leaves are worked flat.
➤Decrease – Video & Photo tutorial found here
➤Color Change – Video & Photo tutorial found here
➤Clean Fasten Off – Video & Photo tutorial found here
Prefer an ad-free, printable PDF version?
Grab The Snake Plant Crochet Pattern HERE.
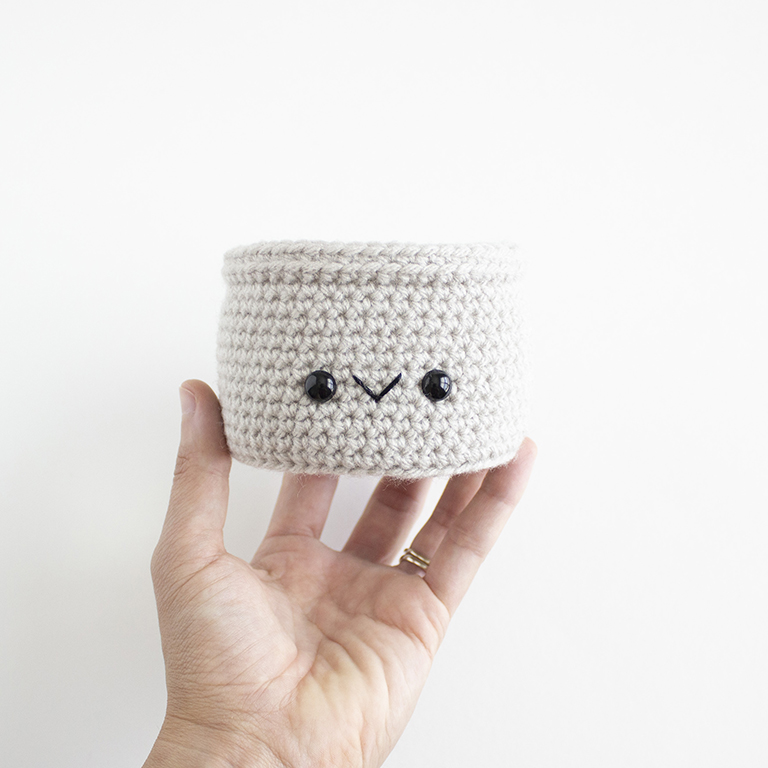
Pot
Using light taupe yarn,
R1: 6 sc in magic ring. (6 sts)
R2: Inc in each st around. (12 sts)
R3: *Sc 1, inc* 6 times. (18 sts)
R4: Sc 1, inc, *Sc 2, inc* 5 times, sc 1. (24 sts)
R5: *Sc 3, inc* 6 times. (30 sts)
R6: Sc 2, inc, *Sc 4, inc* 5 times, sc 2. (36 sts)
R7: *Sc 5, inc* 6 times. (42 sts)
R8: Sc 3, inc, *Sc 6, inc* 5 times, sc 3. (48 sts)
R9: *Sc 7, inc* 6 times. (54 sts)
R10: In BLO, Sc 54.
R11-20: Sc 54.
R21: In FLO, Sc 54.
R22: In BLO, Sc 54.
Fasten off and weave in the tail.
Add safety eyes between rounds 14+15, (5+6 rows up from the rim), placing them 5 stitches apart.
Sew mouth on with black embroidery floss.
Dirt
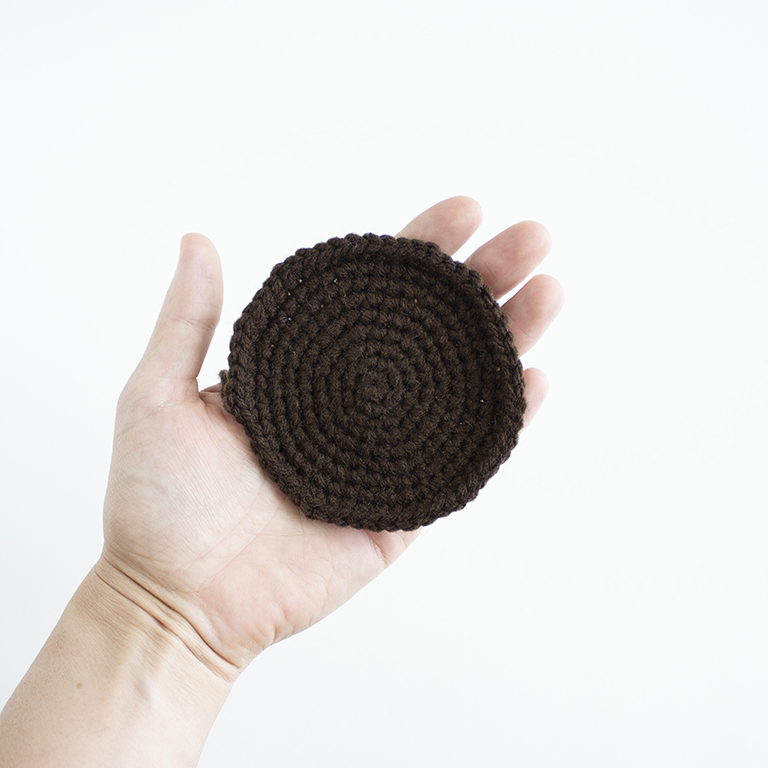
Using dark brown yarn,
R1: 6 sc in magic ring. (6 sts)
R2: Inc in each st around. (12 sts)
R3: *Sc 1, inc* 6 times. (18 sts)
R4: Sc 1, inc, *Sc 2, inc* 5 times, sc 1. (24 sts)
R5: *Sc 3, inc* 6 times. (30 sts)
R6: Sc 2, inc, *Sc 4, inc* 5 times, sc 2. (36 sts)
R7: *Sc 5, inc* 6 times. (42 sts)
R8: Sc 3, inc, *Sc 6, inc* 5 times, sc 3. (48 sts)
R9: *Sc 7, inc* 6 times. (54 sts)
Fasten off and leave a long tail for sewing.
Leaves
There are three sizes for the leaves- small, medium and large. For each size, there are two variations in the striping. You could easily just crochet one variation for all the leaves, but I liked the variety in the striping as it gives the plant a bit of character.
Follow the tips below for making the color changes throughout the leaf patterns.
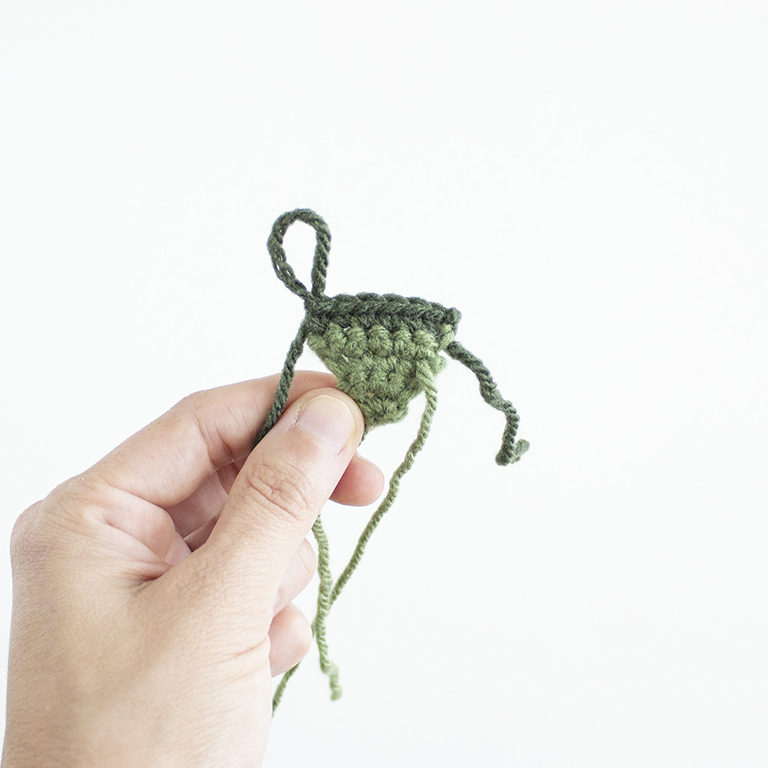
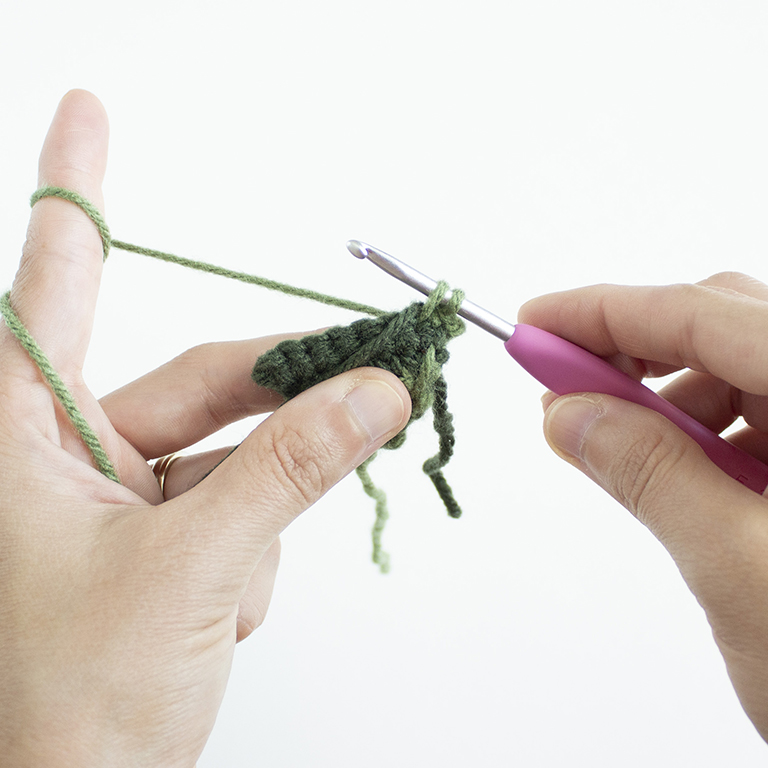
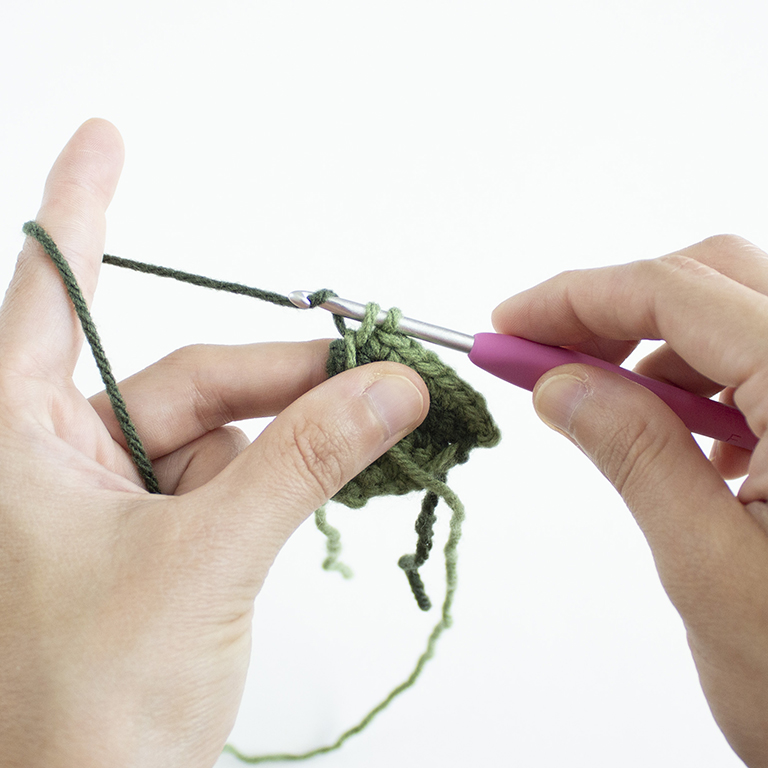
To make the first color change of the leaf- When you reach the last stitch of the row, insert the hook into the stitch and pull up a loop so there are 2 loops on your hook. Yarn over with the new color and pull through to complete the single crochet. You will then chain 1 and turn the work.
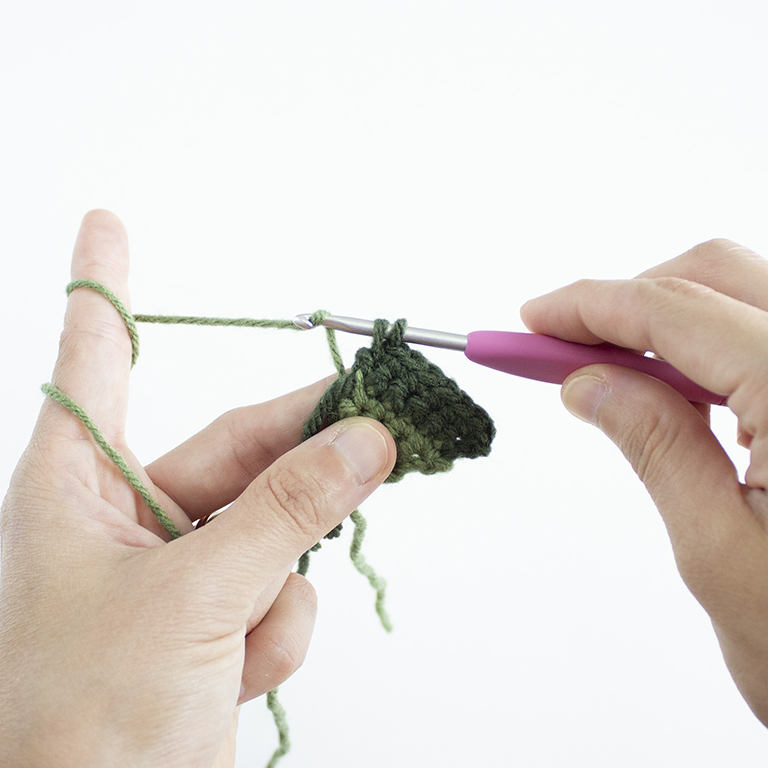
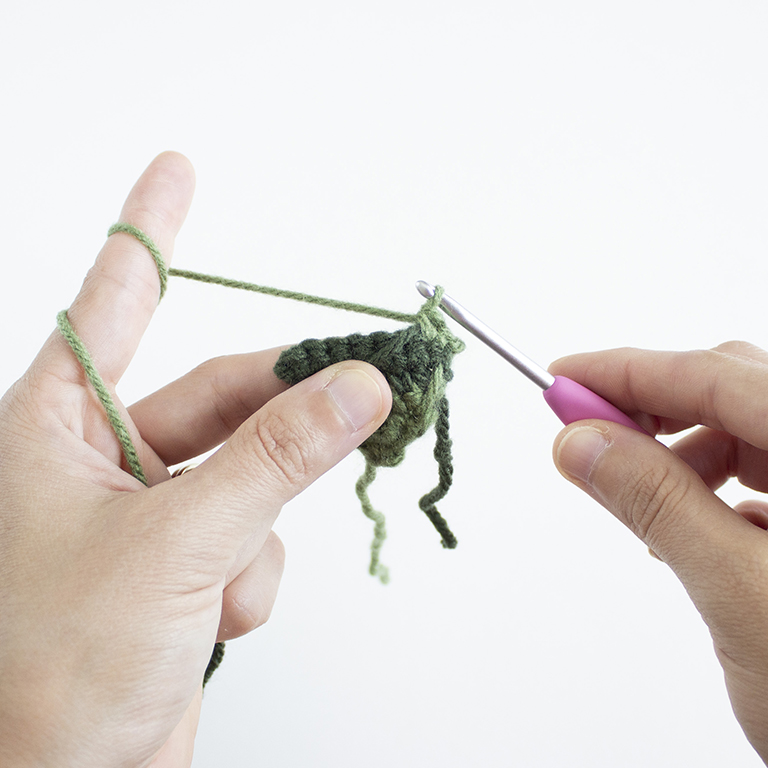
When changing colors, some rows will state to either leave the yarn or carry the yarn to the other side. This makes it easier to change colors without having to cut and rejoin the yarn every time we change colors.
When the yarn needs to be left and picked up again a few rows after, carry the yarn up the side of the leaf. Repeat the steps for changing colors. The lime green yarn at the end will cover up this jog along the edge.
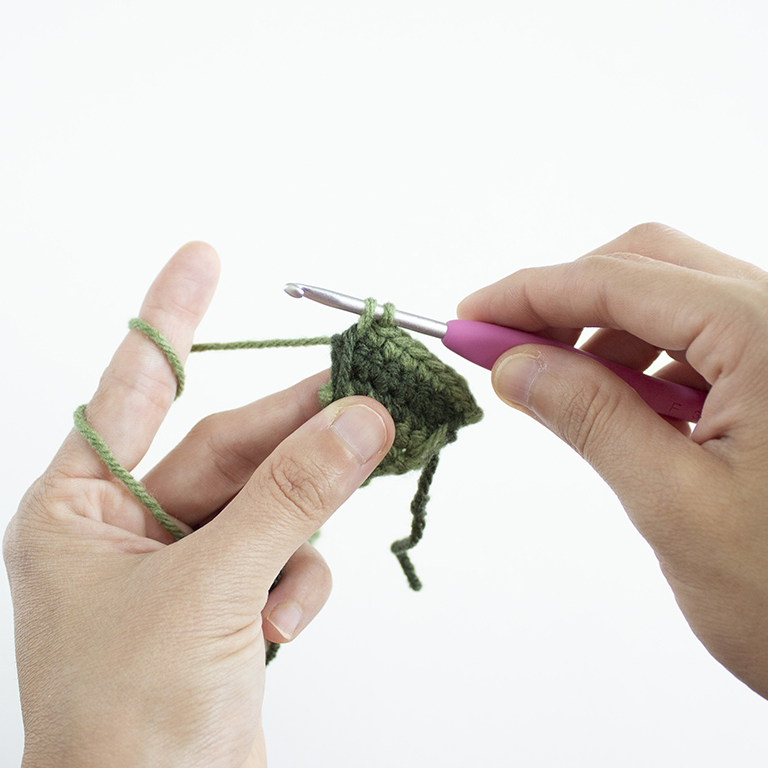
When the yarn needs to be carried to the other side, lay the color being carried across the
stitches and crochet over the yarn while making the single crochets.
Prefer an ad-free, printable PDF version?
Grab The Snake Plant Crochet Pattern HERE.
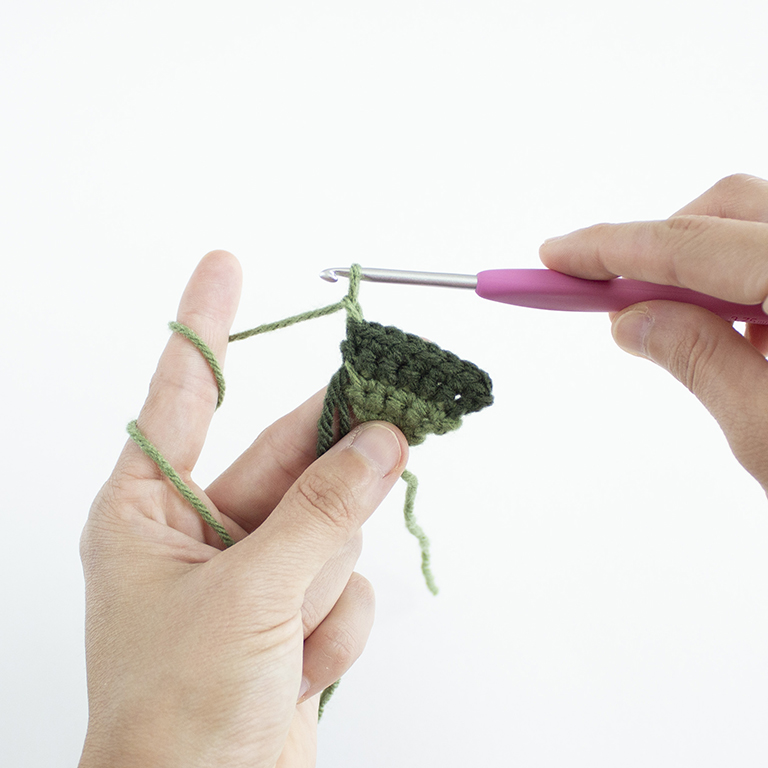
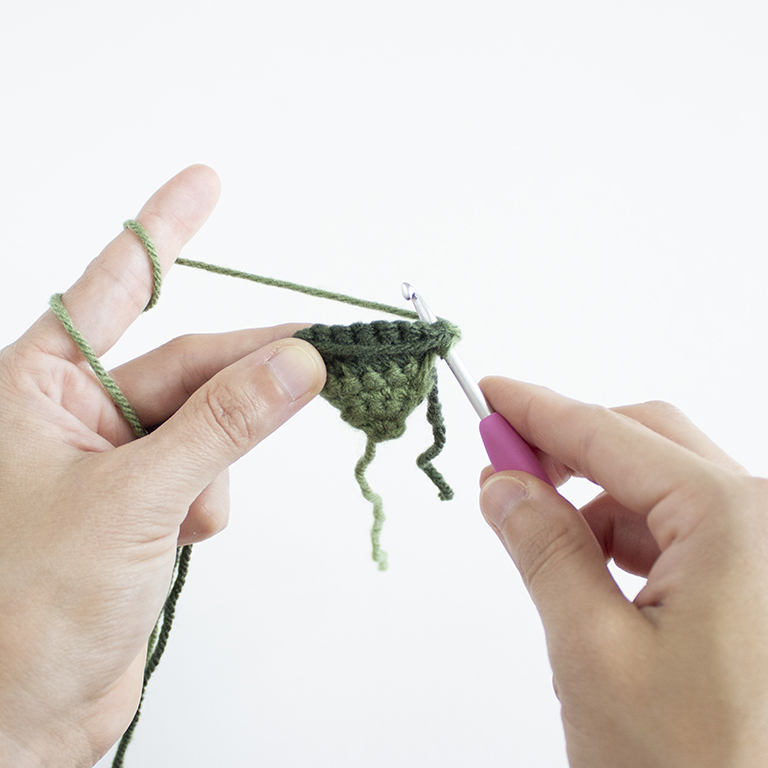
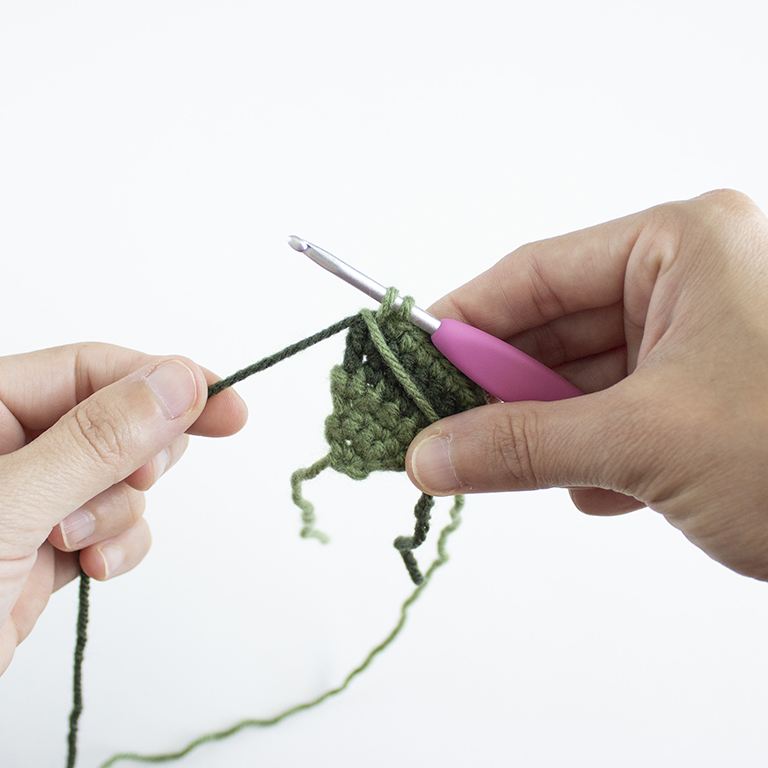
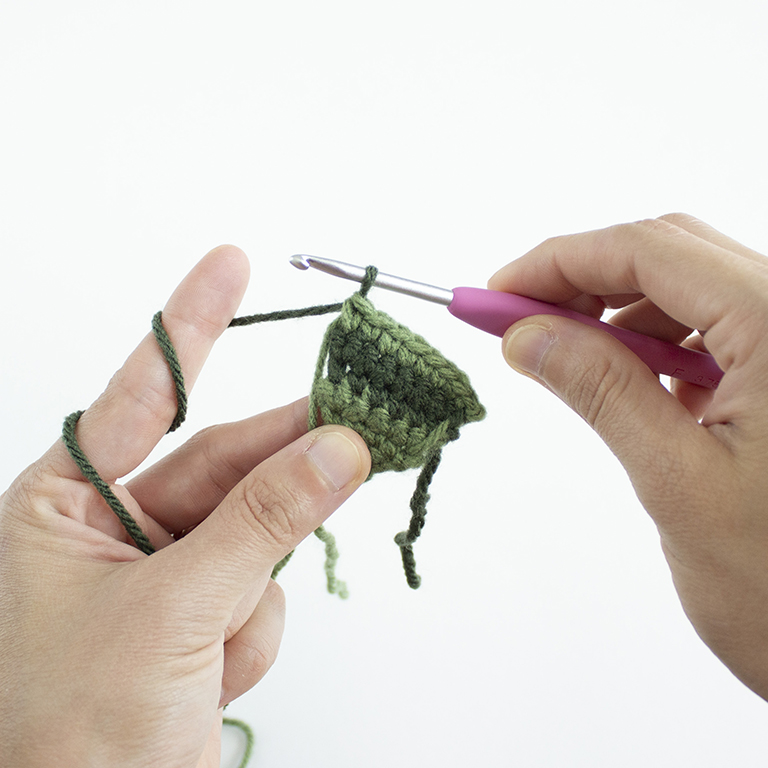
When a color change happens consecutively, bring the tail of the color we just crocheted with to the front. Make sure to lay it on top of the color we will be changing to. Yarn over and complete the stitch with the new color. This will make the row have a clean finish, so the striping is more defined.
When completing your leaves, follow the directions below.
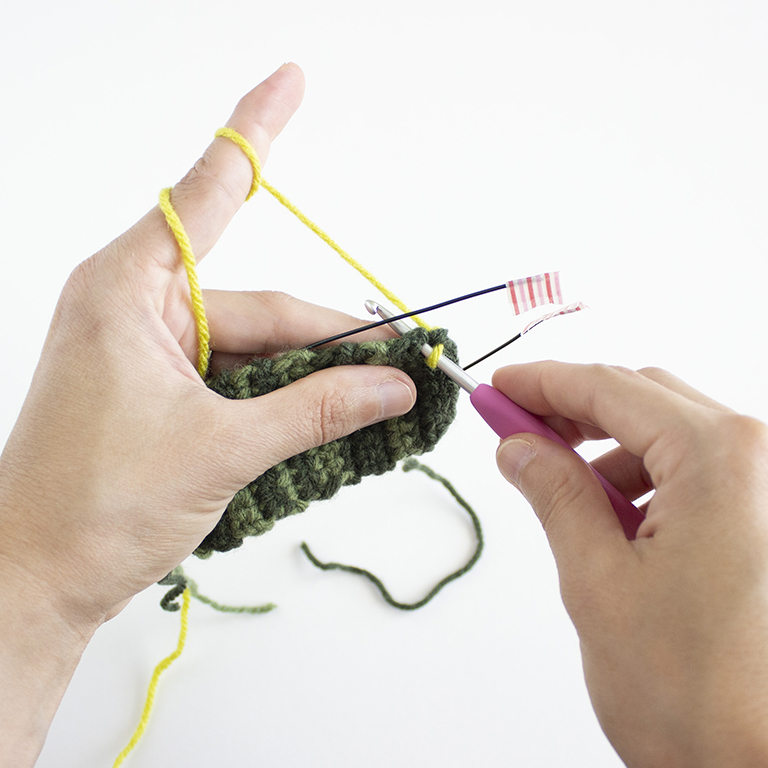
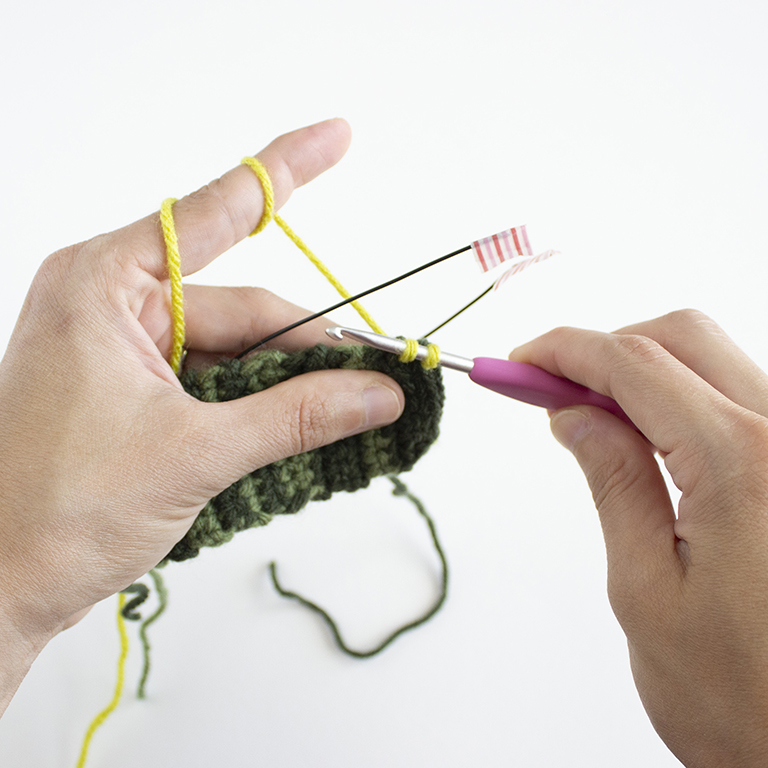
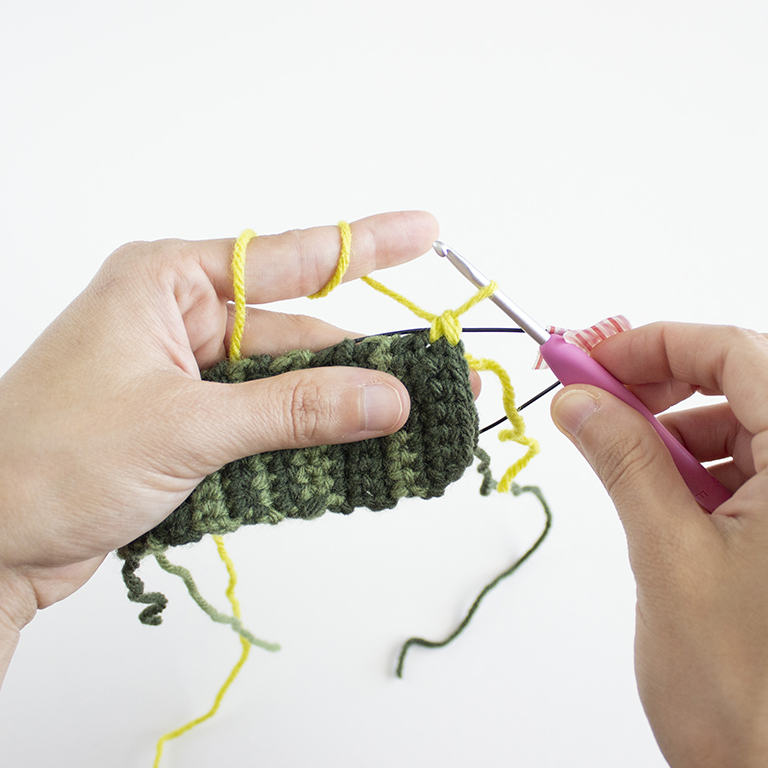
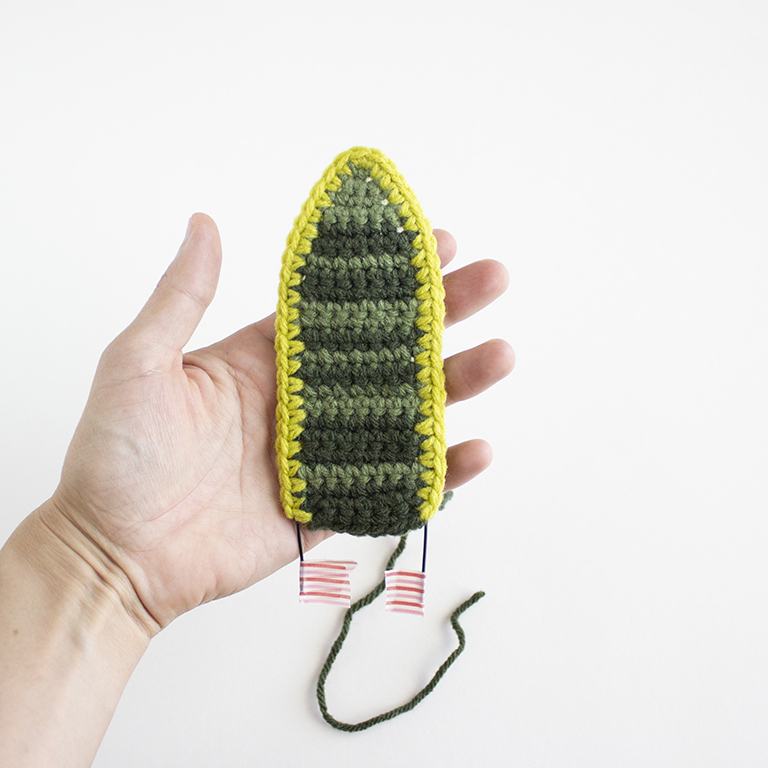
For the craft wire, you’ll want to cut three lengths, 10 inches for the small leaves, 12 inches for the medium leaves, and 14 inches for the large leaves. I like to place tape on the ends of the wire, so I don’t get poked while crocheting. Just remove the tape before attaching the leaves to the dirt. Bend each wire in half, making sure to not pinch the fold, you’ll want it to be slightly rounded.
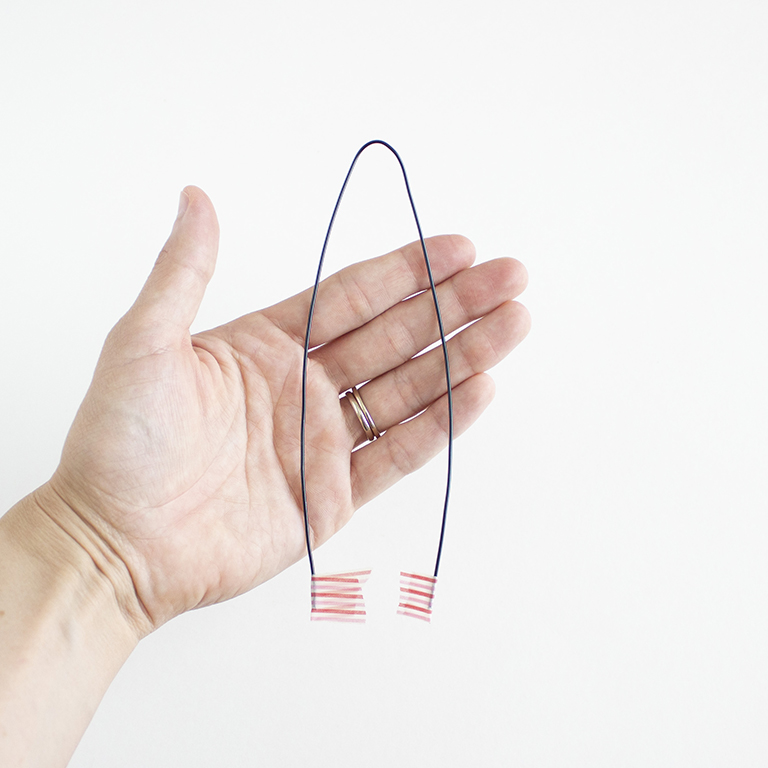
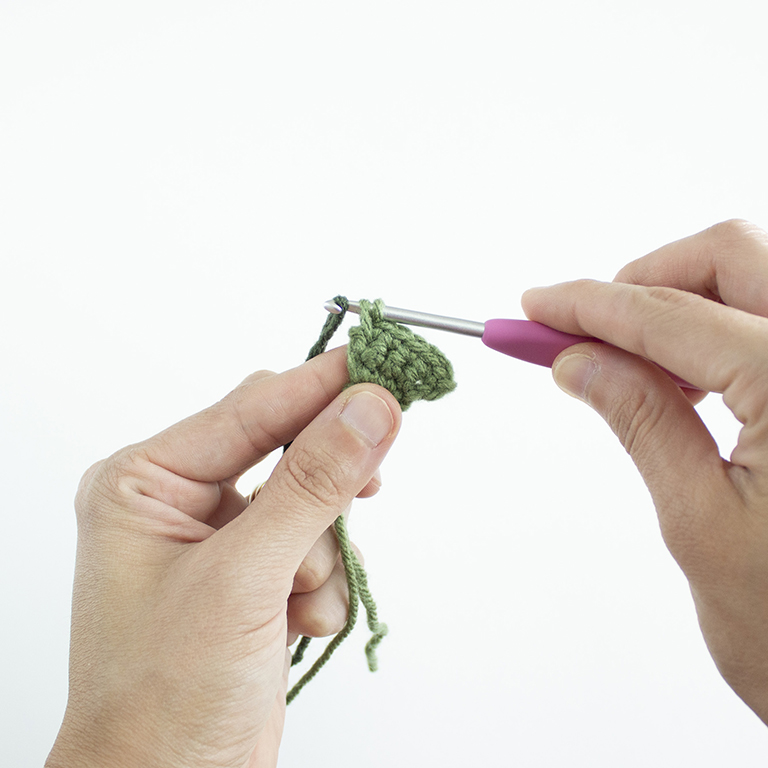
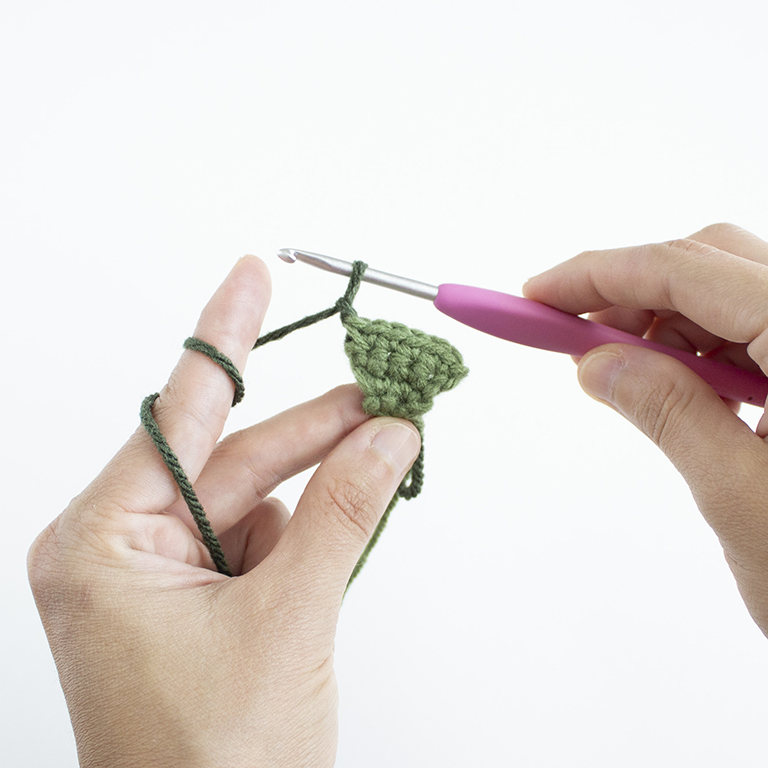
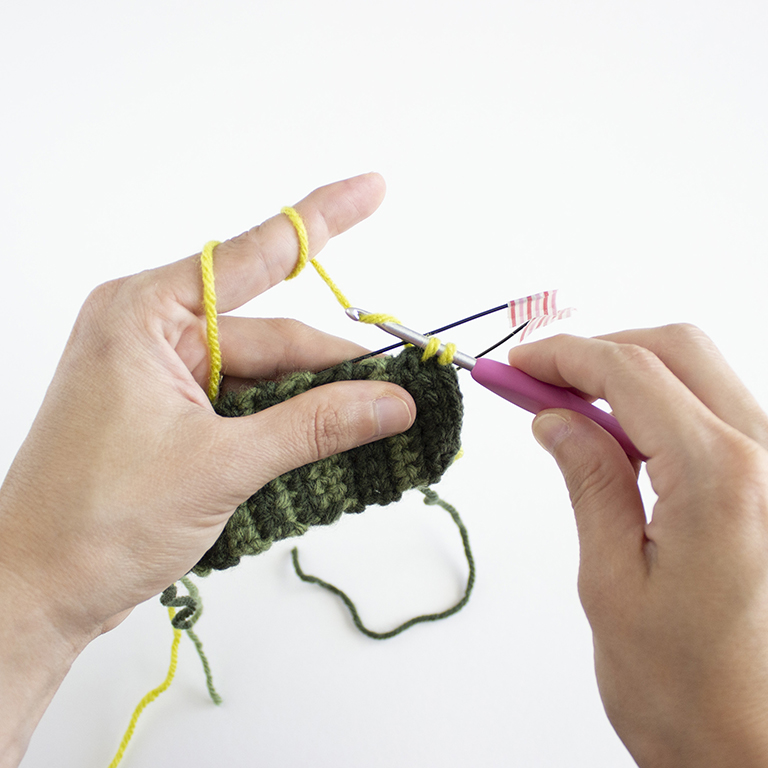
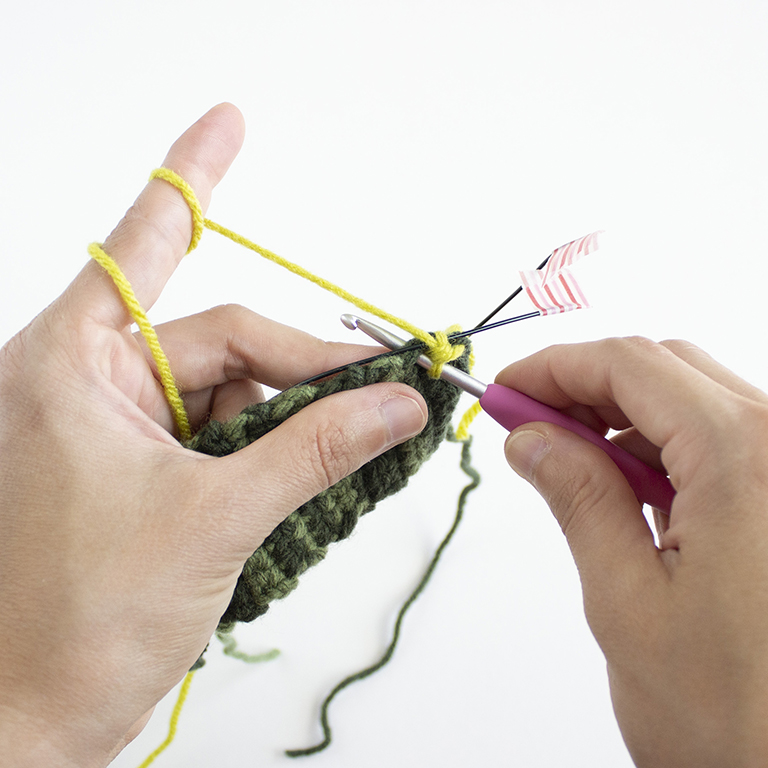
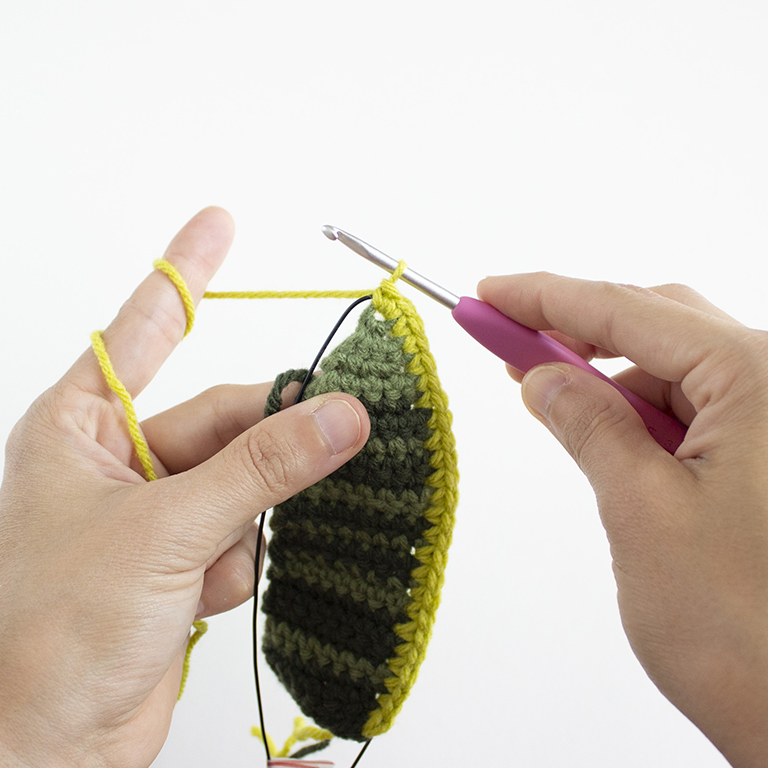
When you get to Row 21, hold the craft wire along the edge of the leaf and crochet around the wire as you make the single crochet stitches. Insert the hook into the side of the leaf, going under the wire, and pull up a loop. Yarn over again and complete the single crochet. (photos 19+20) Make sure to go under the wire as you continue to crochet around it.
As the pattern states, you’ll crochet along the side of the leaf, place an increase into the tip of the leaf, then continue crocheting along the other side of the leaf.
Leave about 1-1.5 inches of wire on each side of the leaf. This extra bit will be inserted into
the dirt later.
Prefer an ad-free, printable PDF version?
Grab The Snake Plant Crochet Pattern HERE.
Small Leaf – Make 3
You can choose which variation to make 2 of.
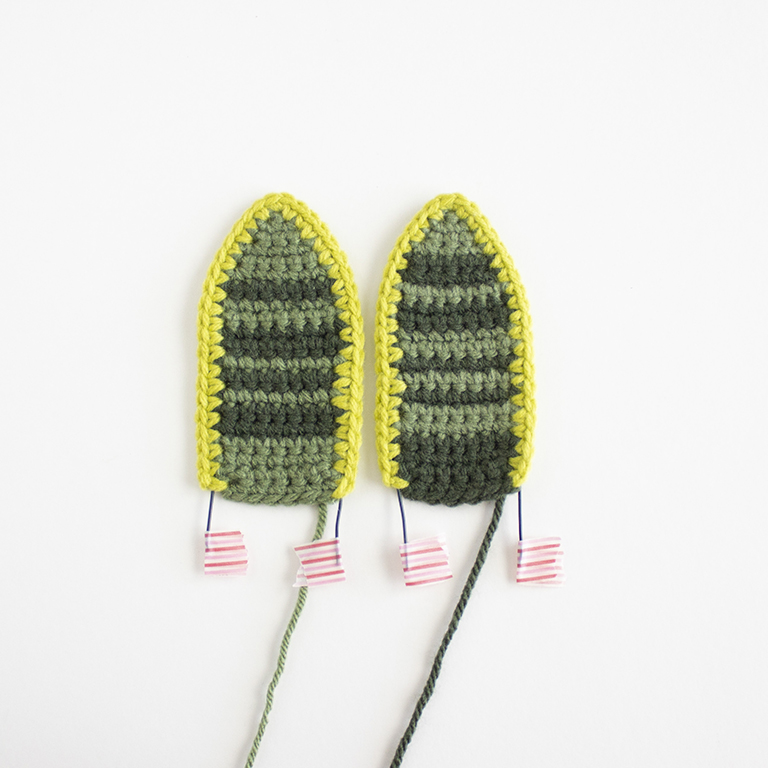
➤Variation #1 (on the right)
With olive green yarn,
R1: Ch 2 then in the 2nd ch from the hook, inc. (2 sts) Ch 1 and turn.
R2: Inc in each st. (4 sts) Ch 1 and turn.
R3: Sc 4. Ch 1 and turn.
R4: Inc, sc 2, inc. (6 sts)
Change to dark forest green. Ch 1 and turn. Leave the olive green yarn.
R5: Sc 6. Ch 1 and turn.
R6: Inc, sc 4, inc. (8 sts)
Change to olive green yarn. Ch 1 and turn.
R7: Sc 8, carrying the dark forest yarn across.
Change to dark forest yarn. Ch 1 and turn. Leave the olive green yarn.
R8: Sc 8. Ch 1 and turn.
R9: Sc 8.
Change to olive green yarn. Ch 1 and turn. Leave the dark forest yarn.
R10: Sc 8. Ch 1 and turn.
R11: Sc 8.
Change to dark forest yarn. Ch 1 and turn.
R12: Sc 8, carrying the olive green yarn across.
Change to olive green yarn. Ch 1 and turn.
R13: Sc 8, carrying the dark forest yarn across.
Change to dark forest yarn. Ch 1 and turn.
R14: Sc 8, carrying the olive green yarn across.
Change to olive green yarn. Ch 1 and turn. Leave the dark forest yarn.
R15: Sc 8. Ch 1 and turn.
R16: Sc 8.
Change to dark forest yarn. Ch 1 and turn. Cut the olive green yarn and weave in the end.
R17: Sc 8. Ch 1 and turn.
R18: Sc 8. Ch 1 and turn.
R19: Dec, sc 4, dec. (6 sts) Ch 1 and turn.
R20: Sc 6.
Change to lime green yarn. Cut the dark forest yarn, leaving a long tail for sewing. Weave in all remaining tails.
R21: Sc around the entire edge of the leaf, holding the wire along the edge. Sc 19 along one edge, inc in the tip, then sc 19 along the other edge. (40 sts)
Fasten off and weave in the lime green tails.
➤Variation #2 (on the left)
With olive green yarn,
R1: Ch 2 then in the 2nd ch from the hook, inc. (2 sts) Ch 1 and turn.
R2: Inc in each st. (4 sts) Ch 1 and turn.
R3: Sc 4. Ch 1 and turn.
R4: Inc, sc 2, inc. (6 sts) Ch 1 and turn.
R5: Sc 6. Ch 1 and turn.
R6: Inc, sc 4, inc. (8 sts)
Change to dark forest yarn. Ch 1 and turn.
R7: Sc 8, carrying the olive green yarn across.
Change to olive green yarn. Ch 1 and turn. Leave the dark forest yarn.
R8: Sc 8. Ch 1 and turn.
R9: Sc 8.
Change to dark forest yarn. Ch 1 and turn. Leave the olive green yarn.
R10: Sc 8. Ch 1 and turn.
R11: Sc 8.
Change to olive green yarn. Ch 1 and turn.
R12: Sc 8, carrying the dark forest yarn across.
Change to dark forest yarn. Ch 1 and turn.
R13: Sc 8, carrying the olive green yarn across.
Change to olive green yarn. Ch 1 and turn.
R14: Sc 8, carrying the dark forest yarn across.
Change to dark forest yarn. Ch 1 and turn. Leave the olive green yarn.
R15: Sc 8. Ch 1 and turn.
R16: Sc 8.
Change to olive green yarn. Ch 1 and turn. Cut the dark forest yarn and weave in the end.
R17: Sc 8. Ch 1 and turn.
R18: Sc 8. Ch 1 and turn.
R19: Dec, sc 4, dec. (6 sts) Ch 1 and turn.
R20: Sc 6.
Change to lime green yarn. Cut the olive green yarn, leaving a long tail for sewing. Weave in all remaining tails.
R21: Sc around the entire edge of the leaf, holding the wire along the edge. Sc 19 along one edge, inc in the tip, then sc 19 along the other edge. (40 sts)
Fasten off and weave in the lime green tails.
Medium Leaf – Make 4
Make 2 of each variation.
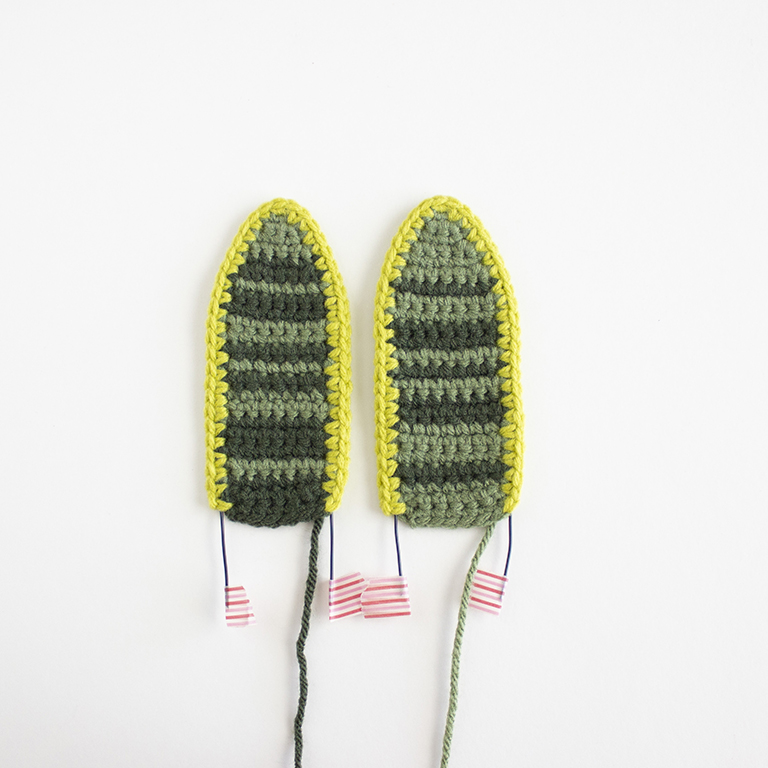
➤Variation #1 (on the left)
With olive green yarn,
R1: Ch 2 then in the 2nd ch from the hook, inc. (2 sts) Ch 1 and turn.
R2: Inc in each st. (4 sts) Ch 1 and turn.
R3: Sc 4. Ch 1 and turn.
R4: Inc, sc 2, inc. (6 sts)
Change to dark forest green. Ch 1 and turn. Leave the olive green yarn.
R5: Sc 6. Ch 1 and turn.
R6: Inc, sc 4, inc. (8 sts)
Change to olive green yarn. Ch 1 and turn.
R7: Sc 8, carrying the dark forest yarn across.
Change to dark forest yarn. Ch 1 and turn. Leave the olive green yarn.
R8: Sc 8. Ch 1 and turn.
R9: Sc 8.
Change to olive green yarn. Ch 1 and turn. Leave the dark forest yarn.
R10: Sc 8. Ch 1 and turn.
R11: Sc 8.
Change to dark forest yarn. Ch 1 and turn.
R12: Sc 8, carrying the olive green yarn across.
Change to olive green yarn. Ch 1 and turn.
R13: Sc 8, carrying the dark forest yarn across.
Change to dark forest yarn. Ch 1 and turn.
R14: Sc 8, carrying the olive green yarn across.
Change to olive green yarn. Ch 1 and turn. Leave the dark forest yarn.
R15: Sc 8. Ch 1 and turn.
R16: Sc 8.
Change to dark forest yarn. Ch 1 and turn.
R17: Sc 8, carrying the olive green yarn across and leaving here. Ch 1 and turn.
R18: Sc 8. Ch 1 and turn.
R19: Sc 8.
Change to olive green yarn. Ch 1 and turn.
R20: Sc 8, carrying dark forest yarn across.
Change to dark forest yarn. Ch 1 and turn. Cut the olive green yarn and weave in the end.
R21: Sc 8. Ch 1 and turn.
R22: Dec, sc 4, dec. (6 sts) Ch 1 and turn.
R23: Sc 6.
Change to lime green yarn. Cut the dark forest yarn, leaving a long tail for sewing. Weave in
all remaining tails.
R24: Sc around the entire edge of the leaf, holding the wire along the edge. Sc 22 along
one edge, inc in the tip, then sc 22 along the other edge. (46 sts)
Fasten off and weave in the lime green tails.
➤Variation #2 (on the right)
With olive green yarn,
R1: Ch 2 then in the 2nd ch from the hook, inc. (2 sts) Ch 1 and turn.
R2: Inc in each st. (4 sts) Ch 1 and turn.
R3: Sc 4. Ch 1 and turn.
R4: Inc, sc 2, inc. (6 sts) Ch 1 and turn.
R5: Sc 6. Ch 1 and turn.
R6: Inc, sc 4, inc. (8 sts)
Change to dark forest yarn. Ch 1 and turn.
R7: Sc 8, carrying the olive green yarn across.
Change to olive green yarn. Ch 1 and turn. Leave the dark forest yarn.
R8: Sc 8. Ch 1 and turn.
R9: Sc 8.
Change to dark forest yarn. Ch 1 and turn. Leave the olive green yarn.
R10: Sc 8. Ch 1 and turn.
R11: Sc 8.
Change to olive green yarn. Ch 1 and turn.
R12: Sc 8, carrying the dark forest yarn across.
Change to dark forest yarn. Ch 1 and turn.
R13: Sc 8, carrying the olive green yarn across.
Change to olive green yarn. Ch 1 and turn.
R14: Sc 8, carrying the dark forest yarn across.
Change to dark forest yarn. Ch 1 and turn. Leave the olive green yarn.
R15: Sc 8. Ch 1 and turn.
R16: Sc 8.
Change to olive green yarn. Ch 1 and turn.
R17: Sc 8, carrying the dark forest yarn across and leaving here. Ch 1 and turn.
R18: Sc 8. Ch 1 and turn.
R19: Sc 8.
Change to dark forest yarn. Ch 1 and turn.
R20: Sc 8, carrying olive green yarn across.
Change to olive green yarn. Ch 1 and turn. Cut the dark forest yarn and weave in the end.
R21: Sc 8. Ch 1 and turn.
R22: Dec, sc 4, dec. (6 sts) Ch 1 and turn.
R23: Sc 6.
Change to lime green yarn. Cut the olive green yarn, leaving a long tail for sewing. Weave in all remaining tails.
R24: Sc around the entire edge of the leaf, holding the wire along the edge. Sc 22 along one edge, inc in the tip, then sc 22 along the other edge. (46 sts)
Fasten off and weave in the lime green tails.
Prefer an ad-free, printable PDF version?
Grab The Snake Plant Crochet Pattern HERE.
Large Leaf – Make 3
You can choose which variation to make 2 of.
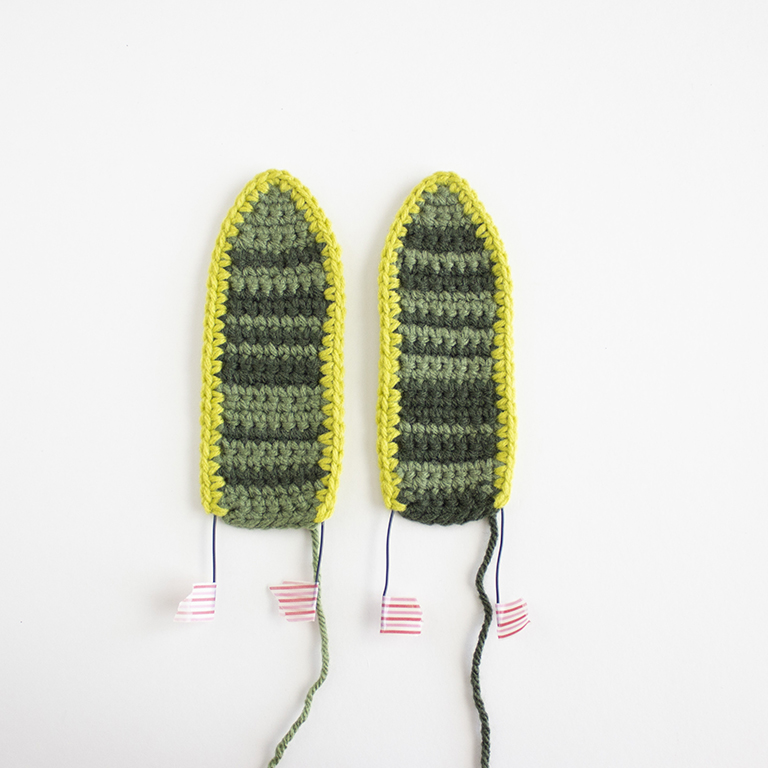
➤Variation #1 (on the right)
With olive green yarn,
R1: Ch 2 then in the 2nd ch from the hook, inc. (2 sts) Ch 1 and turn.
R2: Inc in each st. (4 sts) Ch 1 and turn.
R3: Sc 4. Ch 1 and turn.
R4: Inc, sc 2, inc. (6 sts)
Change to dark forest green. Ch 1 and turn. Leave the olive green yarn.
R5: Sc 6. Ch 1 and turn.
R6: Inc, sc 4, inc. (8 sts)
Change to olive green yarn. Ch 1 and turn.
R7: Sc 8, carrying the dark forest yarn across.
Change to dark forest yarn. Ch 1 and turn. Leave the olive green yarn.
R8: Sc 8. Ch 1 and turn.
R9: Sc 8.
Change to olive green yarn. Ch 1 and turn. Leave the dark forest yarn.
R10: Sc 8. Ch 1 and turn.
R11: Sc 8.
Change to dark forest yarn. Ch 1 and turn.
R12: Sc 8, carrying the olive green yarn across.
Change to olive green yarn. Ch 1 and turn.
R13: Sc 8, carrying the dark forest yarn across.
Change to dark forest yarn. Ch 1 and turn.
R14: Sc 8, carrying the olive green yarn across.
Change to olive green yarn. Ch 1 and turn. Leave the dark forest yarn.
R15: Sc 8. Ch 1 and turn.
R16: Sc 8.
Change to dark forest yarn. Ch 1 and turn.
R17: Sc 8, carrying the olive green yarn across and leaving here. Ch 1 and turn.
R18: Sc 8. Ch 1 and turn.
R19: Sc 8.
Change to olive green yarn. Ch 1 and turn.
R20: Sc 8, carrying dark forest yarn across.
Change to dark forest yarn. Ch 1 and turn. Leave the olive green yarn.
R21: Sc 8. Ch 1 and turn.
R22: Sc 8.
Change to olive green yarn. Ch 1 and turn. Leave the dark forest yarn.
R23: Sc 8. Ch 1 and turn.
R24: Sc 8.
Change to dark forest yarn. Ch 1 and turn. Cut the olive green yarn and weave in the end.
R25: Dec, sc 4, dec. (6 sts) Ch 1 and turn.
R26: Sc 6.
Change to lime green yarn. Cut the dark forest yarn, leaving a long tail for sewing. Weave in all remaining tails.
R27: Sc around the entire edge of the leaf, holding the wire along the edge. Sc 25 along one edge, inc in the tip, then sc 25 along the other edge. (52 sts)
Fasten off and weave in the lime green tails.
➤Variation #2 (on the left)
With olive green yarn,
R1: Ch 2 then in the 2nd ch from the hook, inc. (2 sts) Ch 1 and turn.
R2: Inc in each st. (4 sts) Ch 1 and turn.
R3: Sc 4. Ch 1 and turn.
R4: Inc, sc 2, inc. (6 sts) Ch 1 and turn.
R5: Sc 6. Ch 1 and turn.
R6: Inc, sc 4, inc. (8 sts)
Change to dark forest yarn. Ch 1 and turn.
R7: Sc 8, carrying the olive green yarn across.
Change to olive green yarn. Ch 1 and turn. Leave the dark forest yarn.
R8: Sc 8. Ch 1 and turn.
R9: Sc 8.
Change to dark forest yarn. Ch 1 and turn. Leave the olive green yarn.
R10: Sc 8. Ch 1 and turn.
R11: Sc 8.
Change to olive green yarn. Ch 1 and turn.
R12: Sc 8, carrying the dark forest yarn across.
Change to dark forest yarn. Ch 1 and turn.
R13: Sc 8, carrying the olive green yarn across.
Change to olive green yarn. Ch 1 and turn.
R14: Sc 8, carrying the dark forest yarn across.
Change to dark forest yarn. Ch 1 and turn. Leave the olive green yarn.
R15: Sc 8. Ch 1 and turn.
R16: Sc 8.
Change to olive green yarn. Ch 1 and turn.
R17: Sc 8, carrying the dark forest yarn across and leaving here. Ch 1 and turn.
R18: Sc 8. Ch 1 and turn.
R19: Sc 8.
Change to dark forest yarn. Ch 1 and turn.
R20: Sc 8, carrying olive green yarn across.
Change to olive green yarn. Ch 1 and turn. Leave the dark forest yarn.
R21: Sc 8. Ch 1 and turn.
R22: Sc 8.
Change to dark forest yarn. Ch 1 and turn.
R23: Sc 8, carrying the olive green yarn.
Change to olive yarn. Ch 1 and turn. Cut the dark forest yarn and weave in the end.
R24: Sc 8. Ch 1 and turn.
R25: Dec, sc 4, dec. (6 sts) Ch 1 and turn.
R26: Sc 6.
Change to lime green yarn. Cut the olive green yarn, leaving a long tail for sewing. Weave in all remaining tails.
R27: Sc around the entire edge of the leaf, holding the wire along the edge. Sc 25 along one edge, inc in the tip, then sc 25 along the other edge. (52 sts)
Fasten off and weave in the lime green tails.
Assembly
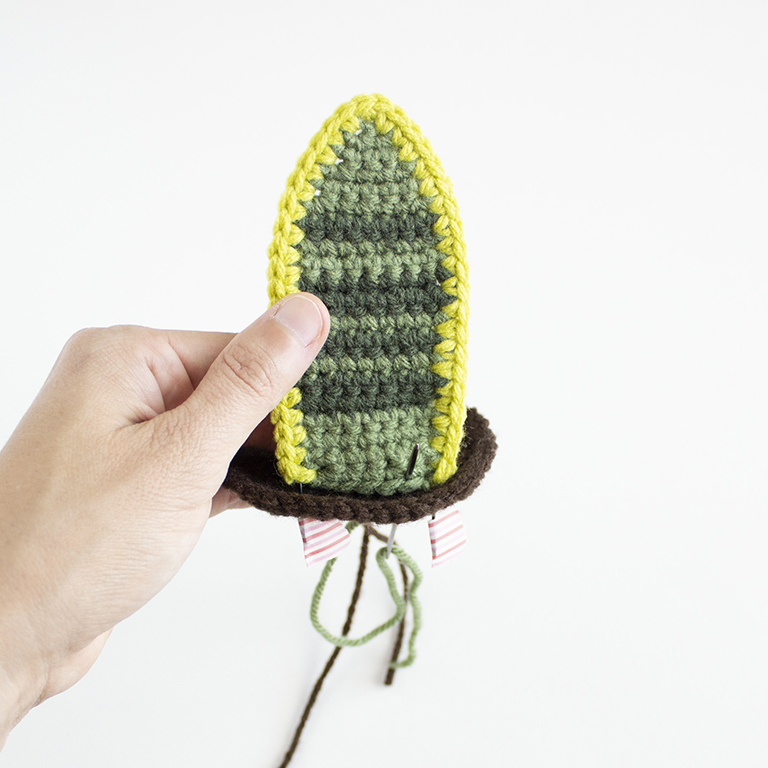
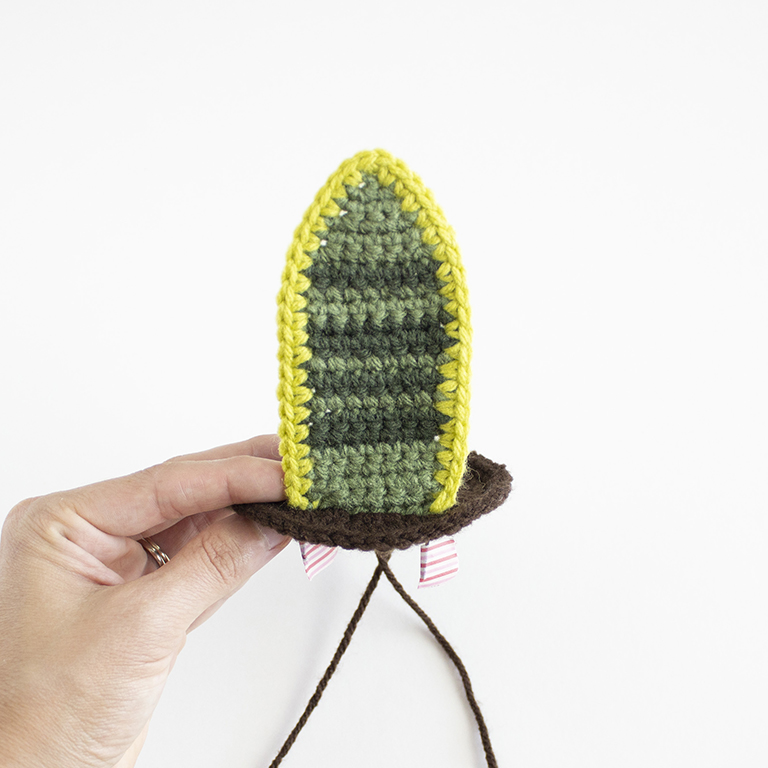
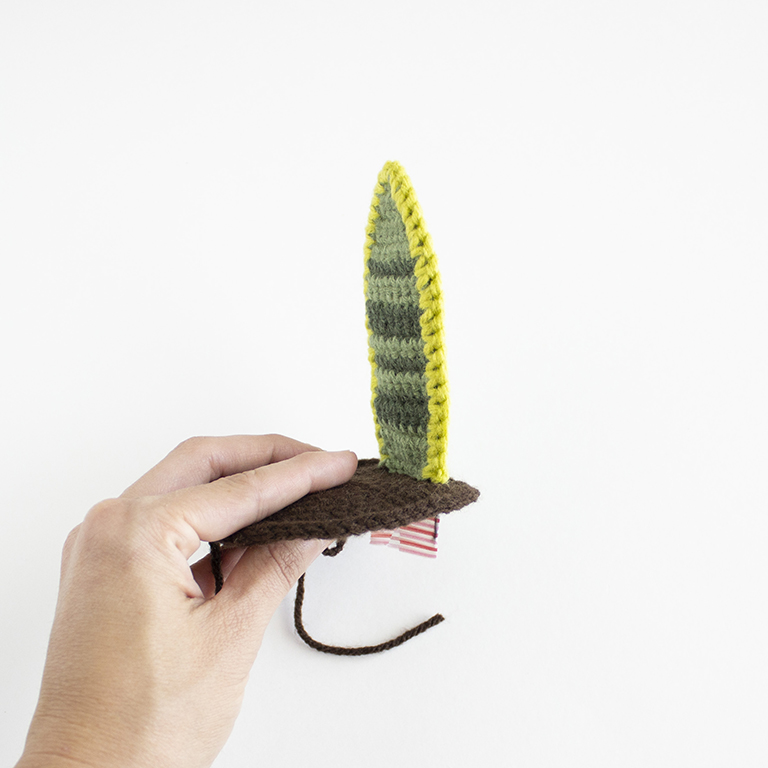
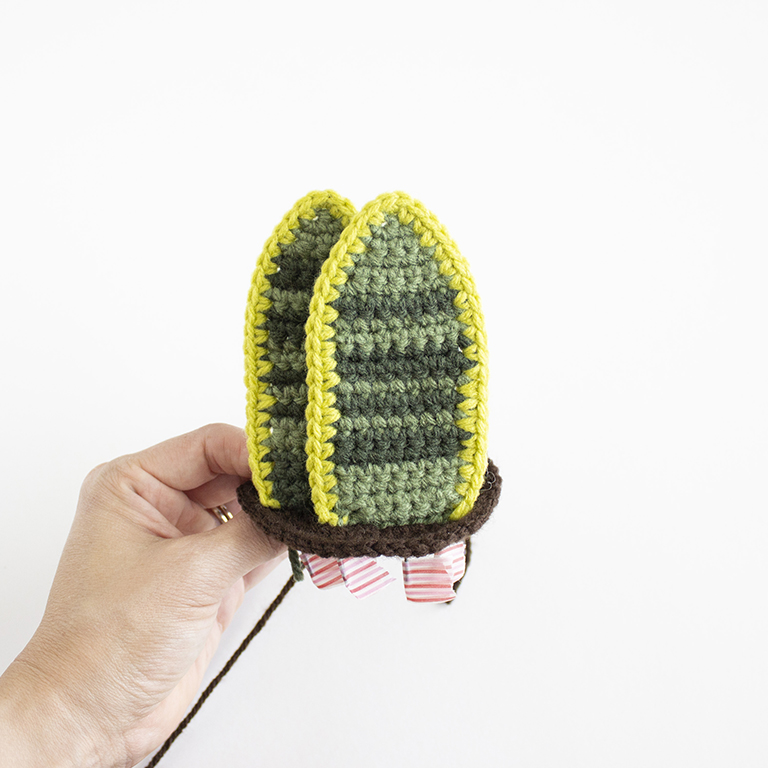
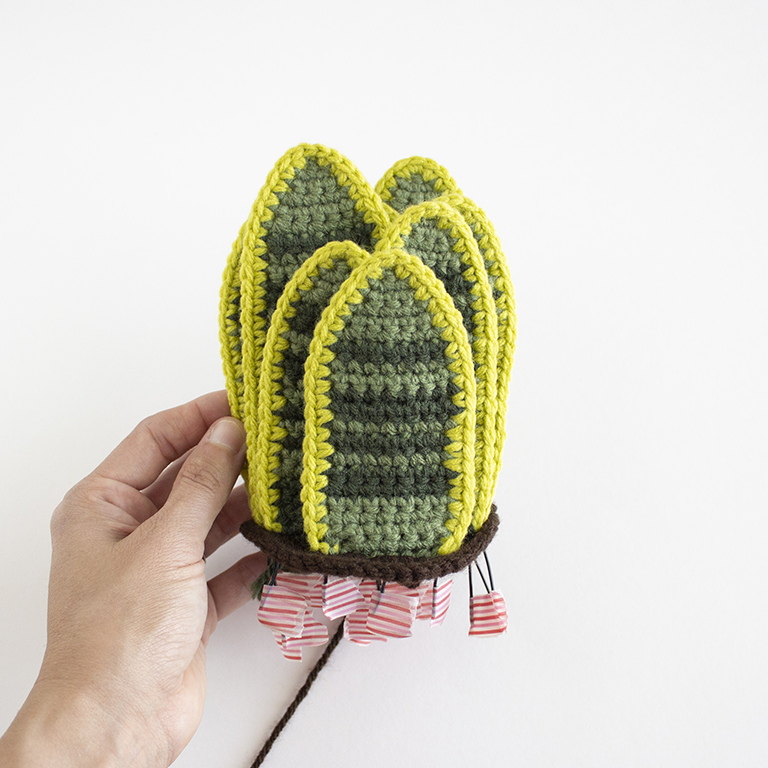
See diagram for where to place each crochet leaf.
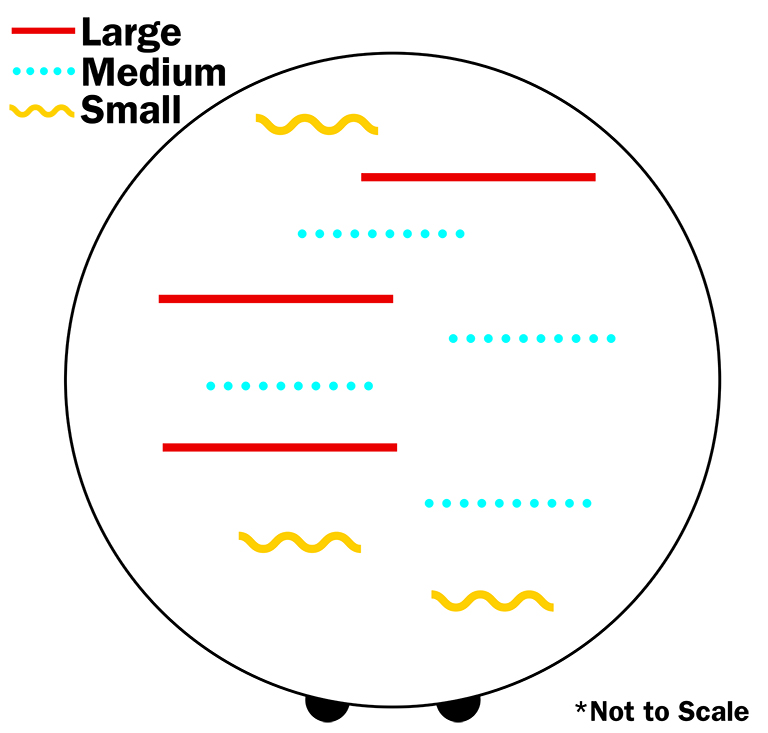
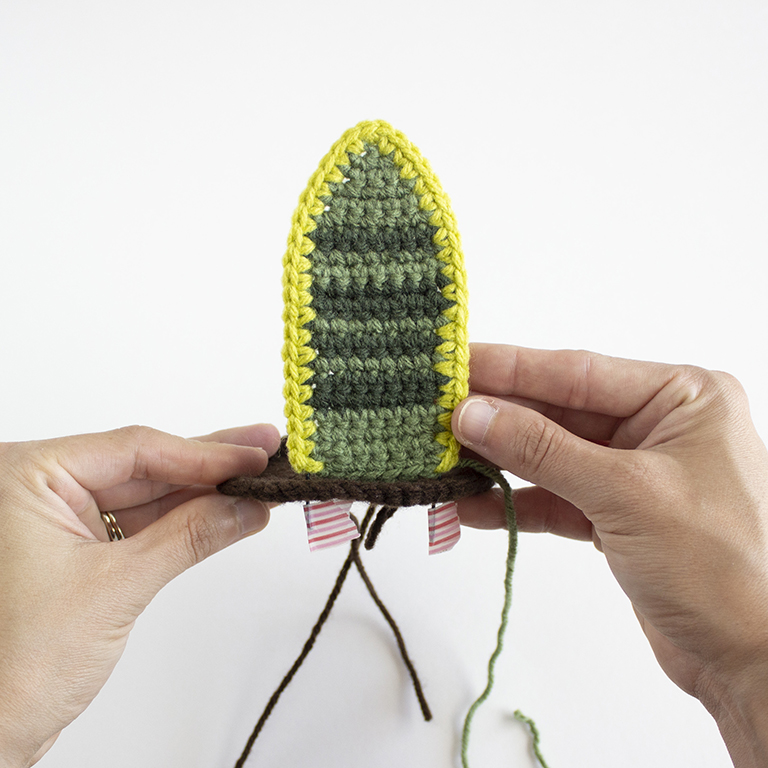
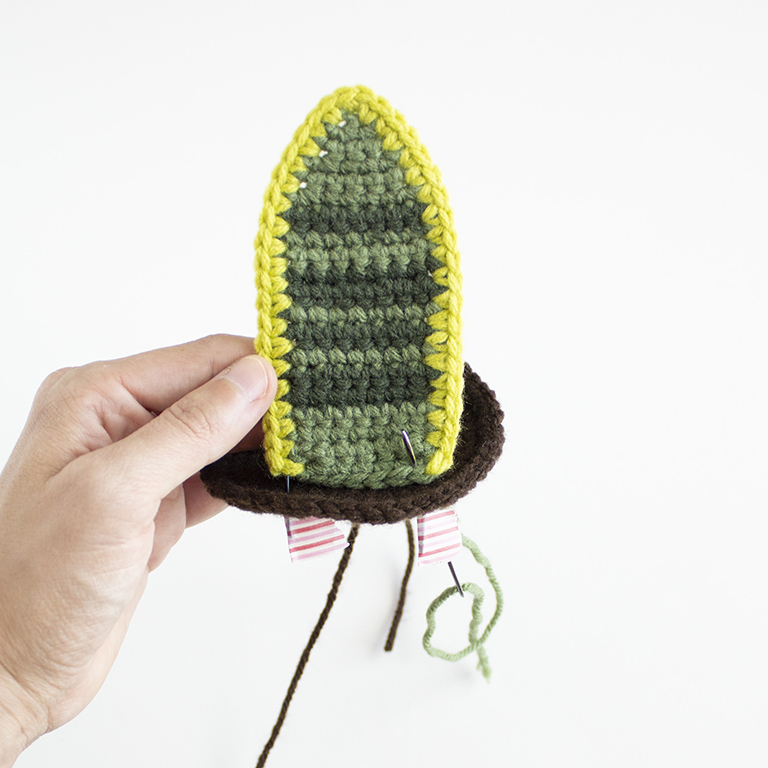
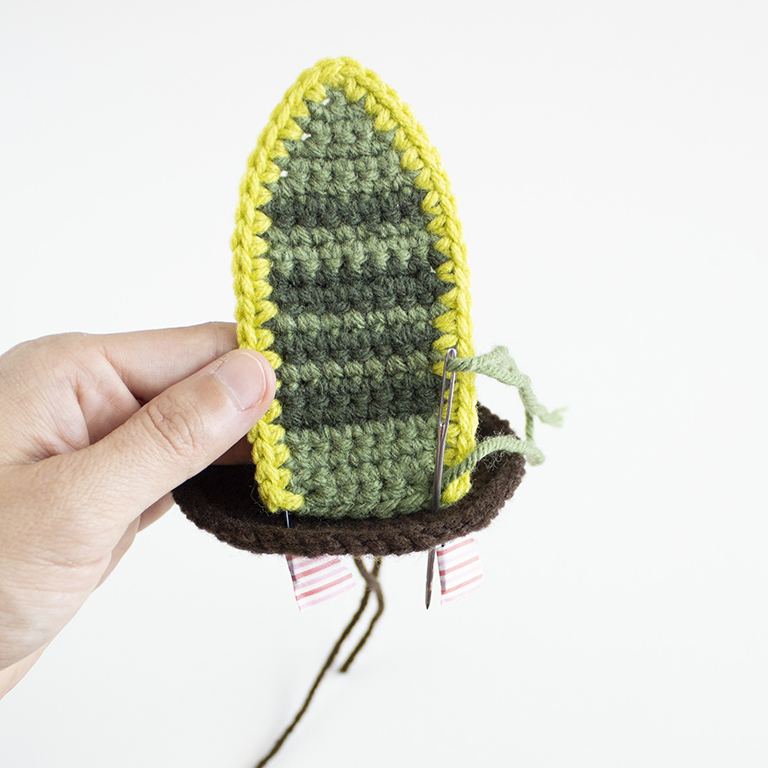
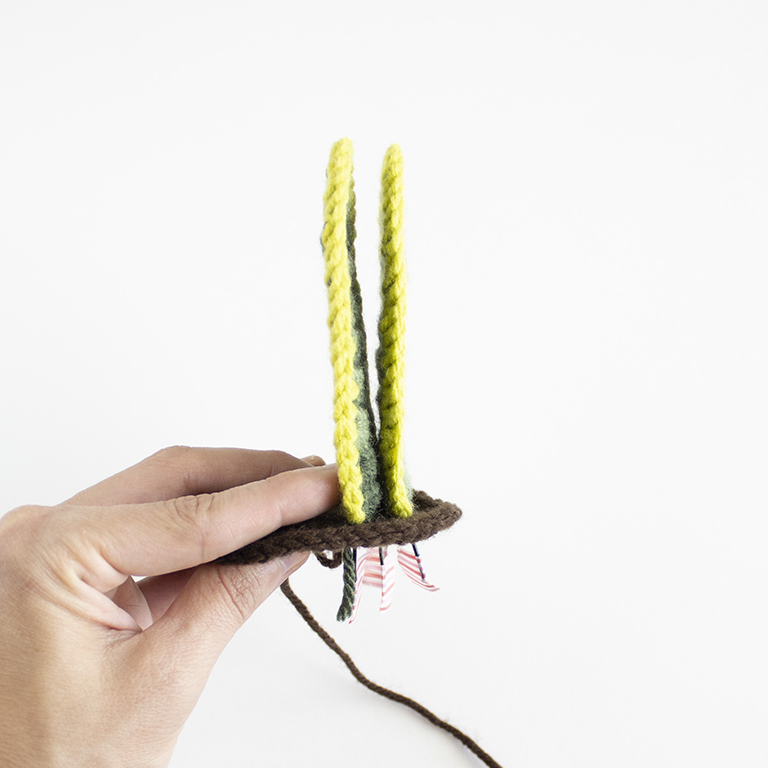
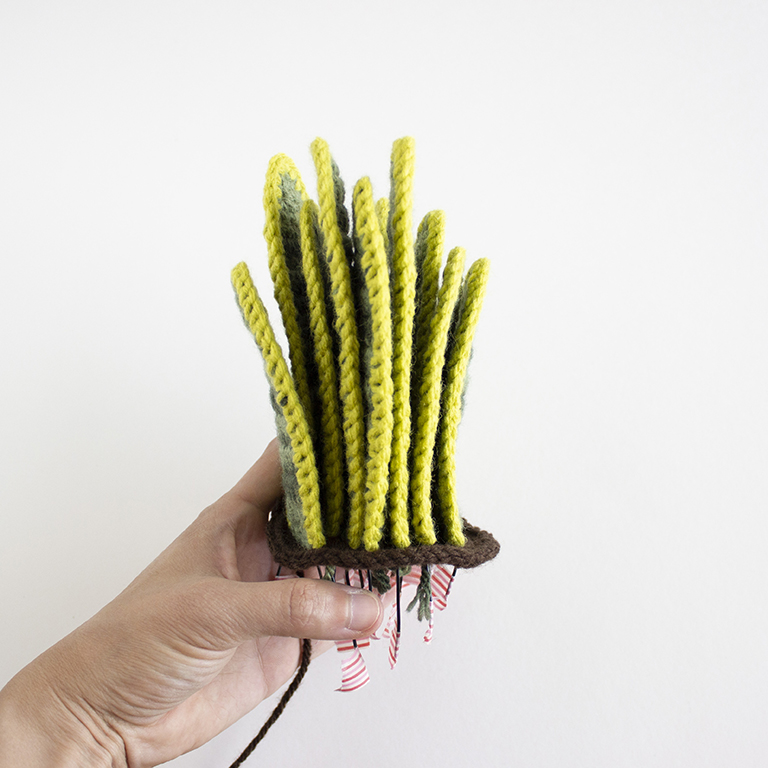
Insert each side of the wire into a stitch hole on the dirt. I like to re-add the tape to the wire, so I don’t get poked while sewing. Using the yarn needle and tail, sew the leaves in place on the dirt. Weave the needle under the “V” from the stitches of the last row and then weave into the dirt. Repeat until all of the leaf is sewn into place. Secure with a knot and hide on the inside of the dirt.
Prefer an ad-free, printable PDF version?
Grab The Snake Plant Crochet Pattern HERE.
I like to work from front to back, adding one leaf and sewing it in place, then moving on to the next leaf and repeating. Adding all the leaves at once is a bit overwhelming so adding one at a time works best. When sewing each leaf into place, make sure to position them really close together. This ensures there will be enough space for all ten leaves.
Finally, trace the base of the pot onto the cardboard and cut out. You’ll want this to fit perfectly into the bottom of the pot so you may have to trim it down a little. Place the cardboard into the bottom of the pot and then add fiberfill. It’s okay to not add all of it at once since you can always add more as you sew the pieces together.
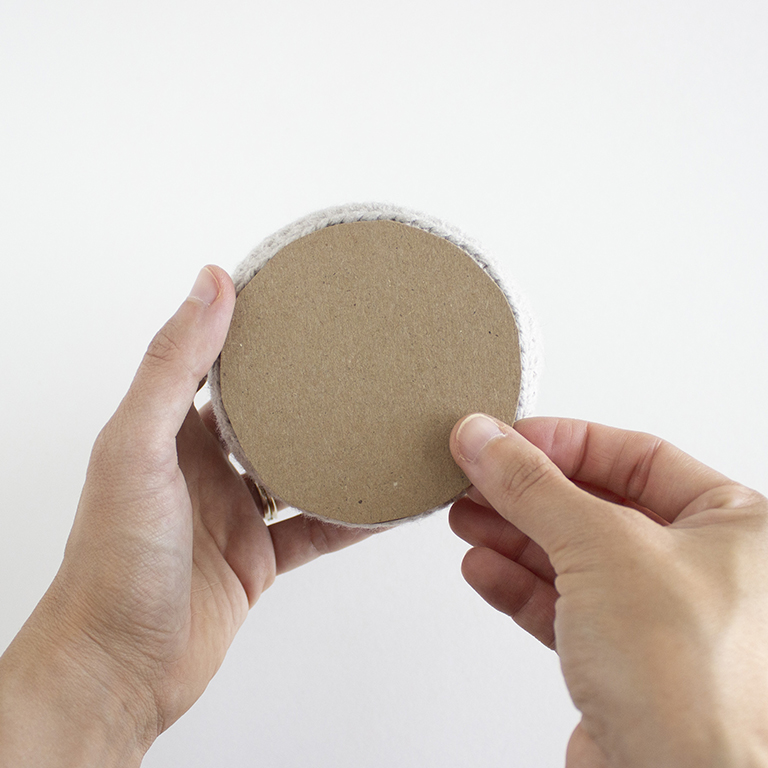
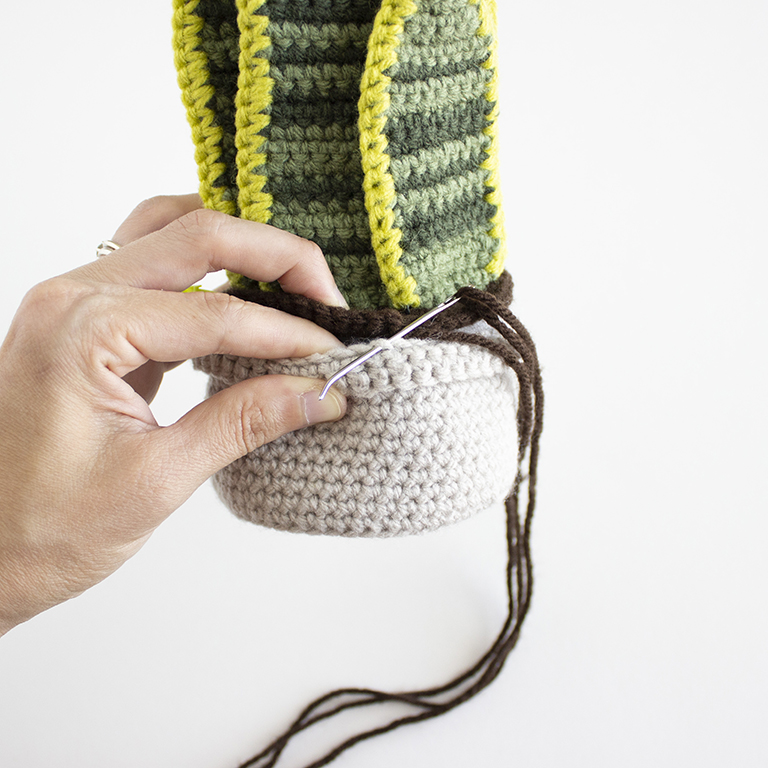
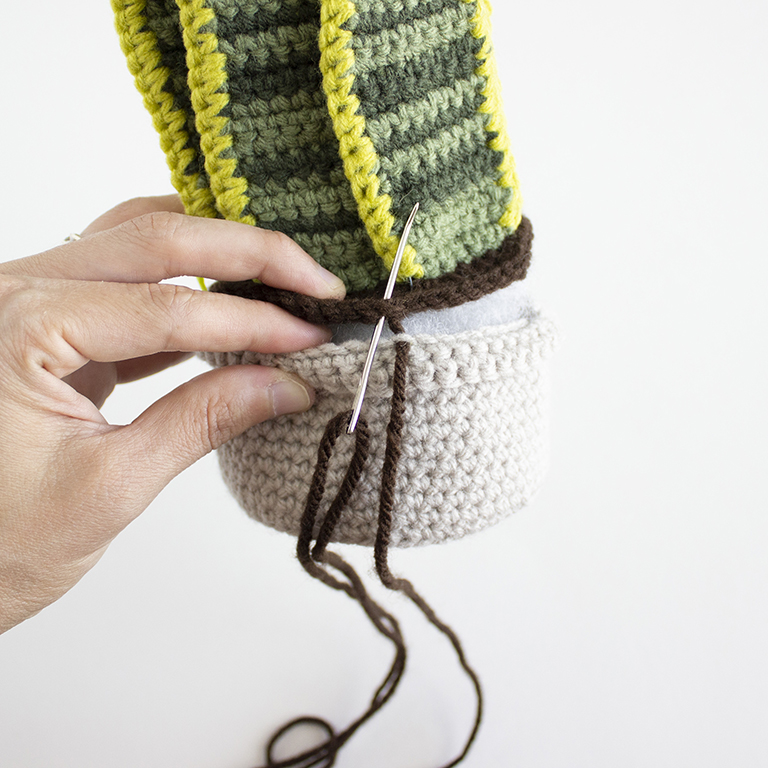
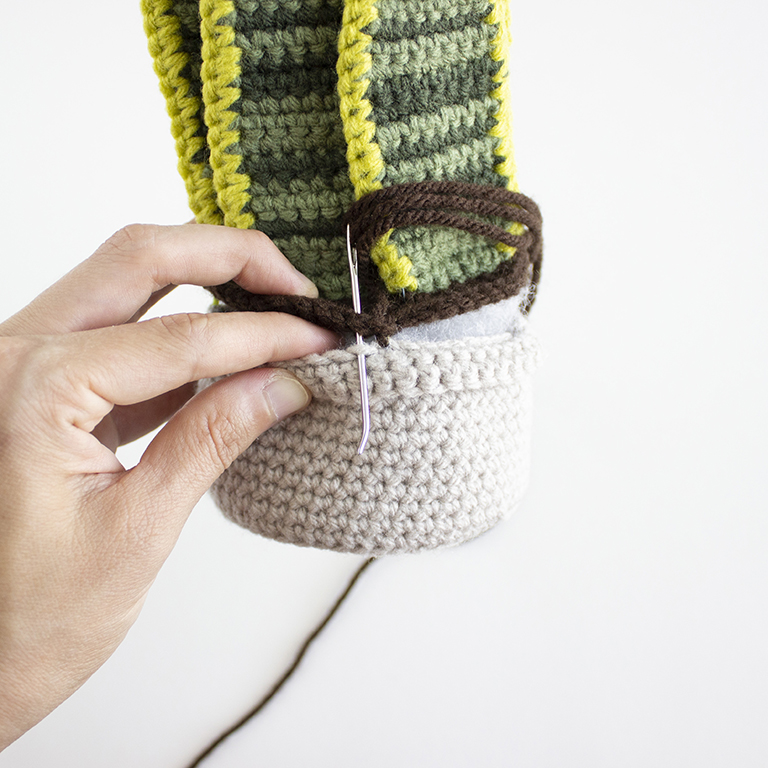
For attaching the dirt to the pot, you’ll want to make sure the smaller leaves are positioned in the front. With a stitch marker, attach it to both the dirt and the back loop on the pot to hold it in place. Place a couple more stitch markers every 10 or so stitches so it’s all lined up evenly. Remove each stitch marker as you sew the pieces together.
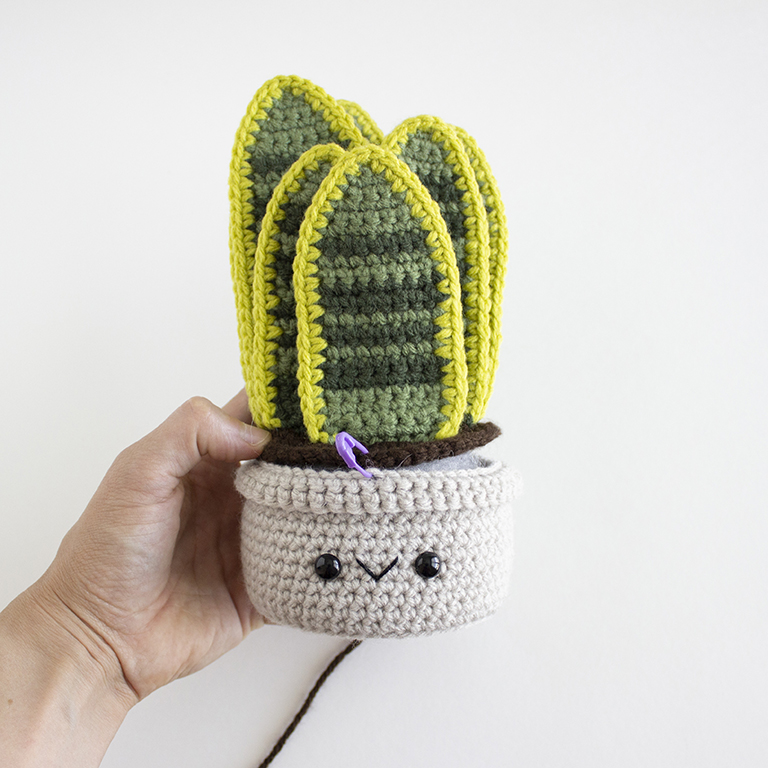
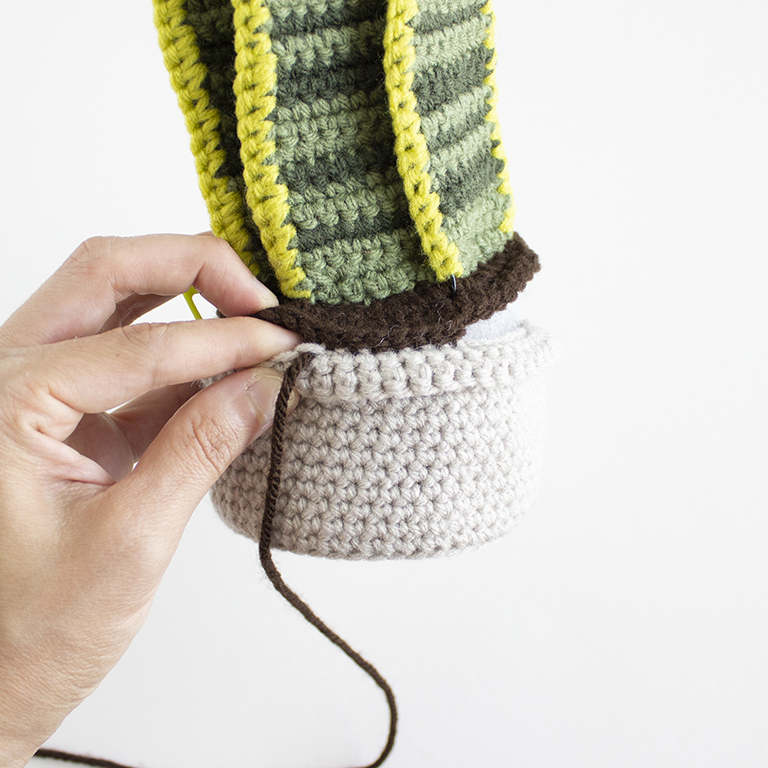
Using the yarn needle and yarn tail, weave the needle through the back loops left over from R21 of the pot and between the stitches from R9 of the dirt. To do this, weave the needle under the back loop of the pot then go up and under the stitch (the “V”)on the dirt. Next, move over to the next stitch on the dirt. Go down and under the next stitch (the “V”) and then under the back loop on the pot.
Prefer an ad-free, printable PDF version?
Grab The Snake Plant Crochet Pattern HERE.
Repeat this technique all the way around. Make sure to go through the stitches, not over them, to create a clean finish on the pot. Add more fiberfill if needed. Secure and hide the yarn tail inside the pot.
➤Make sure to check out all of my other free crochet patterns here!

CLICK TO PIN THIS POST NOW!
And there you have it! A super cute and easy to take care of Crochet Snake Plant! I hope you’ve loved this free amigurumi snake plant pattern. I can’t wait to see all the adorable crochet snake plants you all make. Please be sure to tag me in your snake plant posts on Instagram @amenagerieofstitches and use the hashtag #amenagerieofstitches
Happy Crocheting!
Lauren
If you have any trouble with this amigurumi pattern, please don’t hesitate to reach out!
If you would like to make even more free crochet cuties check others out here!
This crochet snake plant pattern is an original design by Lauren Espy of A Menagerie of Stitches. Please do not claim this crochet snake plant pattern as your own. If you’d like to share this amigurumi pattern, you may provide a link to this post but please do not reprint it on your website. You may sell products made from this crochet pattern but please credit me, Lauren Espy of A Menagerie of Stitches, and provide a link to my blog amenagerieofstitchesblog.com Absolutely no mass production or manufacturing of any kind is allowed. Thank you for understanding.
Disclaimer- This crochet post contains affiliate links. By clicking these links, you help support me and my business at no cost to you.





Thank you so much!! After 4 decades of crocheting, I’ve finally gotten over my fear of amigurumi. Plants are next!! I’m living with my son now, at his request,, and we have close to 150 indoor plants. It’s not an addiction. We can stop anytime, really. It’s not a problem. Hahaha! Anyway, snake plants are one of my favorites as well! Recently, about 2 years ago, I found some called pineapple snake plants and BOY do they grow babies like crazy!! I’m so excited to make a bunch of these crochet snakes!! Thanks again!!
You are so very welcome!!! It’s great that you are confident to jump into amigurumi, it’s super fun! It sounds like you have an amazing indoor plant obsession! I would too if I could only keep mine alive. I will definitely check out these pineapple snake plants. They may be just the one that won’t die on me! Hahahaha!