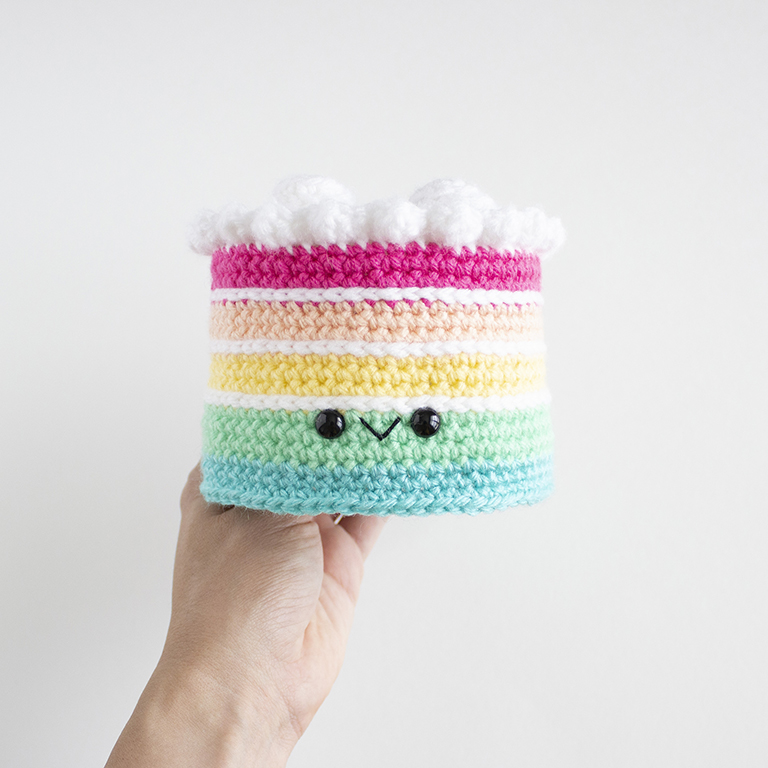
No birthday is ever complete without a big cake to celebrate!
Ever since I was a little kid, birthdays have always been a big deal. I have vivid memories of counting down the days to my big day and being so excited for birthday cake and presents. My mom would make our cakes for us each year and they were one of the things I looked forward to the most. Her birthday cakes were by far the best! Being that my birthday is in July, it always meant my day was spent swimming and playing outside with my sisters and the neighborhood kids. While that was fun and all, I really just wanted to go inside and eat my birthday cake!
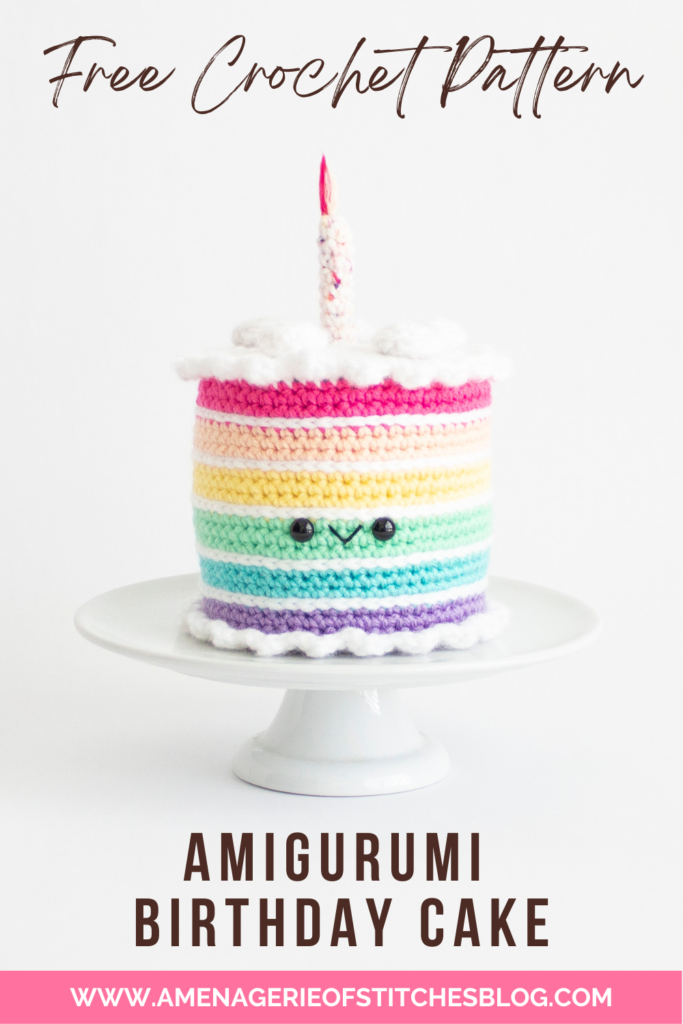
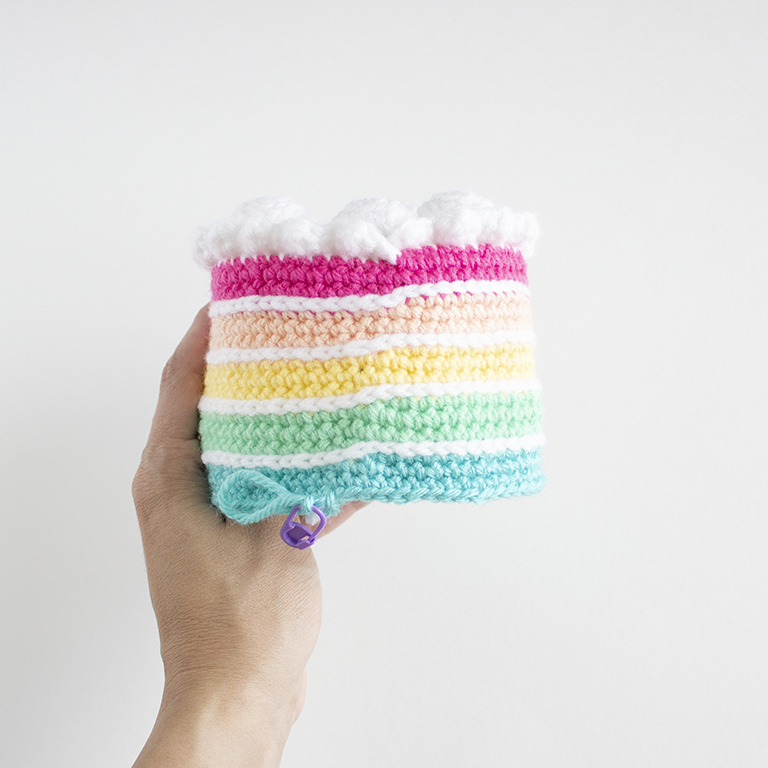
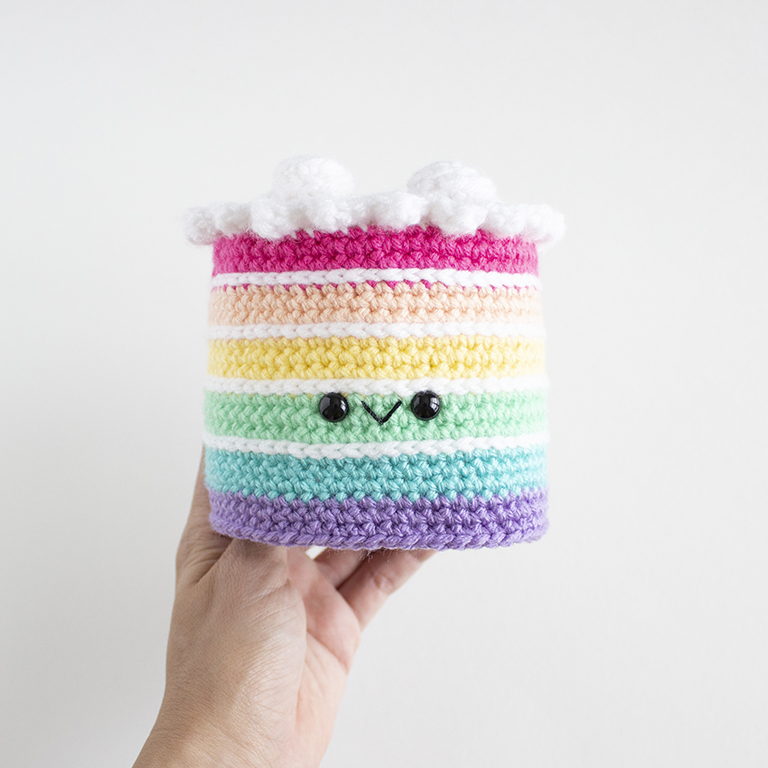
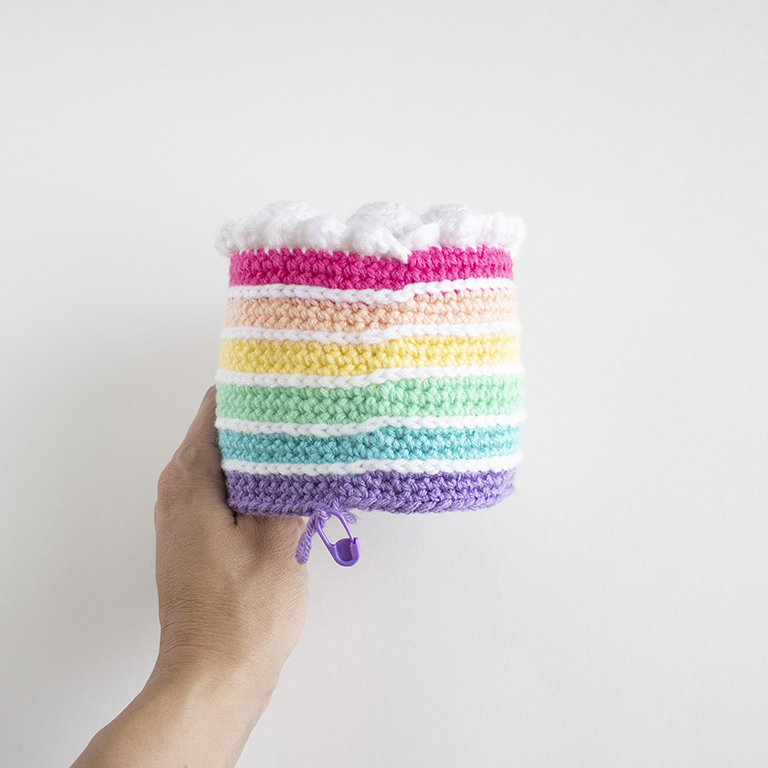
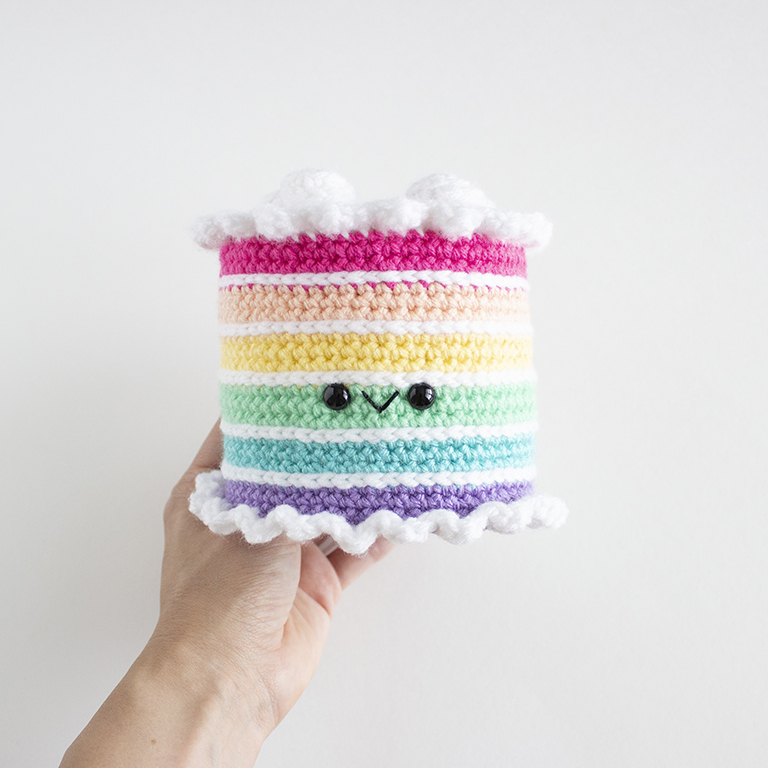
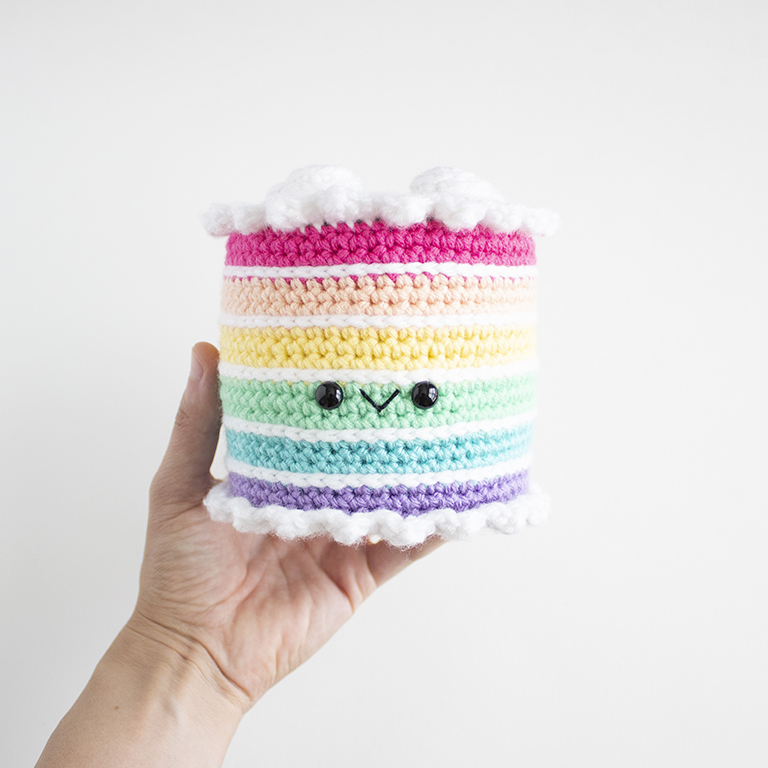
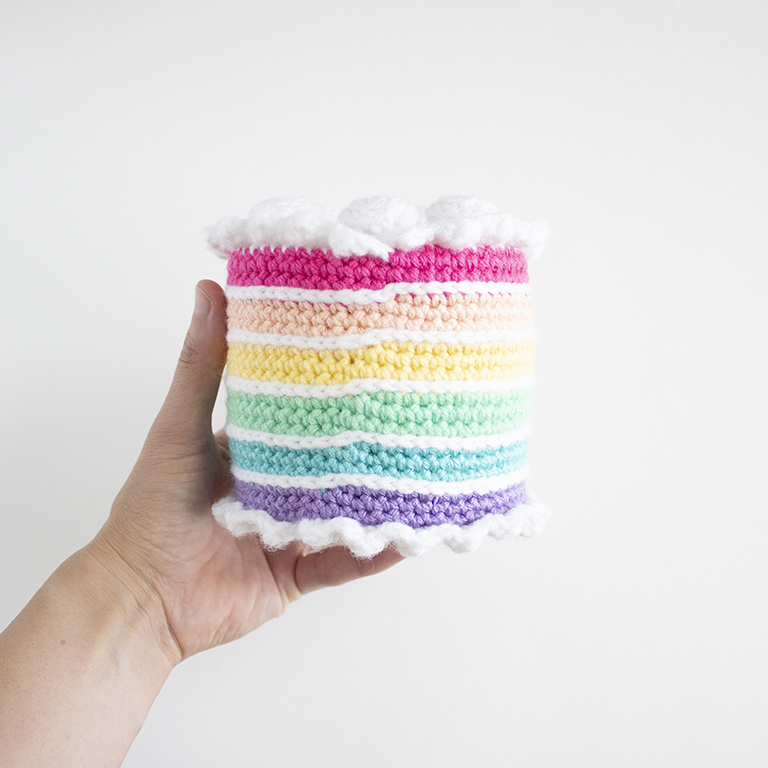
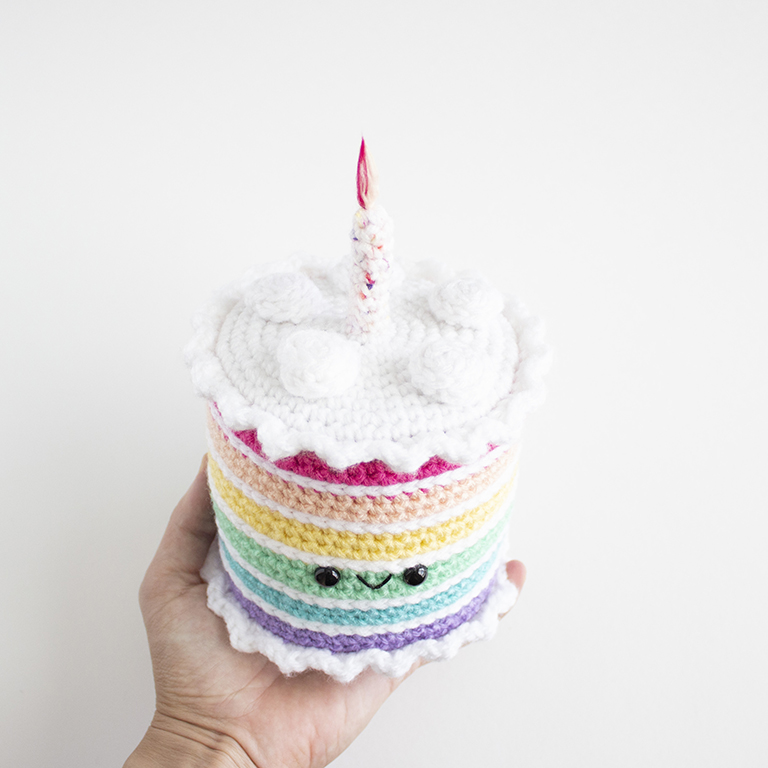
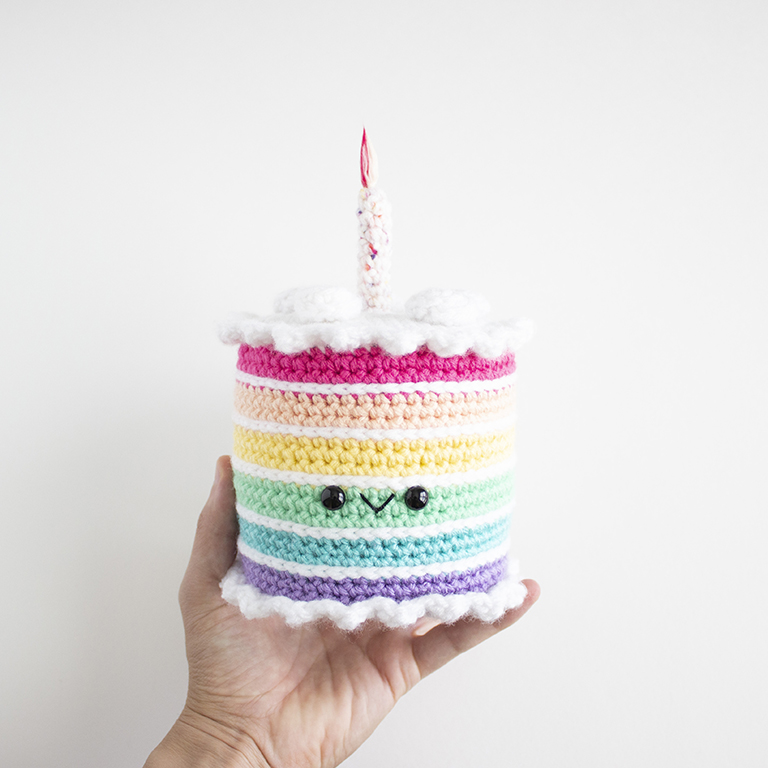
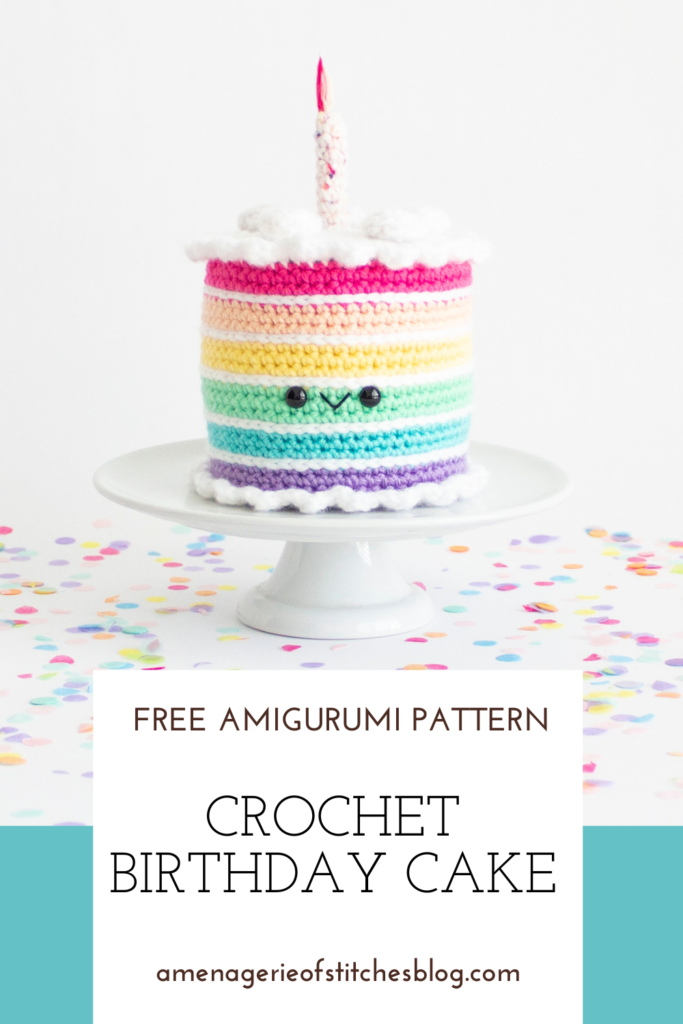
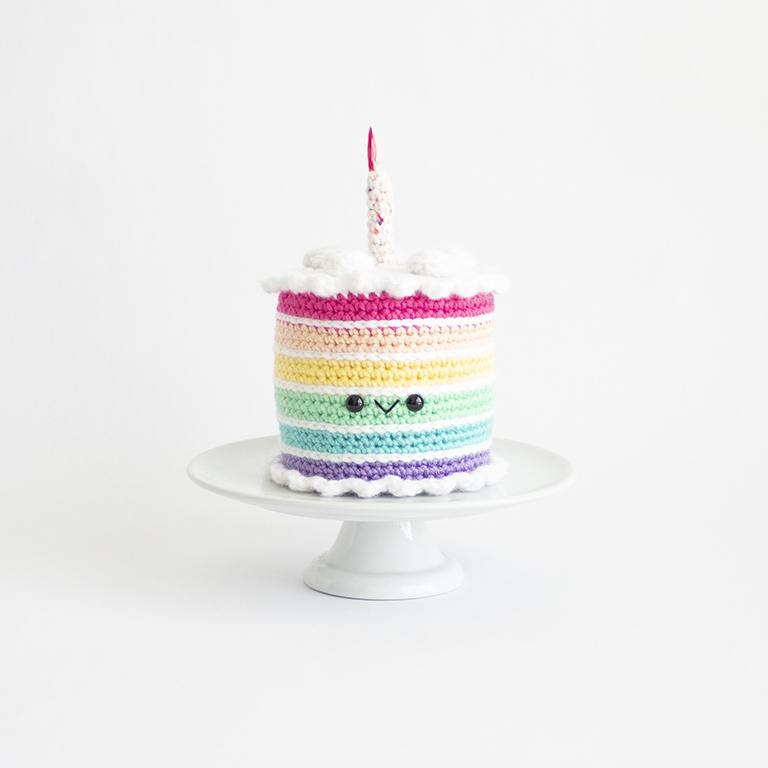
This six layer rainbow amigurumi birthday cake is perfect for celebrating birthdays, or even just those days where you need a pick me up. No judgment here! White frosting separates each colorful cake layer and big crochet dollops of frosting circle the top, where a candle fits perfectly in the center. Make this a crochet rainbow birthday cake or go tradition with funfetti or chocolate! The options are endless, and you’ll have one sweet amigurumi cake afterwards!
CLICK TO PIN THIS POST NOW!
Here’s what you’ll need:
- Worsted weight yarn: White, Pink, Peach, Yellow, Mint, Blue, and Purple.
I used Lion Brand Vanna’s Choice in the color Aqua Marine.
Loops & Threads Impeccable in the colors White, Lippy, Butterscotch and Mint.
Hobby Lobby I love this yarn in the colors Light Peach and Amethyst. - Size F/3.75mm crochet hook
- Black embroidery floss and needle
- One pair of 9mm safety eyes
- Polyester fiberfill stuffing
- Yarn needle
- Scissors
- Stitch marker
- Straight Pins
- Thick cardboard
Optional- Yarn for the candle. I used Hobby Lobby’s I love this yarn! in the color “Drizzle Me This”. You’ll also need about 5 inches of a bright red yarn for the flame. *You’ll also need a pet slicker brush.
Abbreviations and Terms Used:
Crochet pattern is written using U.S. crochet terminology.
Crochet technique video & photo tutorials can be found here.
R- Round/Row
Mr- Magic Ring
Sc- Single Crochet
Inc- Increase
Inv Dec- Invisible Decrease
FLO- Front Loops Only
BLO- Back Loops Only
Ch- Chain
Sl St- Slip Stitch
Hdc- Half Double Crochet
Dc- Double Crochet
St/s- Stitch/es
* – Repeat the directions in between * and * as many times as stated.
( ) – The number inside will indicate how many stitches you should have at the end of each round.
Finished Measurements:
Measures 4.5 inches tall by 5 inches wide
*Please note- Sizes will vary depending on your tension, hook and yarn used.
Pattern Notes:
- This pattern is worked in continuous rounds. This means you do not join at the end of each round, and you simply continue onto the next round. Use a stitch marker to mark the end of the round.
- In the cake pattern, for “hdc dc hdc, sc 2” this means to place the hdc dc hdc together in one stitch, then place one sc in the next two spaces.
➤Clean Color Change – Video & Photo tutorial found here
➤Clean Fasten Off – Video & Photo tutorial found here
White Frosting Layer on Cake:
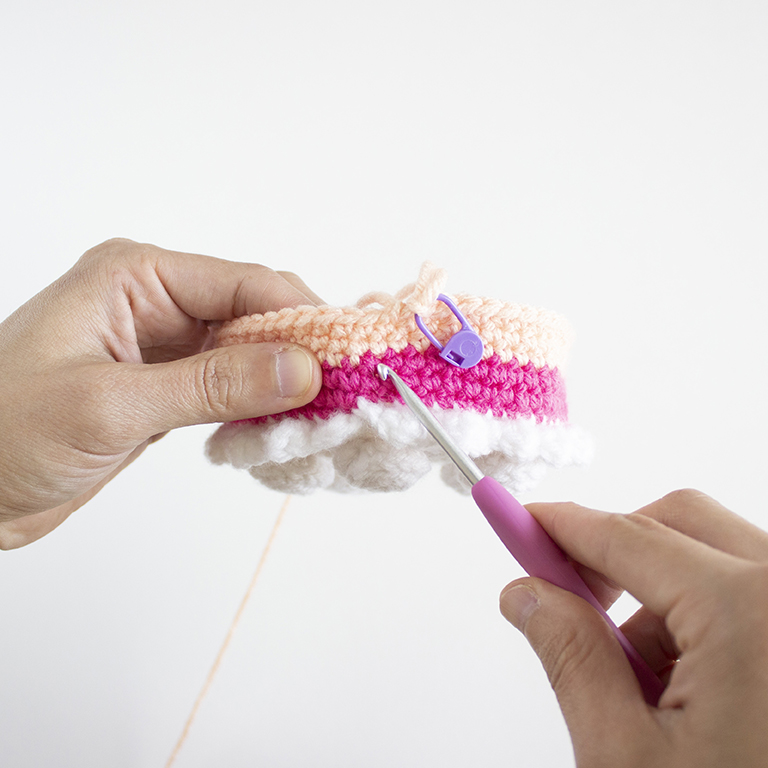
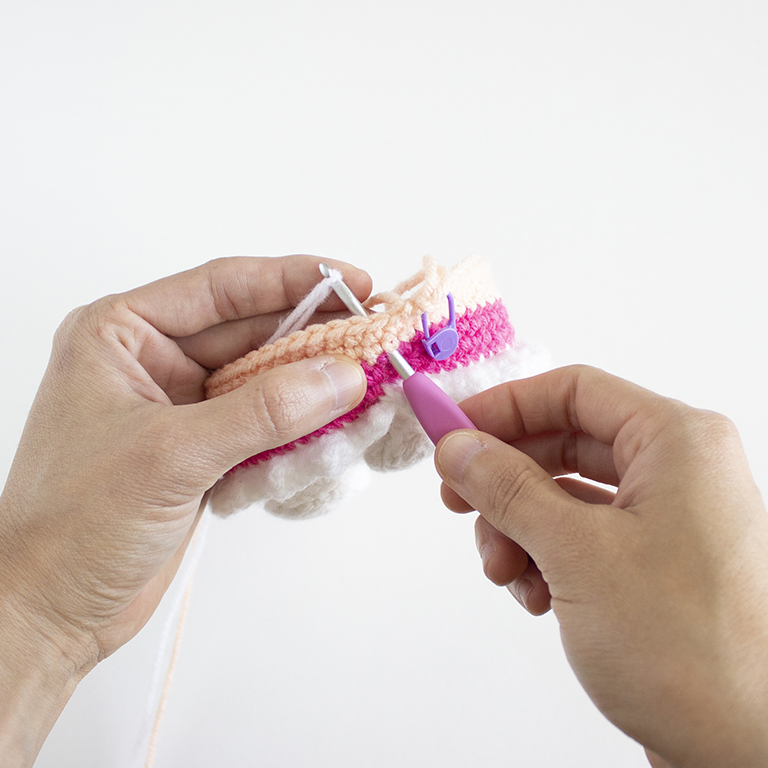
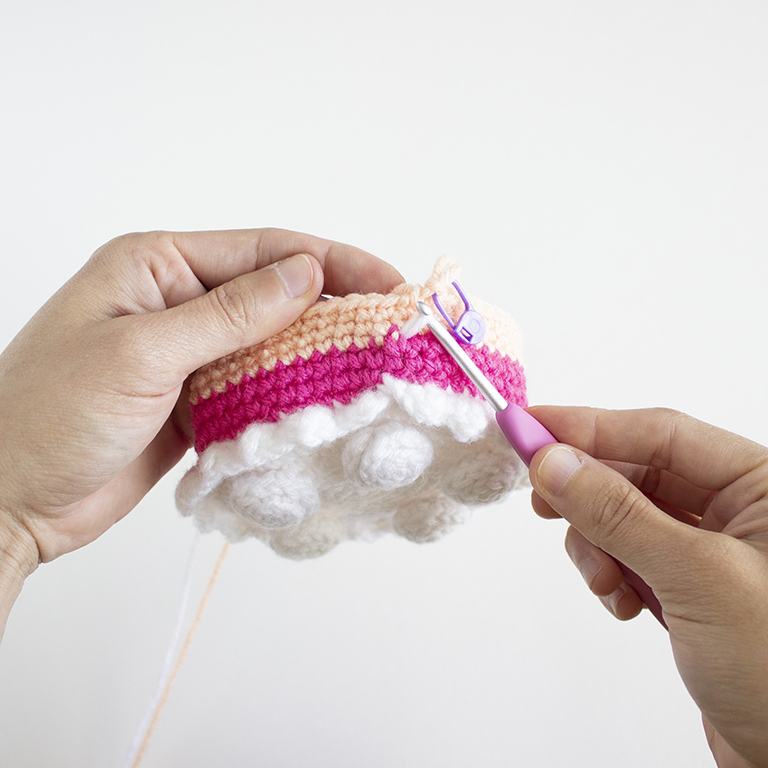
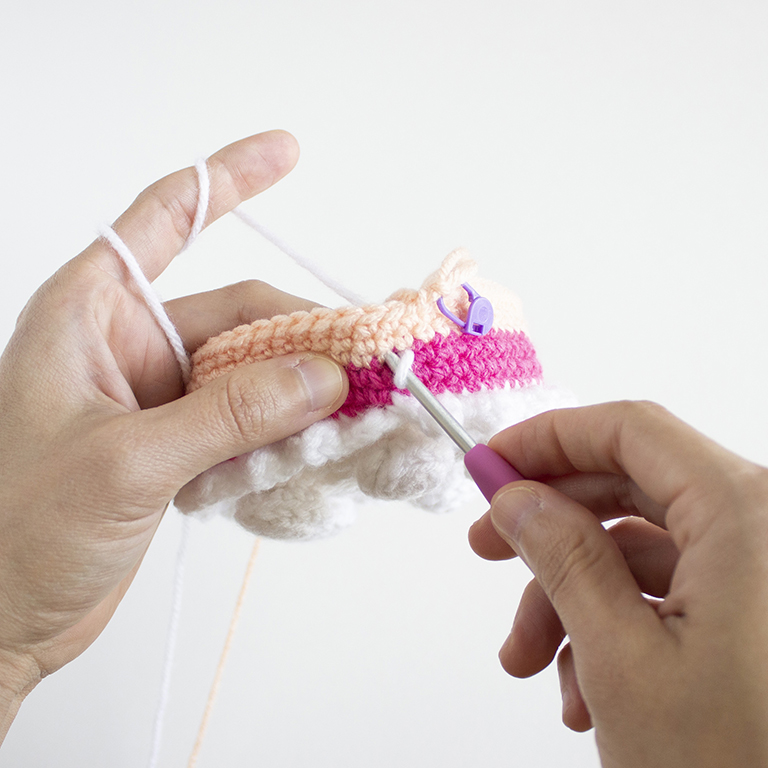
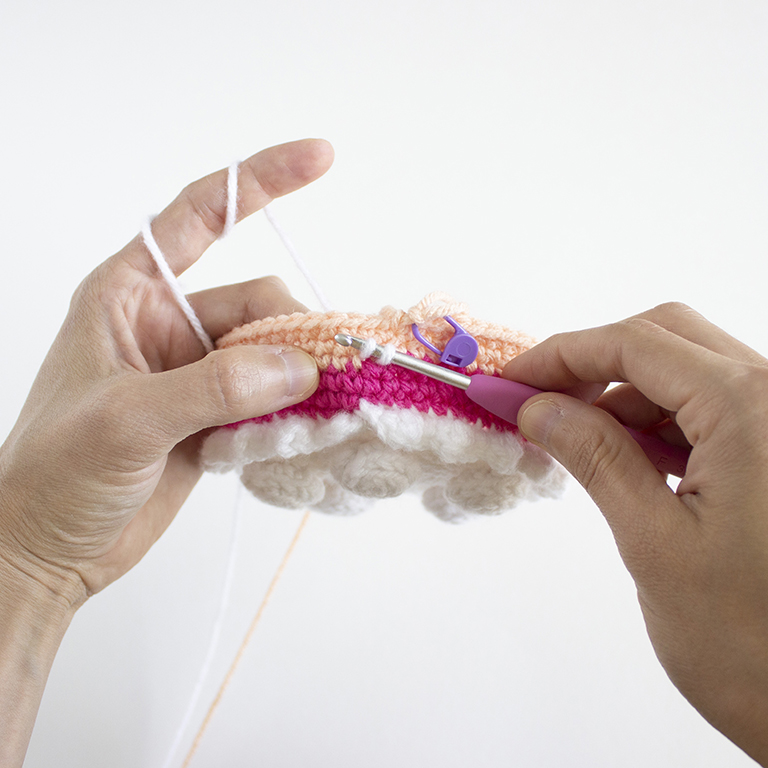
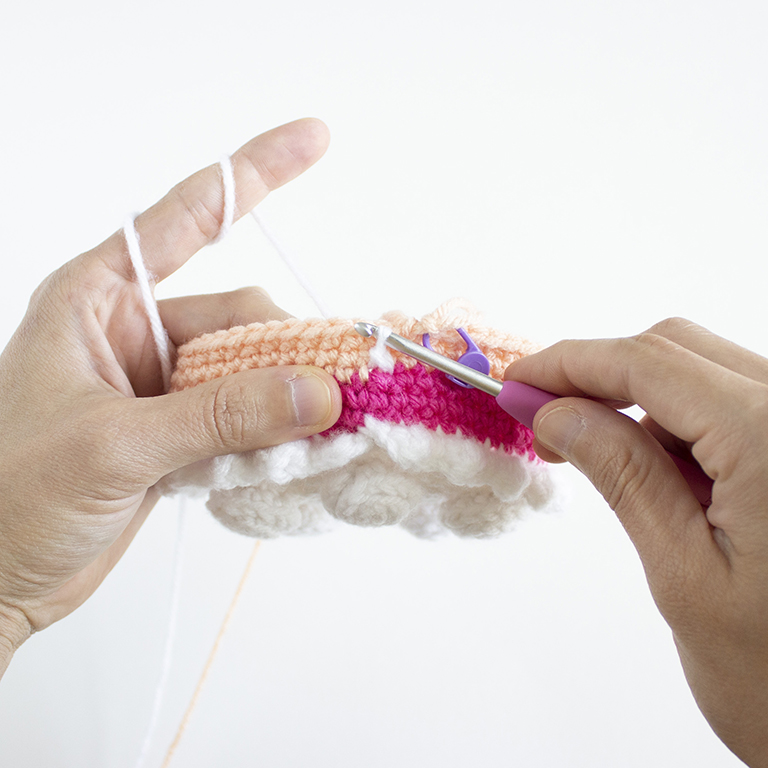
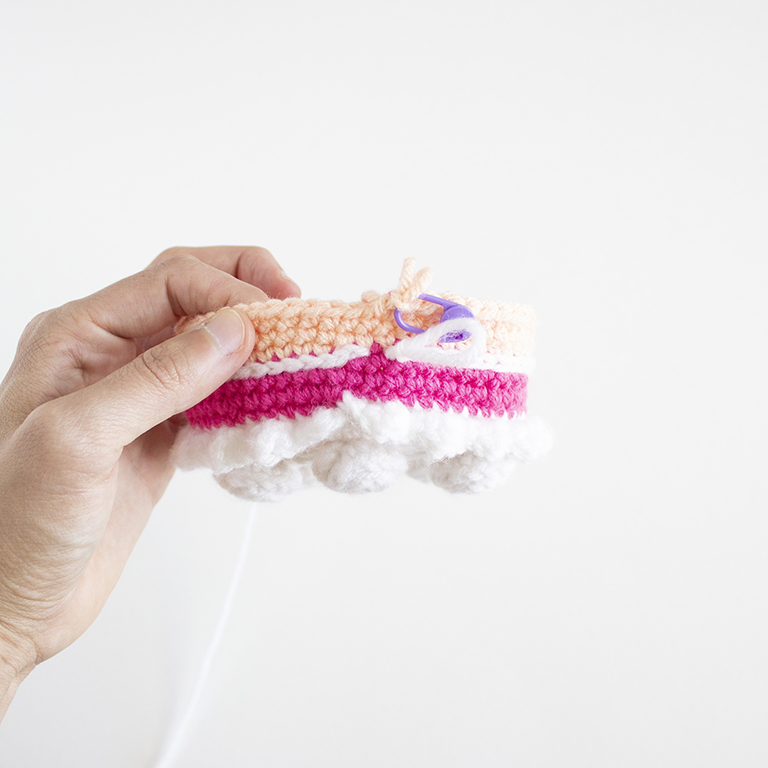
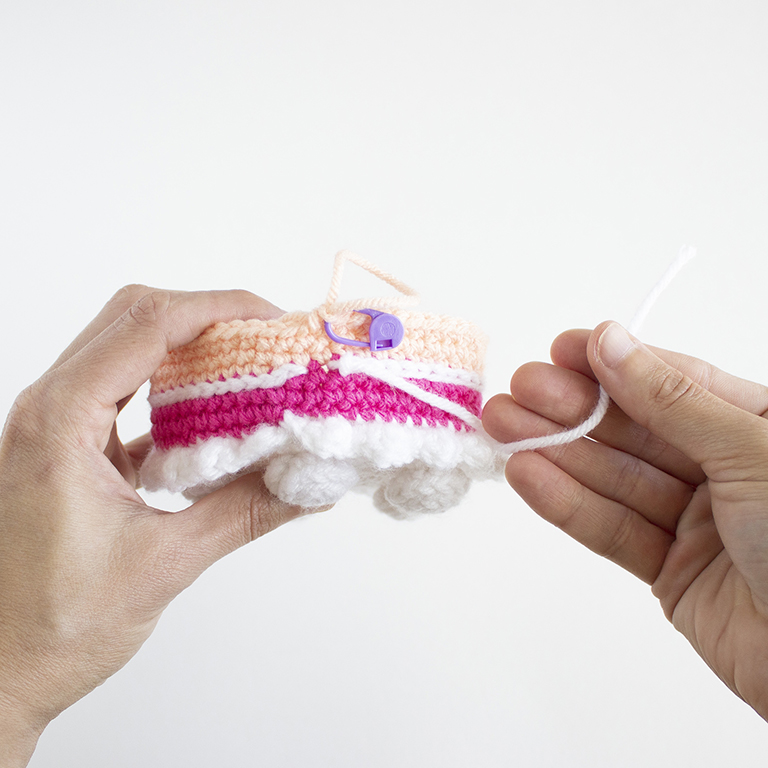
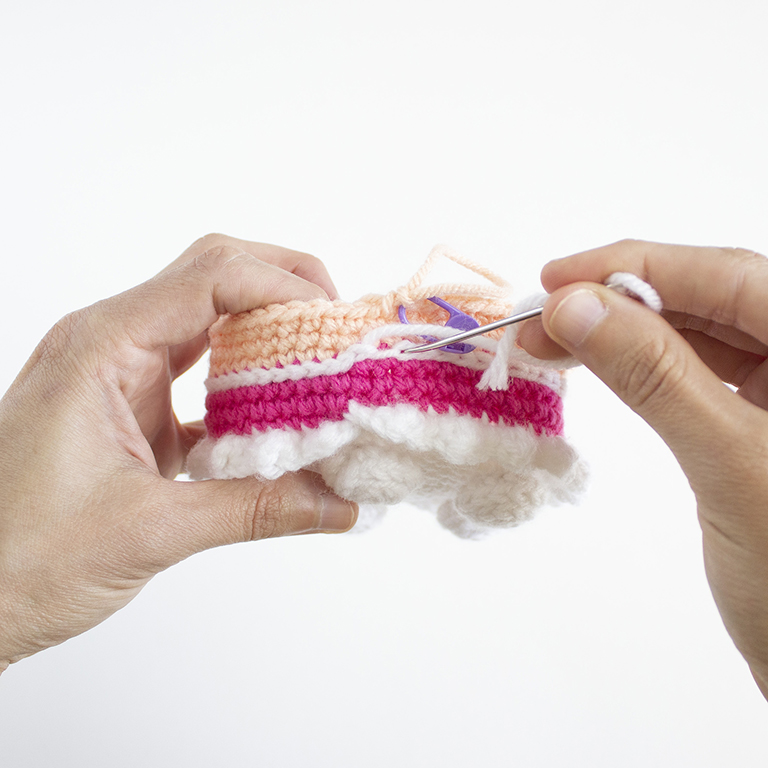
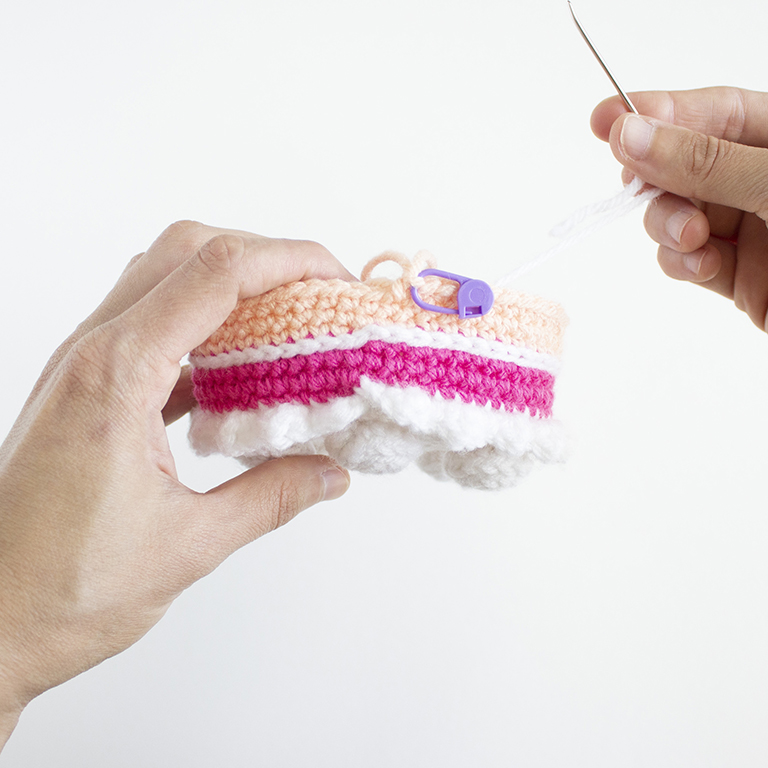
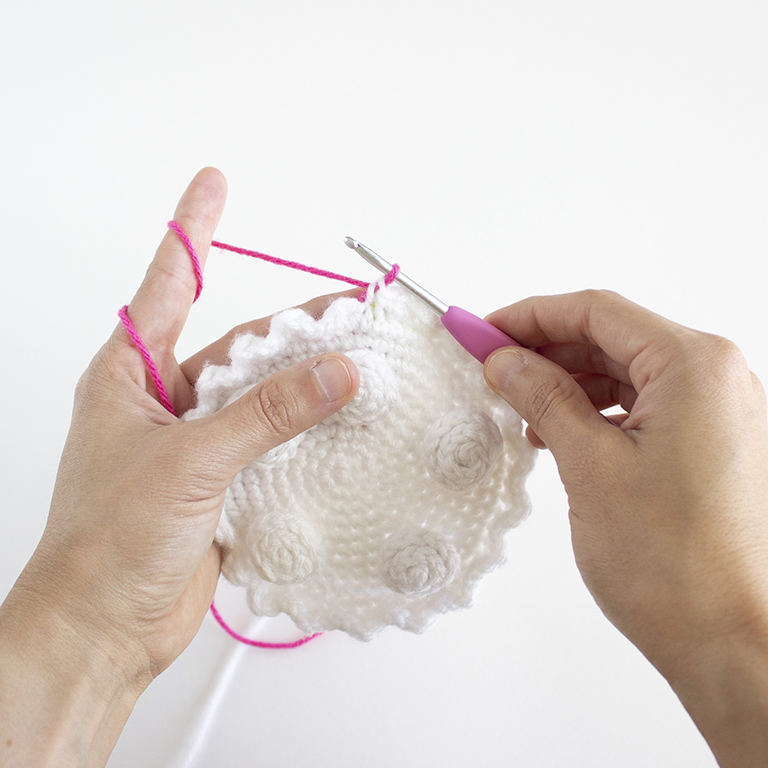
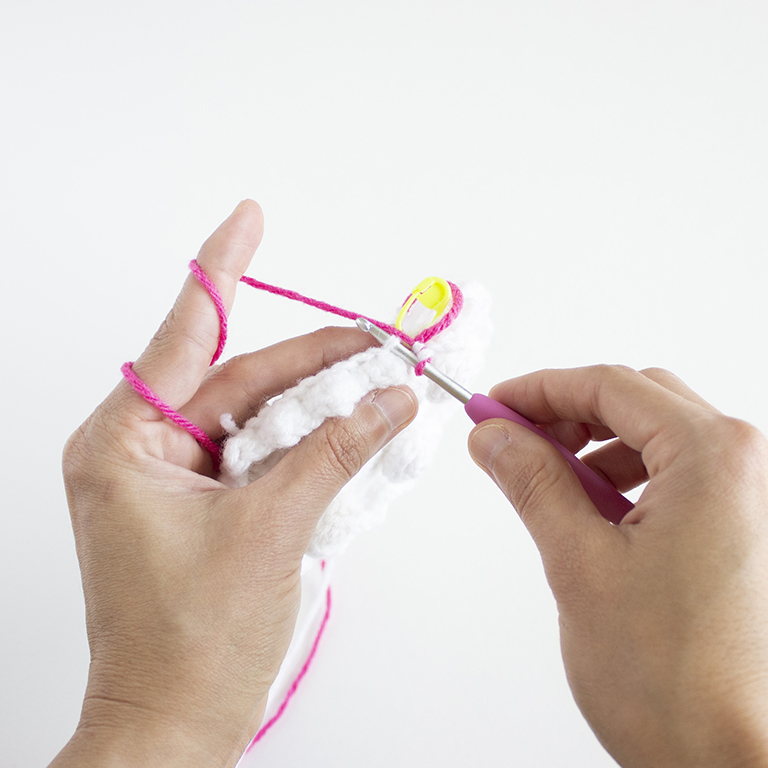
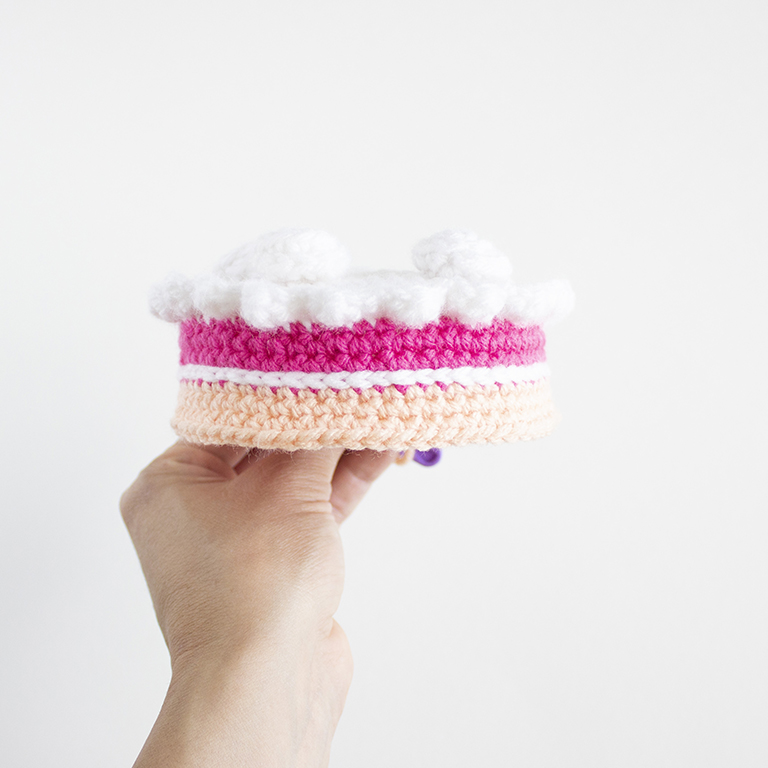
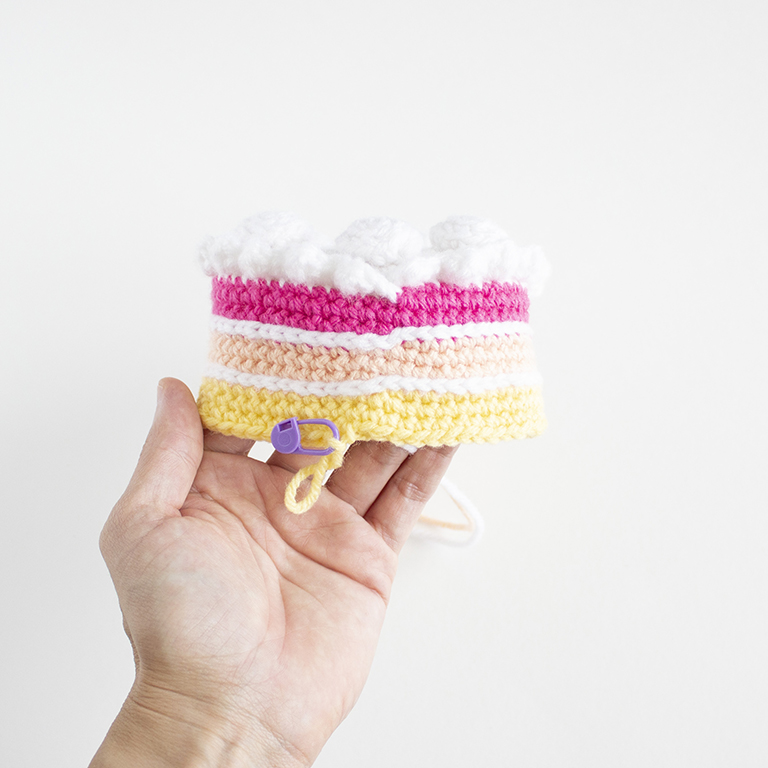
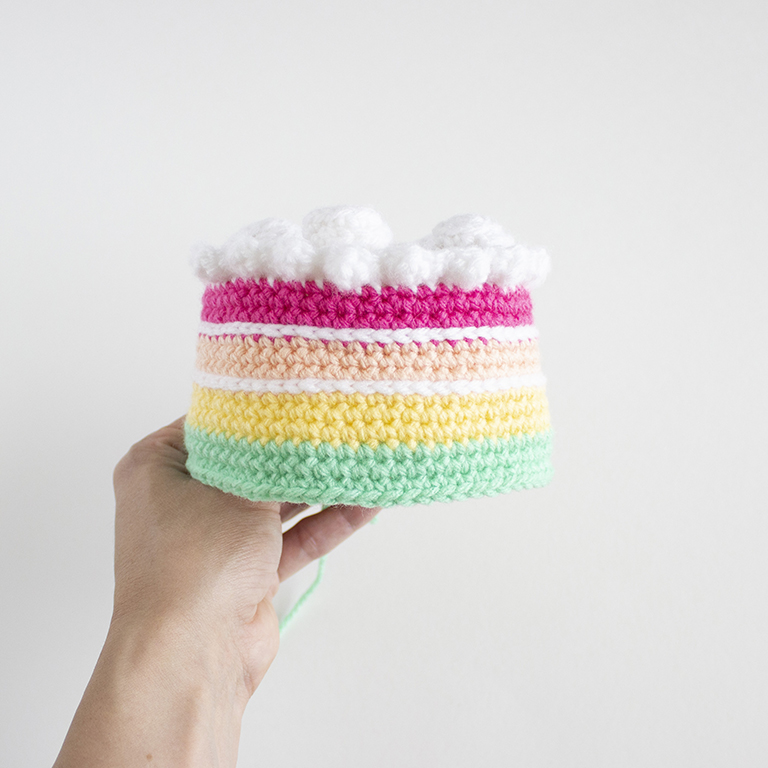
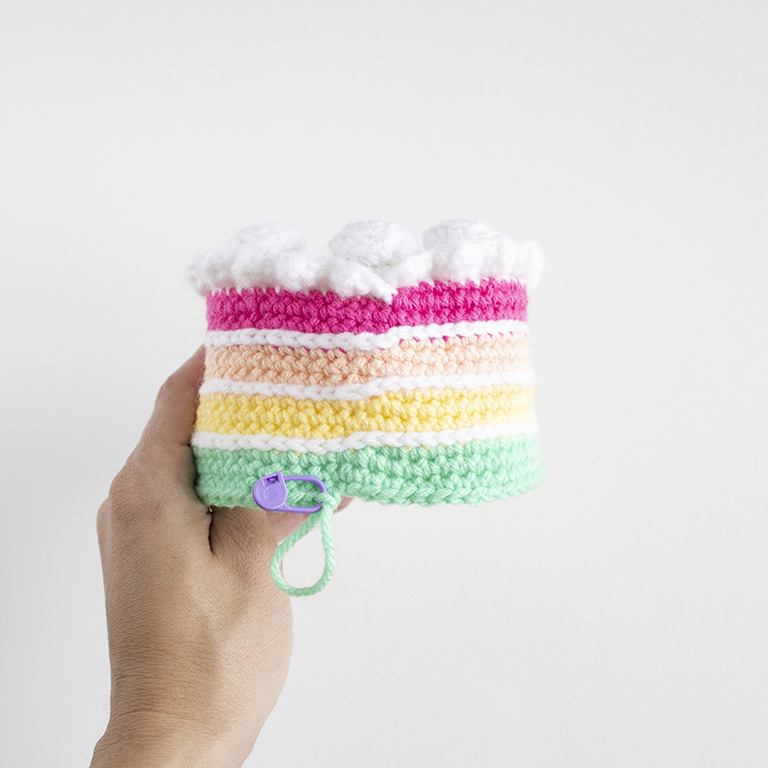
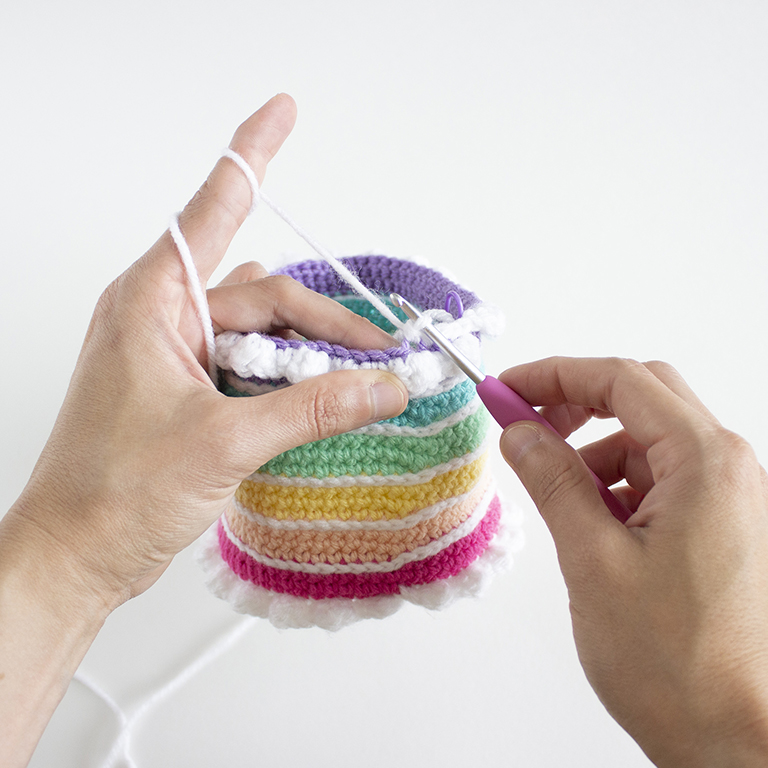
For the white frosting layer in between the colors, we will be making surface slip stitches to create the line. Insert your hook into the stitch hole directly under the last stitch of the first round of color (in this example- the peach color) On the inside of the cake, yarn over with the white yarn and pull up a loop to the outside of the cake. Insert the crochet hook into the next stitch hole to the left. Yarn over with the white yarn and pull up a loop, then continue making a slip stitch. Repeat this all the way around the cake until you reach one stitch before the first slip stitch. Fasten off and leave a small tail for finishing. Pull the yarn tail all the way through.
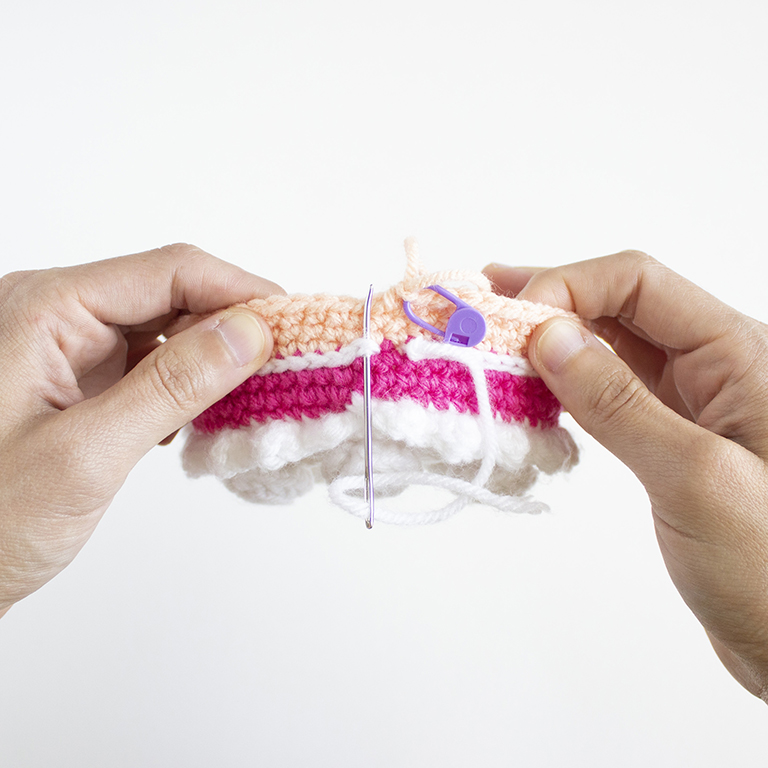
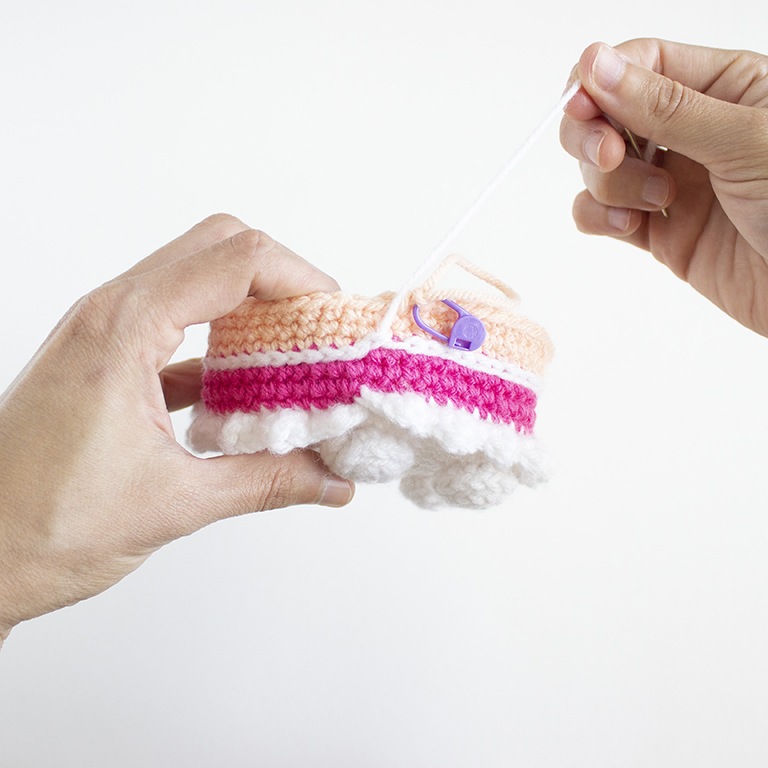
To connect the white line of stitches, we’re going to do a “clean fasten off”. With the yarn needle and the yarn tail, weave the needle under both loops of the first slip stitch and pull through. Then take the needle and insert it into the middle of the last slip stitch and pull through to the inside of the cake. This will connect the white line and make it look like a stitch. Secure the ends with a knot.
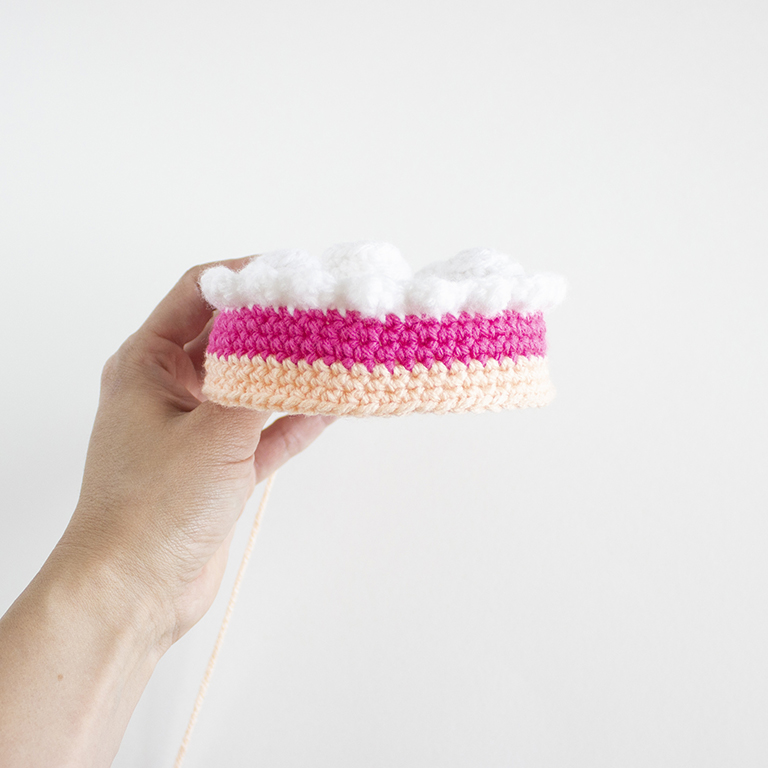
I like to wait until all three rounds of the one color of cake are made before adding the white layer. This will be noted throughout the pattern.
Prefer an ad-free, printable PDF version?
Grab The Rainbow Birthday Crochet Cake Pattern.
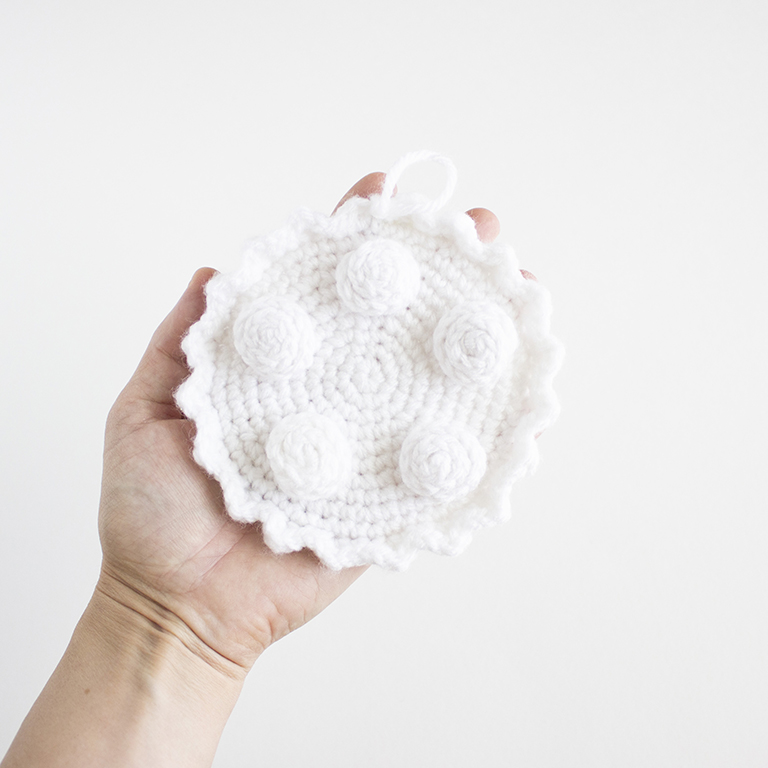
Dollops of Frosting – Make 5
Using white yarn,
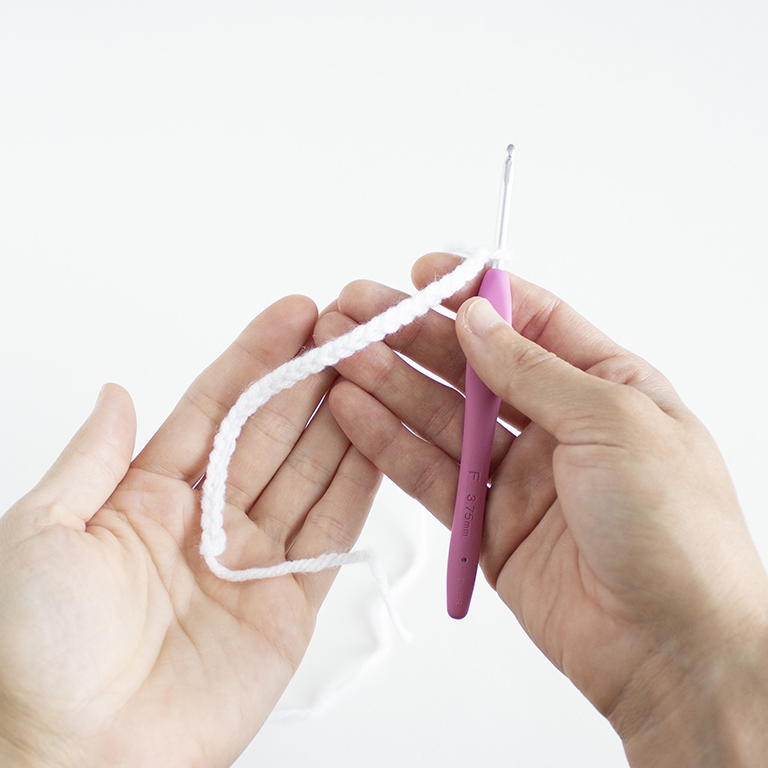
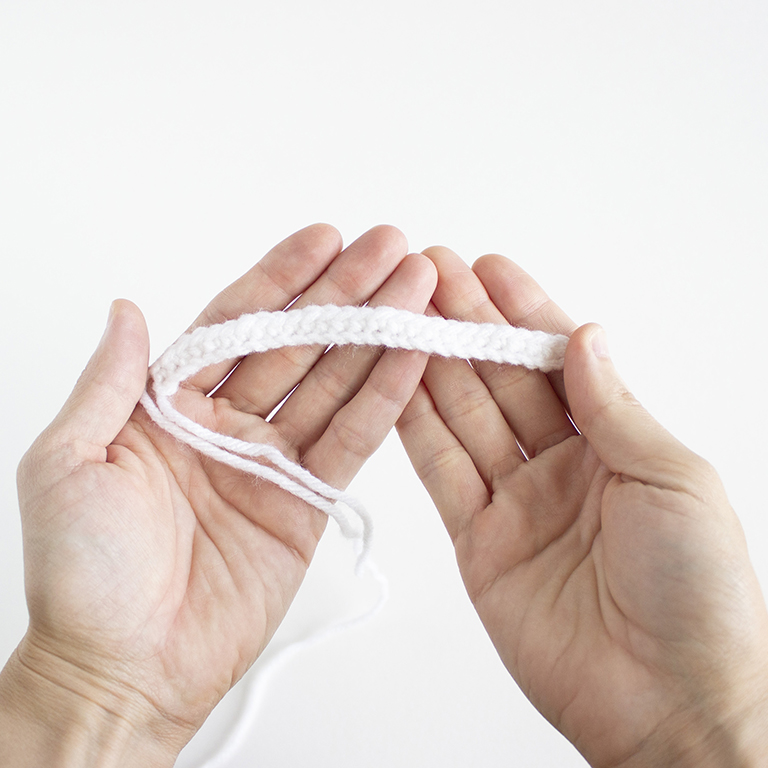
R1: Ch 27 then starting in the 2nd ch from hook, sc in each ch across. (26 sts)
Fasten off and leave a tail for sewing.
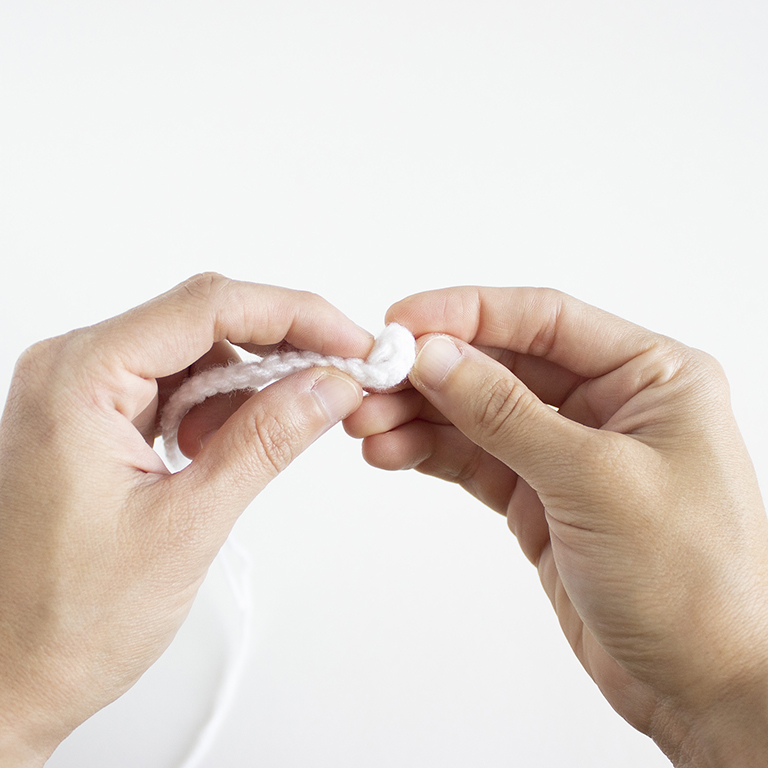
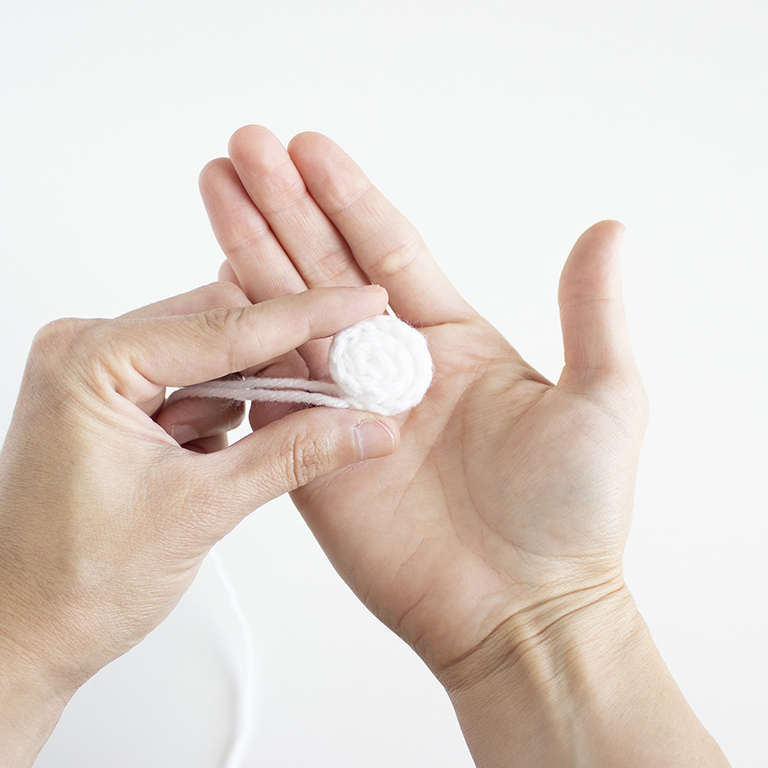
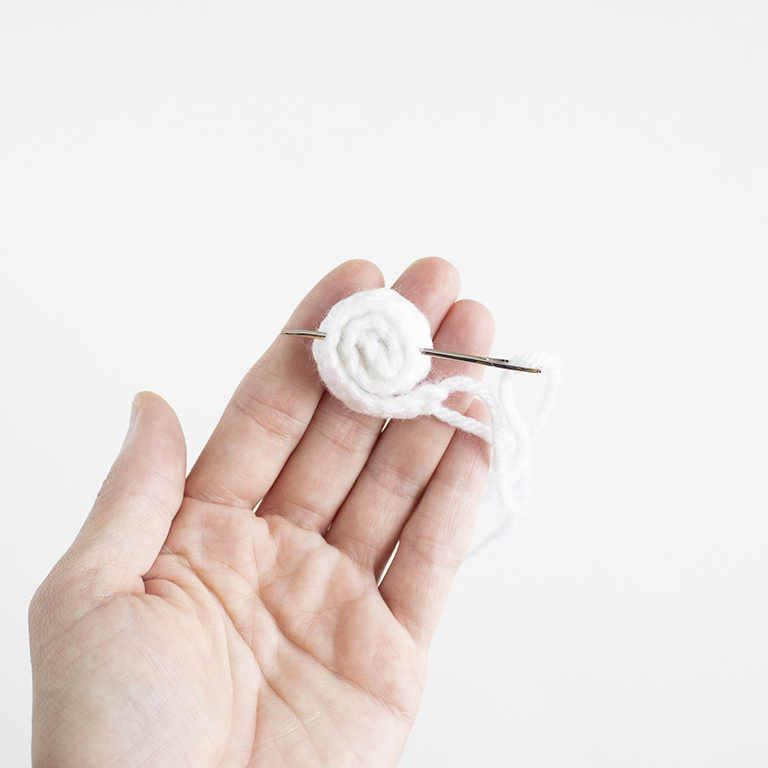
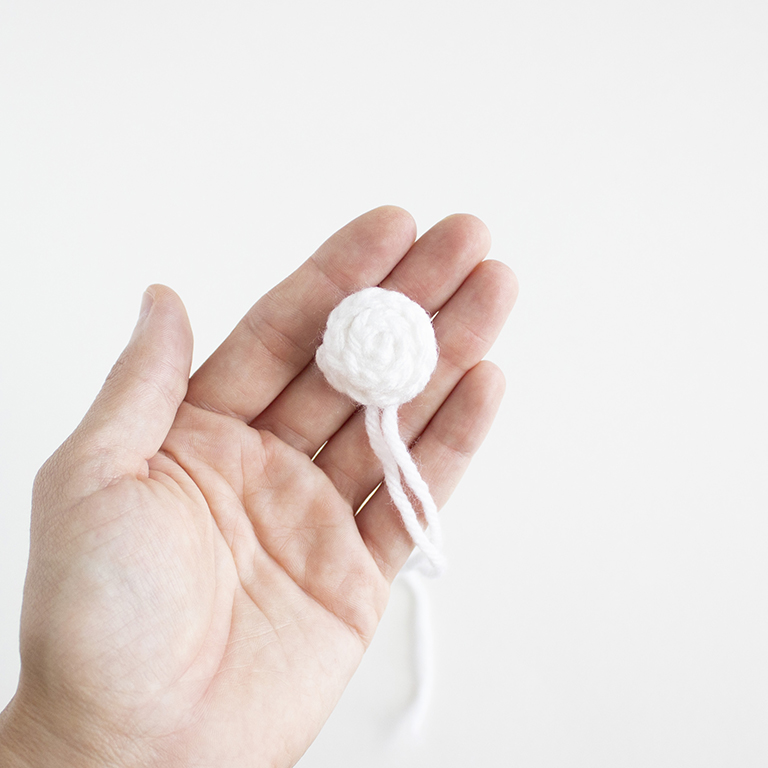
To form the dollop, begin by rolling the end that does not have the yarn tails towards the tails. Keep rolling until the dollop has formed. With the longer yarn tail and the yarn needle, weave through the icing and come out the other side. Do this a few times in different directions to make sure all the sides are connected. This will make it so the dollops don’t come undone. Leave the yarn tails and use them to sew the dollops to the top of the crocheted cake. Set these aside.
Cake
Make sure to refer to the Pattern Notes for how to create the white frosting layer in between the colors.
Using white yarn,
R1: 6 sc in magic ring. (6 sts)
R2: Inc in each st around. (12 sts)
R3: *Sc 1, inc* 6 times. (18 sts)
R4: Sc 1, inc, *sc 2, inc* 5 times, sc 1. (24 sts)
R5: *Sc 3, inc* 6 times. (30 sts)
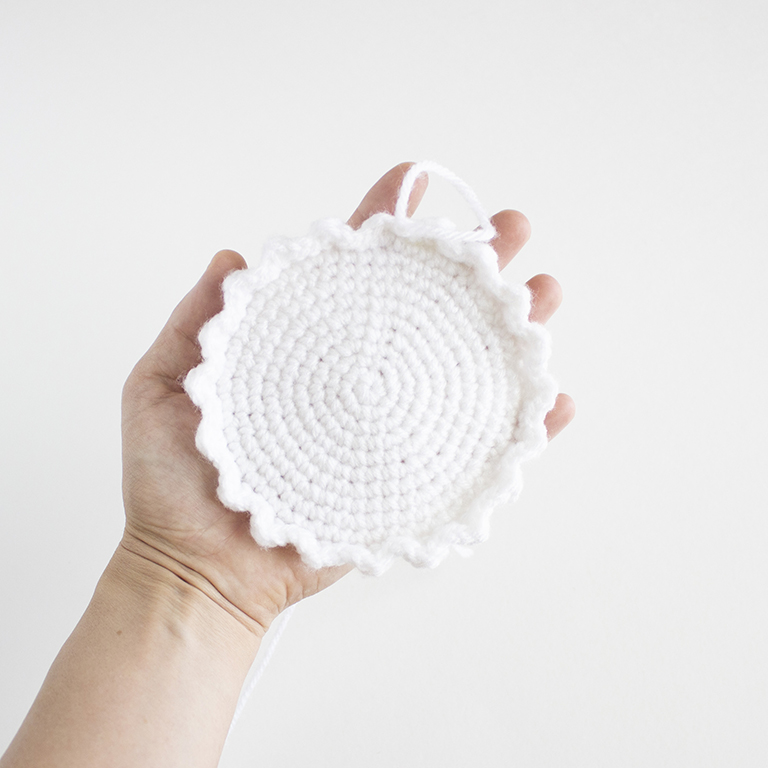
R6: Sc 2, inc, *sc 4, inc* 5 times, sc 2. (36 sts)
R7: *Sc 5, inc* 6 times. (42 sts)
R8: Sc 3, inc, *sc 6, inc* 5 times, sc 3. (48 sts)
R9: *Sc 7, inc* 6 times. (54 sts)
R10: Sc 4, inc, *sc 8, inc* 5 times, sc 4. (60 sts)
R11: In FLO, *hdc dc hdc, sc 2* 20 times.
With the yarn needle, sew the five dollops of frosting to the top of the cake.
Make sure to space them evenly around the top.
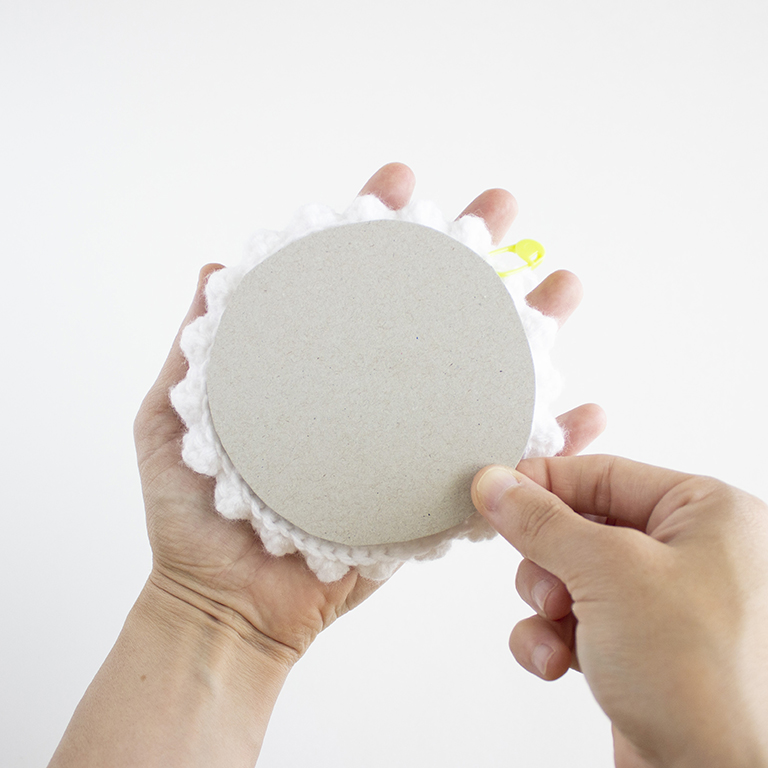
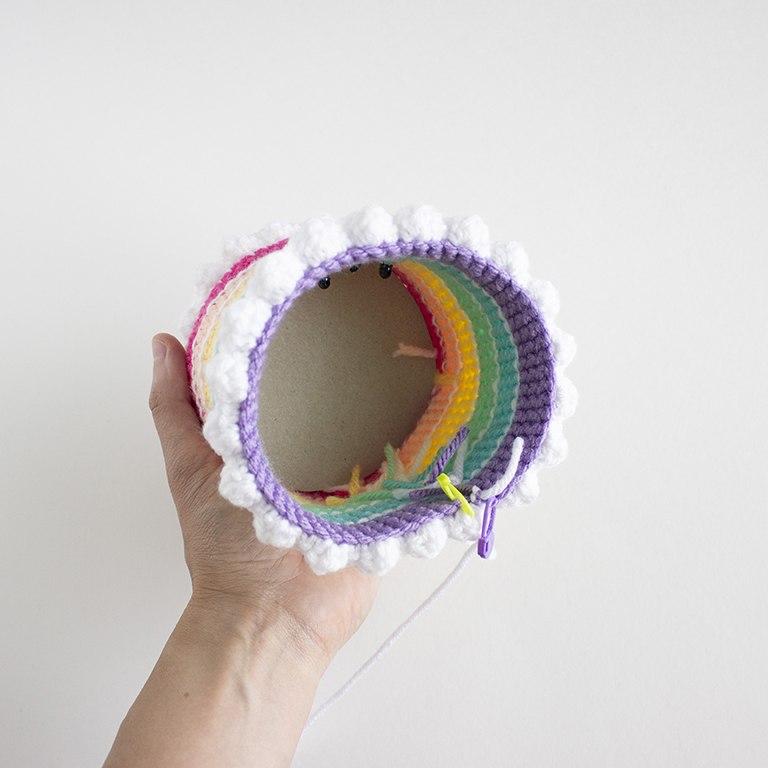
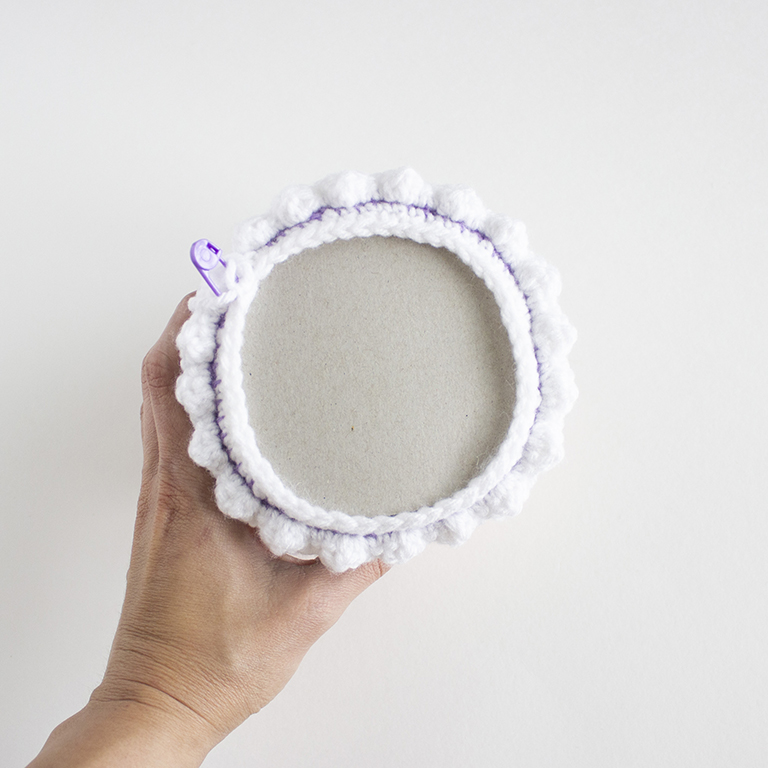
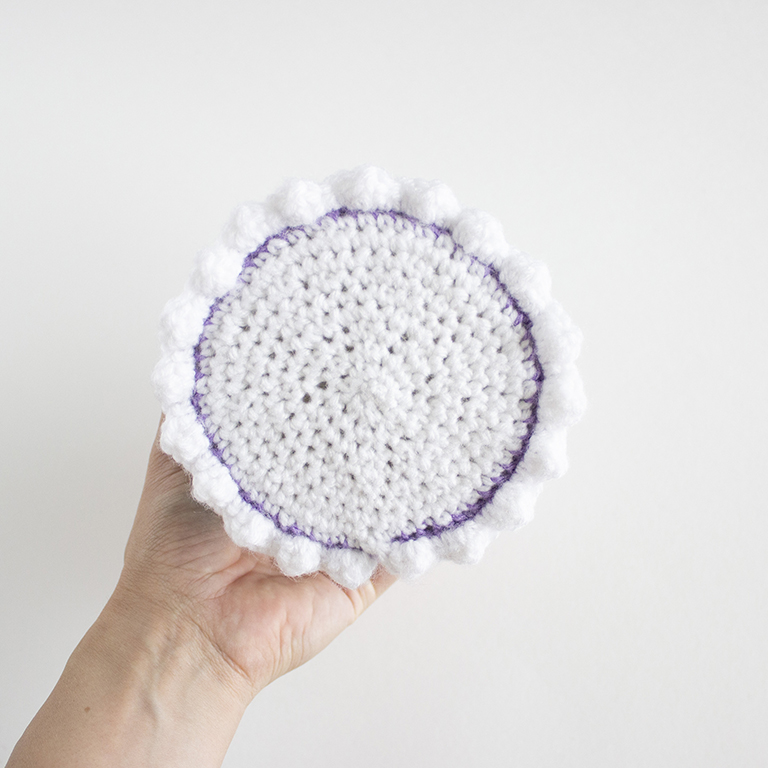
Trace the top of the cake onto cardboard and cut out. You’ll want this to fit inside the top of the cake, with the back loops around the edge of the cardboard. Make 2 of these. Set aside.
Change to pink yarn. Fasten off the white yarn.
R11: In BLO, Sc 60.
R12+13: Sc 60.
Change to peach yarn. Fasten off the pink yarn.
R14-16: Sc 60. Make the white frosting layer between rounds 13+14.
Change to yellow yarn. Fasten off the peach yarn.
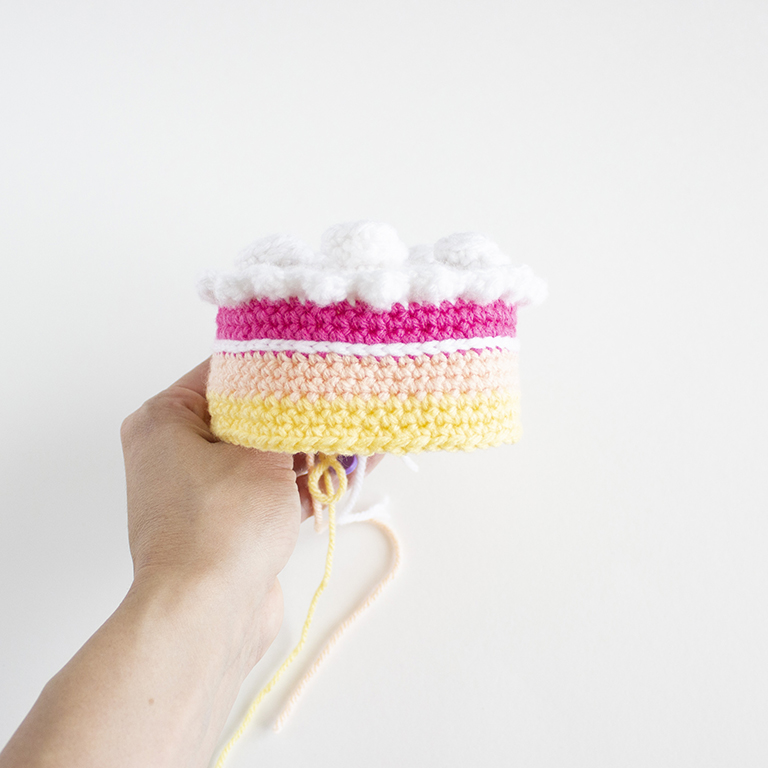
R17-19: Sc 60. Make the white frosting layer between rounds 16+17.
Change to mint yarn. Fasten off the yellow yarn.
R20-22: Sc 60. Make the white frosting layer between rounds 19+20.
Change to blue yarn. Fasten off the mint yarn.
Prefer an ad-free, printable PDF version?
Grab The Rainbow Birthday Crochet Cake Pattern.
Add the safety eyes between rounds 20+21, placing them 4 stitches apart.
Sew mouth on with black embroidery floss.
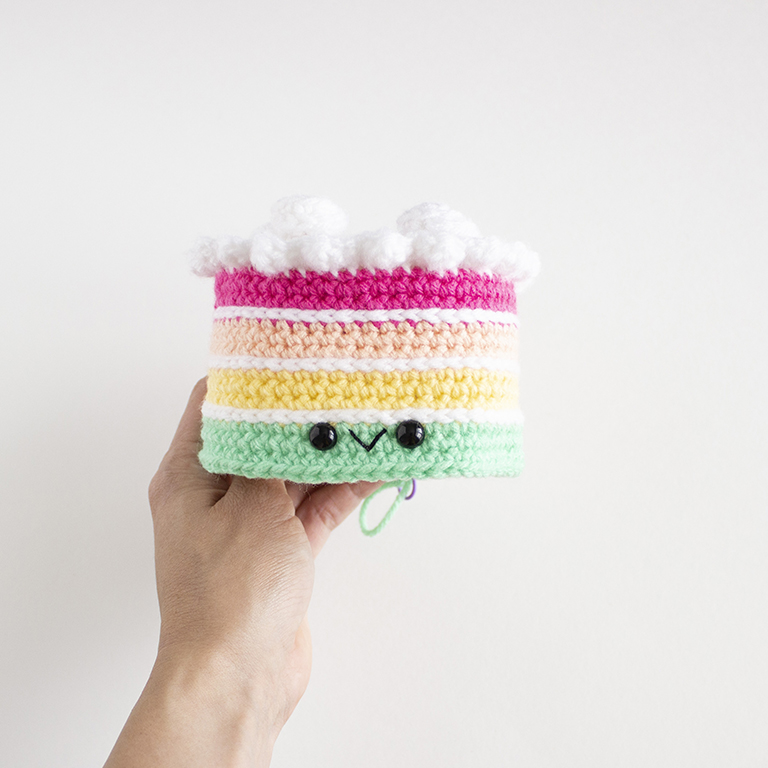
R23-25: Sc 60. Make the white frosting layer between round 22+23.
Change to purple yarn. Fasten off the blue yarn.
R26-28: Sc 60. Make the white frosting layer between round 25+26.
Change to white yarn. Fasten off the purple yarn.
R29: In FLO, *hdc dc hdc, sc 2* 20 times.
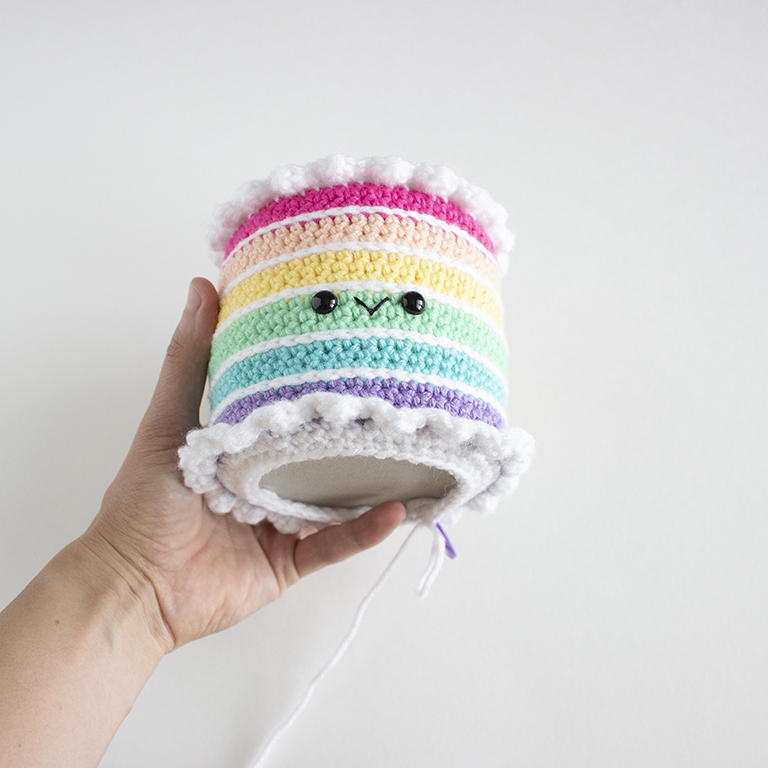
Insert one piece of cardboard to the cake.
R29: In BLO, Sc 4, inv dec, *sc 8, inv dec* 5 times, sc 4. (54 sts)
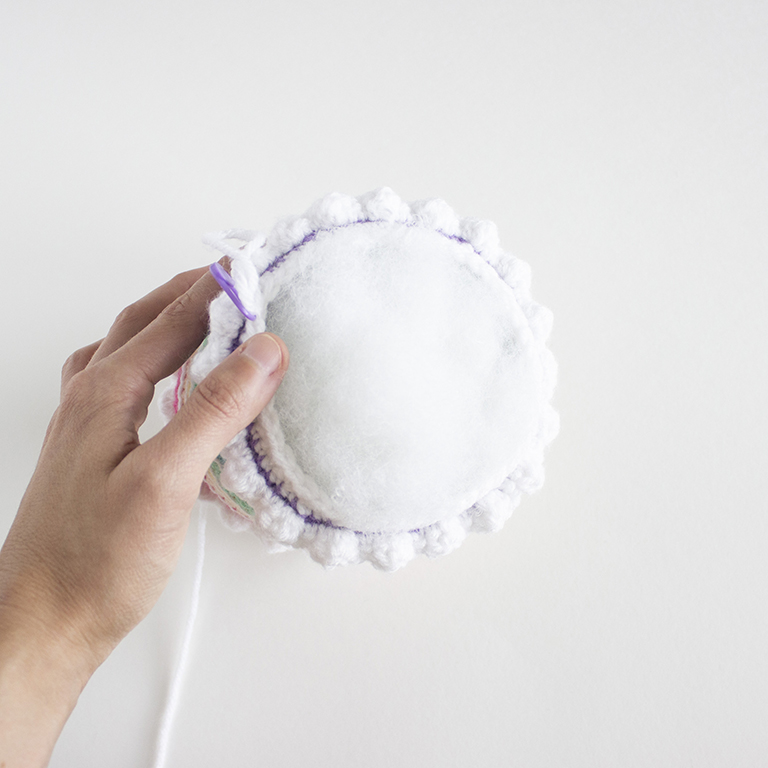
Add fiberfill to the cake. Make sure to add all that you’ll need since the second piece of cardboard will prohibit us being able to add more. Insert the second piece, making sure R29 goes on top of it.
Prefer an ad-free, printable PDF version?
Grab The Rainbow Birthday Crochet Cake Pattern.
R30: *Sc 7, inv dec* 6 times. (48 sts)
R31: Sc 3, inv dec, *sc 6, inv dec* 5 times, sc 3. (42 sts)
R32: *Sc 5, inv dec* 6 times. (36 sts)
R33: Sc 2, inv dec, *sc 4, inv dec* 5 times, sc 2. (30 sts)
R34: *Sc 3, inv dec* 6 times. (24 sts)
R35: Sc 1, inv dec, *sc 2, inv dec* 5 times, sc 1. (18 sts)
R36: *Sc 1, inv dec* 6 times. (12 sts)
R37: Inv dec around 6 times. (6 sts)
Fasten off and leave a tail to close piece.
Candle
This is an optional add on but makes the amigurumi cake so much cuter! Usually, I like to crochet a number if it’s for a special birthday or anniversary. I use the number crochet patterns from Moogly, which can be found here.
Using the yarn color of your choice,
R1: 6 sc in magic ring. (6 sts)
R2-9: Sc 6.
Fasten off and leave a tail for sewing. Leave candle unstuffed.
For the flame- Use red, peach and yellow yarn. Cut about 5 inches of all three colors. Tie a knot at one end. Then with the yarn needle, weave the needle through the magic ring on the candle and pull the yarn through. Trim to desired length. With a pet slicker brush or yarn needle, brush or pick apart the yarn to make the flame more realistic.
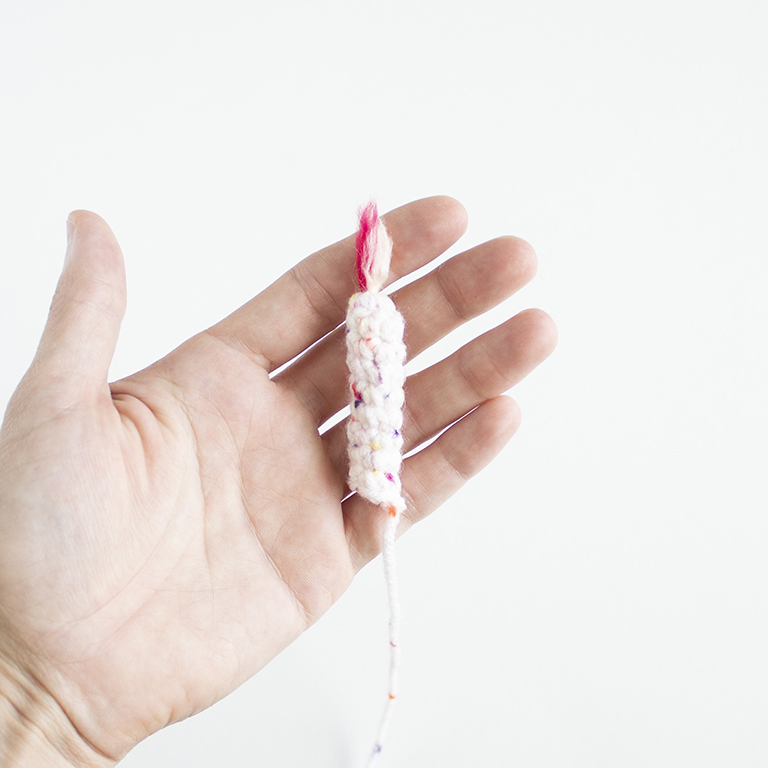
With the yarn needle and tail from the candle, sew the candle in place on the cake, directly on top of the magic ring. Secure with a knot and hide the end inside the cake.
➤Make sure to check out all of my other free crochet patterns here!

CLICK TO PIN THIS POST NOW!
And there you have it! A super yummy and easy to make crochet rainbow birthday cake! I hope you’ve loved this free amigurumi rainbow birthday cake pattern. I can’t wait to see all the sweet and cute amigurumi cakes you all make. Please be sure to tag me in your crochet cake posts on Instagram @amenagerieofstitches and use the hashtag #amenagerieofstitches
Happy Crocheting!
Lauren
If you have any trouble with this crochet cake pattern, please don’t hesitate to reach out!
If you would like to make even more free amigurumi crochet cuties check others out here!
This rainbow crochet birthday cake pattern is an original pattern by Lauren Espy of A Menagerie of Stitches. Please do not claim this amigurumi pattern as your own. If you’d like to share this crochet pattern, you may provide a link to this post but please do not reprint it on your website. You may sell products made from this pattern but please credit me, Lauren Espy of A Menagerie of Stitches, and provide a link to my blog www.amenagerieofstitchesblog.com Absolutely no mass production or manufacturing of any kind is allowed. Thank you for understanding.
Disclaimer- This crochet post contains affiliate links. By clicking these links, you help support me and my business at no cost to you.
