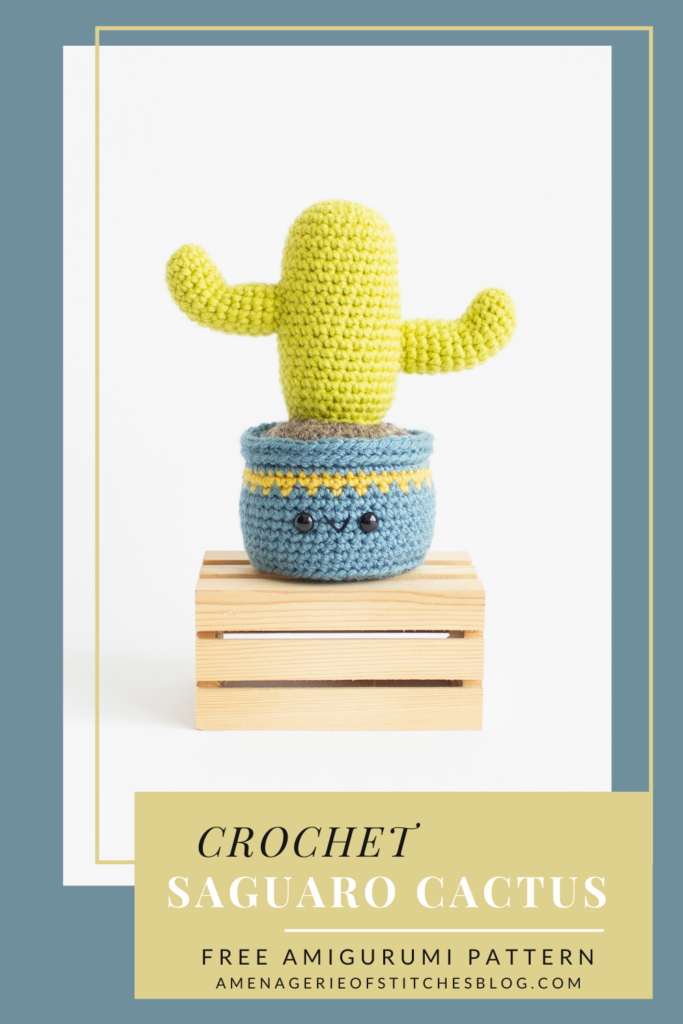
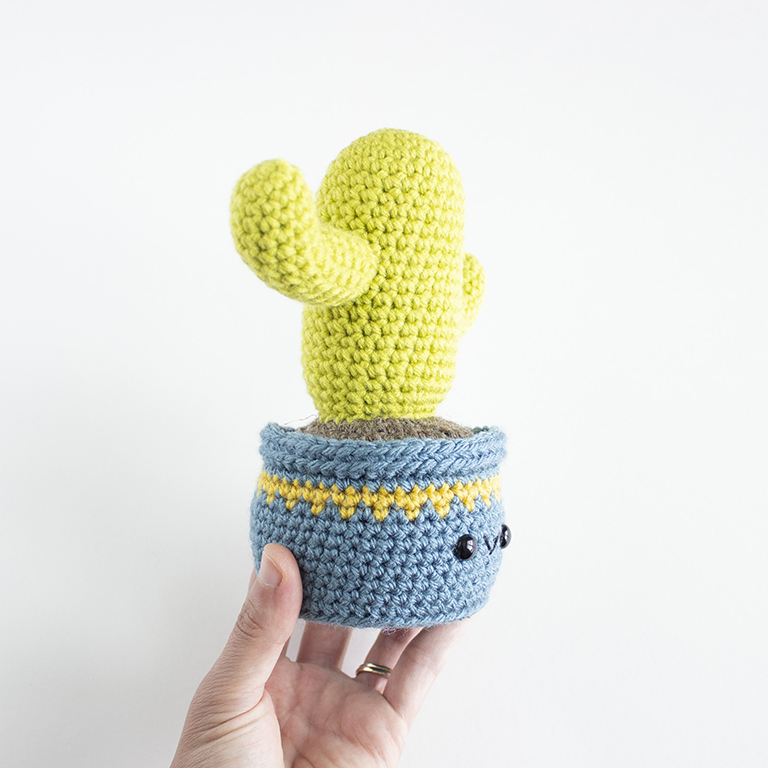
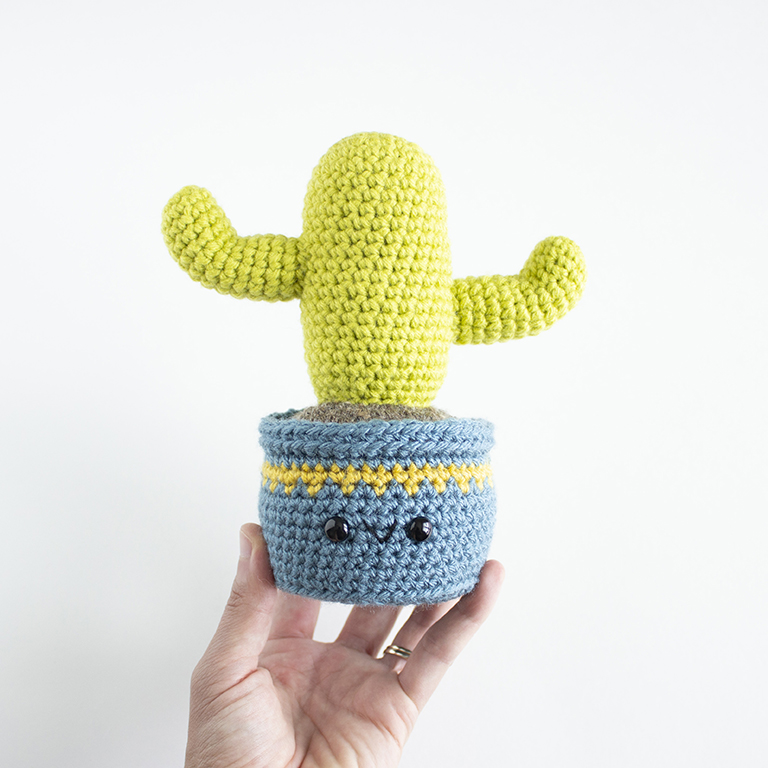
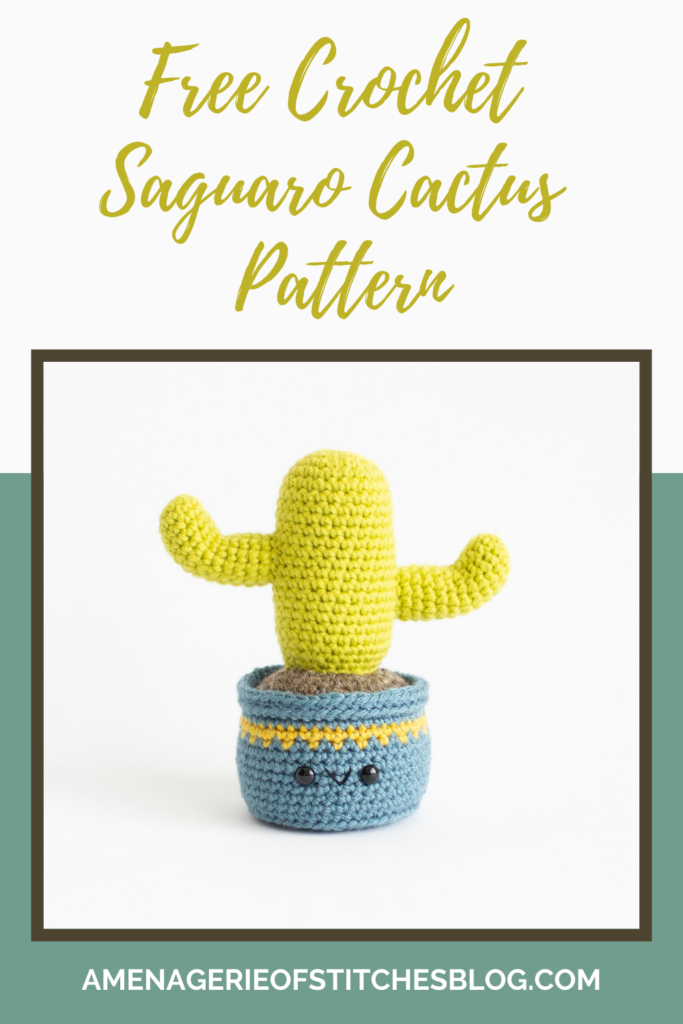
There’s a new cactus in town!! If you’ve been around for a while, you probably know all about my love for crocheted plants. Especially ones that are super cute like this crochet saguaro cactus!
Back in April, I shared and released a brand new collection of amigurumi cacti and succulents that you can view in my shop. They were a huge hit and I couldn’t believe how many people shared my love for the amigurumi plants you can’t kill! The full collection contains 6 crochet plants ranging from super quick and easy like the Mexican Fencepost Cactus to a little more tedious and intermediate like the Fishbone Cactus. All of them are equally cute and SO fun to make.
While this crochet Saguaro Cactus didn’t make the cut for the Cactus & Succulent Collection v2, it’s just too cute and I knew I couldn’t let a great amigurumi cactus pattern go to waste. If you’ve been eyeing any of my crochet plant patterns, or are maybe too intimidated to try them, this amigurumi pattern is going to change your mind! I’m pretty sure you’ll become as obsessed as I am and want to make all the crocheted plants! These amigurumi make great gifts for friends and family, or for yourself if you need a little cuteness in your life.
CLICK TO PIN THIS POST NOW!
Here’s what you’ll need:
- Worsted weight yarn:
Lion Brand Vanna’s Choice in the colors Dusty Blue, Mustard and Barley. (Can be Purchased Here)
Michaels Loops & Threads Impeccable in the color Grass. (Can be Purchased Here) - Size F/3.75mm crochet hook
- Black embroidery floss and needle
- One pair of 9mm safety eyes
- Polyester fiberfill stuffing
- Yarn needle
- Scissors
- Straight Pins
- Stitch marker
- Optional – thin cardboard for base of pot
Abbreviations:
Crochet Pattern is written using U.S. crochet terminology.
Crochet technique video & photo tutorials can be found here.
R- Round
Mr- Magic Ring
Sc- Single Crochet
Inc- Increase
Inv Dec- Invisible Decrease
BLO- Back Loops Only
FLO- Front Loops Only
St/s- Stitch/es
* – Repeat the directions in between * and * as many times as stated.
( ) – The number inside will indicate how many stitches you should have at the end of each round.
Finished Measurements:
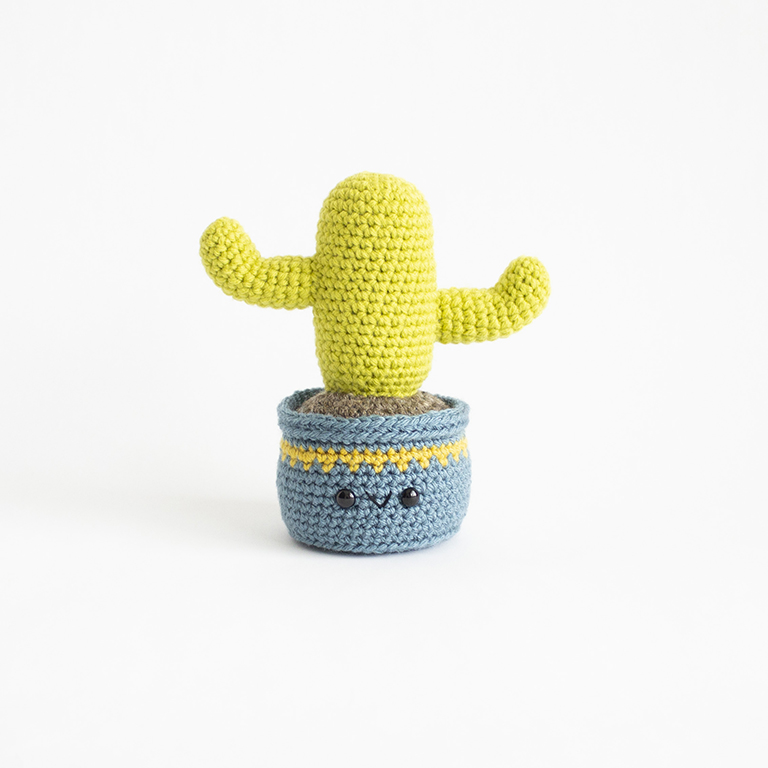
Approx. 6.25 inches tall by 5.5 inches wide (from arm to arm)
*Please note- Sizes will vary depending on your tension, hook and yarn used.
Pattern Notes:
This crochet pattern is worked in continuous rounds. This means you do not join at the end of each round, and you simply continue onto the next round. Use a stitch marker to mark the end of the round.
➤Clean Color Change – Video & Photo tutorial found here
➤Clean Fasten off – Video & Photo tutorial found here
Prefer an ad-free, printable PDF version?
Grab The Saguaro Cactus Crochet Pattern HERE.
Pot
Using blue yarn,
R1: 6 sc in magic ring. (6 sts)
R2: Inc in each st around. (12 sts)
R3: *Sc 1, inc* 6 times. (18 sts)
R4: Sc 1, inc, *sc 2, inc* 5 times, sc 1. (24 sts)
R5: *Sc 3, inc* 6 times. (30 sts)
R6: Sc 2, inc, *sc 4, inc* 5 times, sc 2. (36 sts)
R7: *Sc 5, inc* 6 times. (42 sts)
R8: Sc 3, inc, *sc 6, inc* 5 times, sc 3. (48 sts)
R9: In BLO, Sc 48.
R10-15: Sc 48.
Change to yellow yarn,
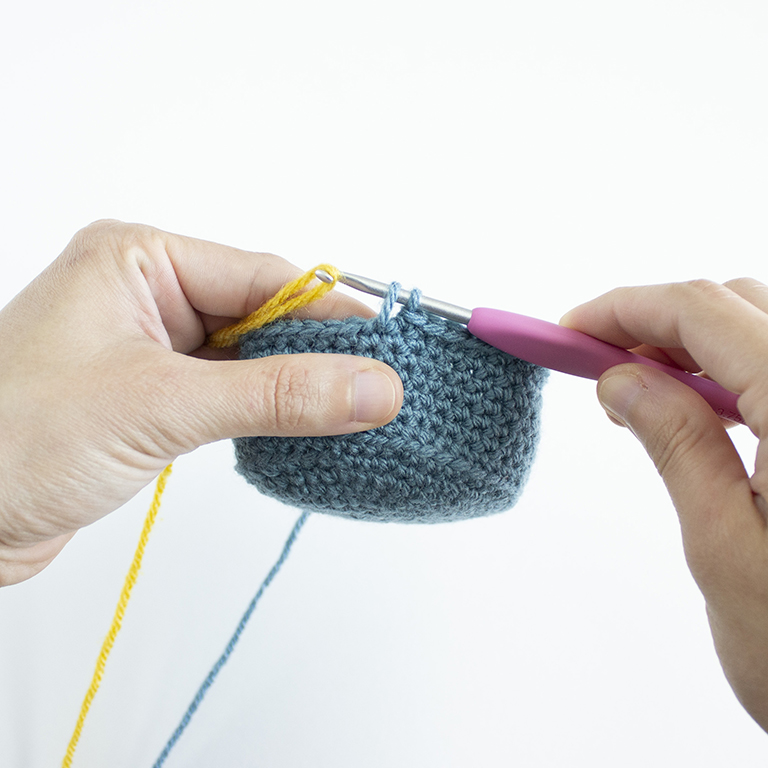
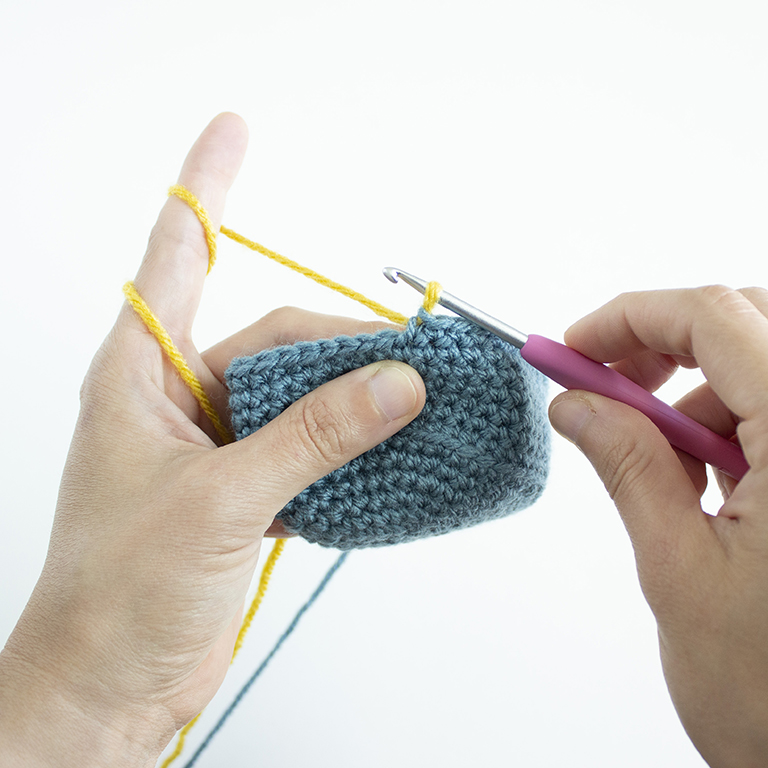
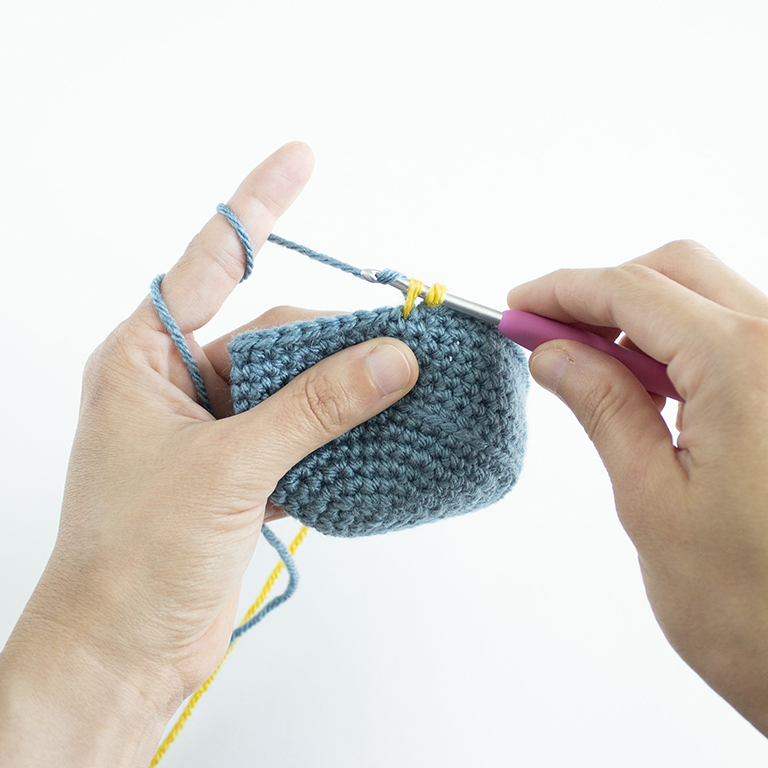
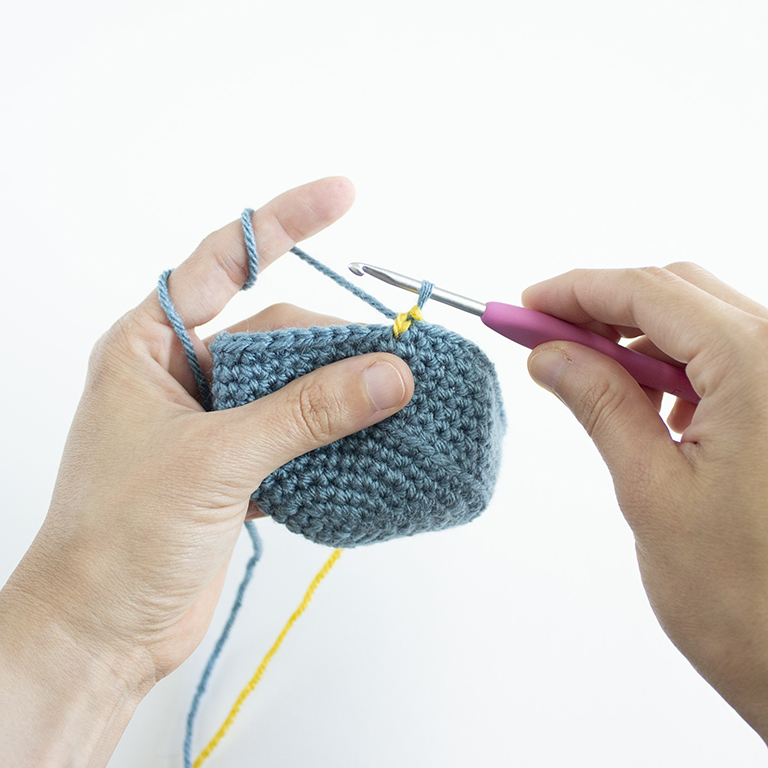
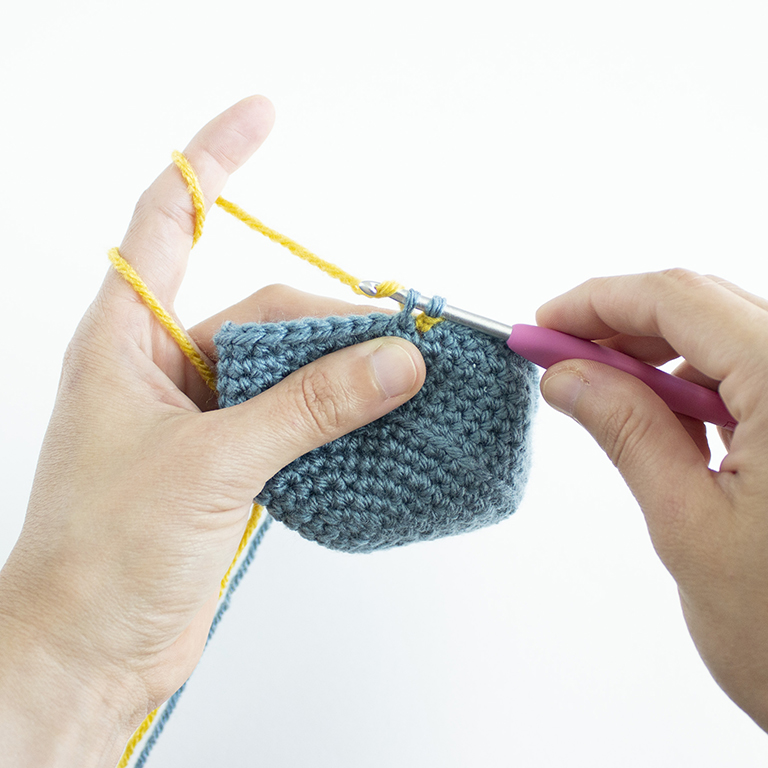
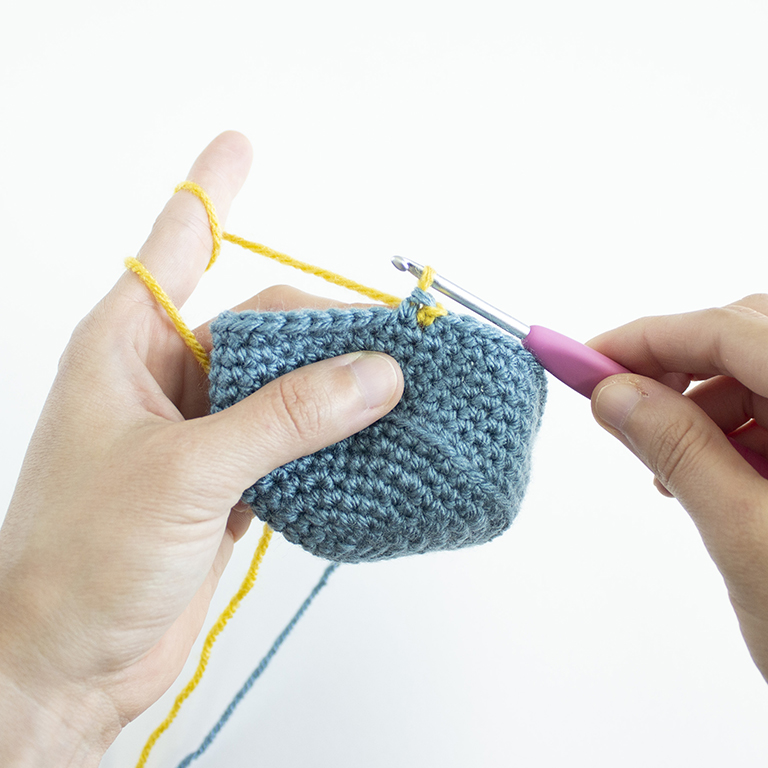
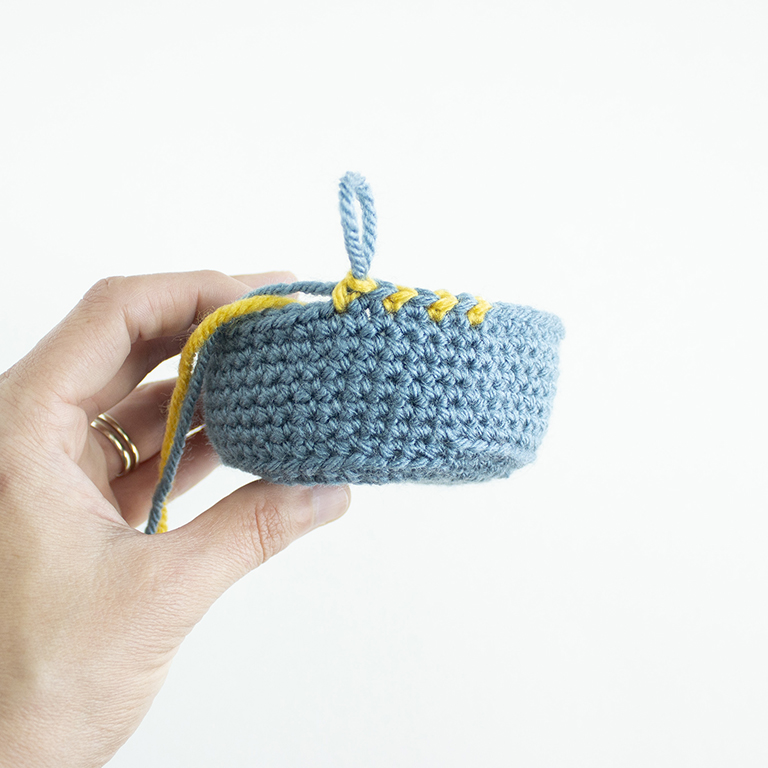
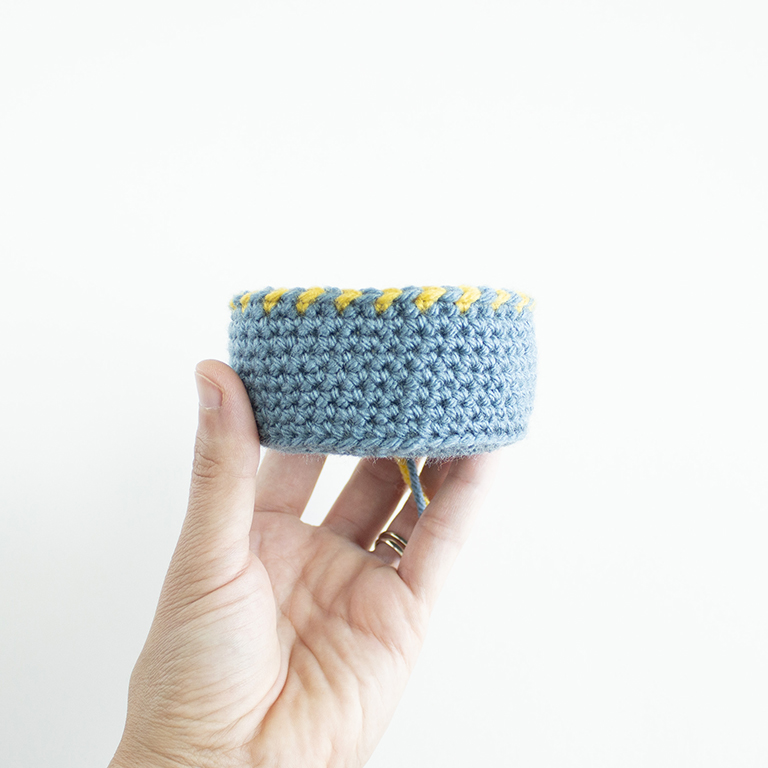
R16: Sc 48, alternating between yellow and blue yarn for every other stitch. Simply make
one sc in yellow then make one sc in blue, repeating until you reach the end. The round
will end with blue.
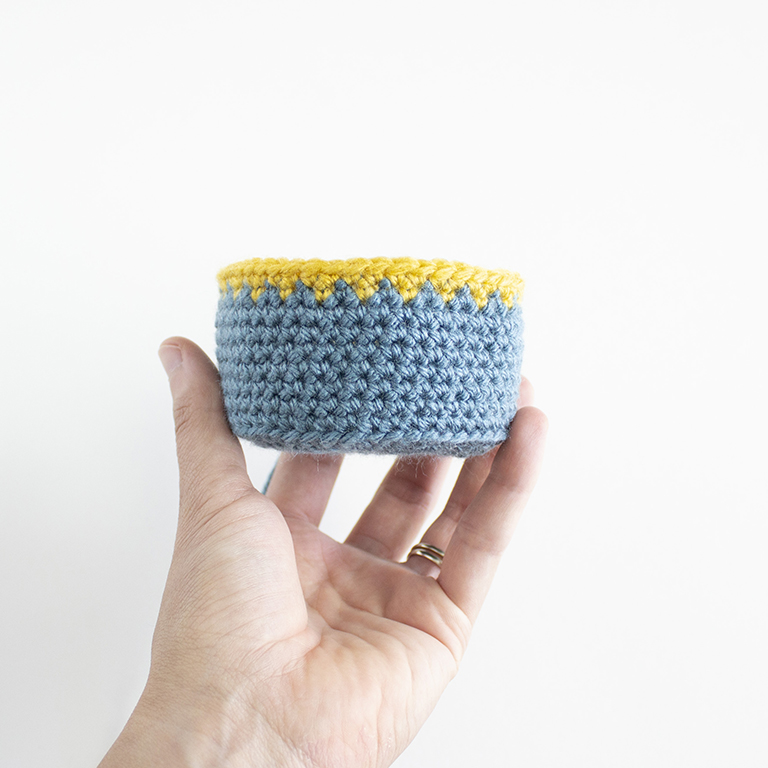
Follow along with this video for the pot technique.
Step by step photos are below it.
Change to yellow yarn,
R17: Sc 48.
Change to blue,
R18: Sc 48.
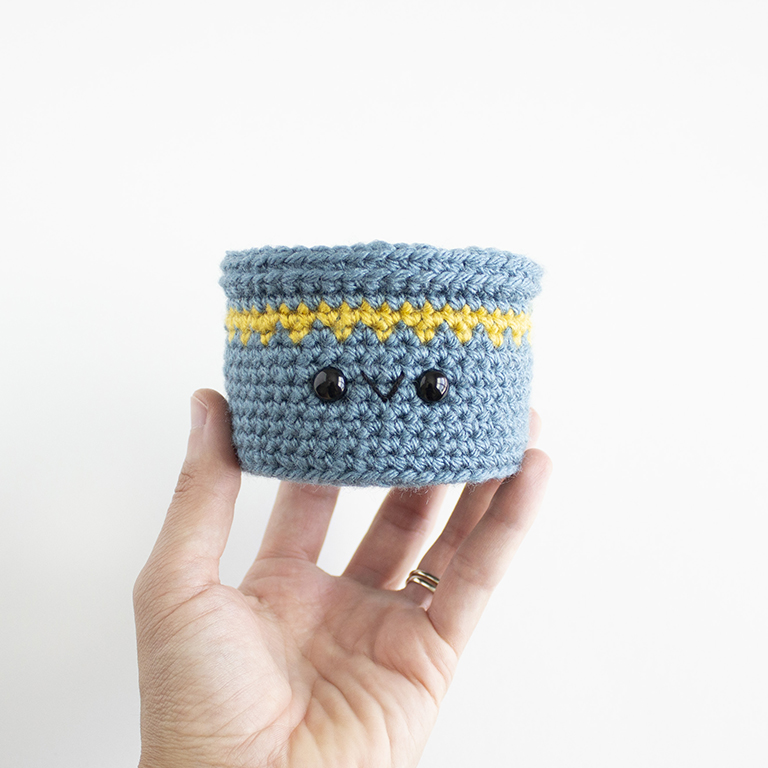
R19: In FLO, Sc 48.
R20: In BLO, Sc 48.
Fasten off and weave in tail.
Add safety eyes between rounds 13+14 (5+6 rows up from the rim) Place them 4 stitches apart. Sew mouth on with black embroidery floss.
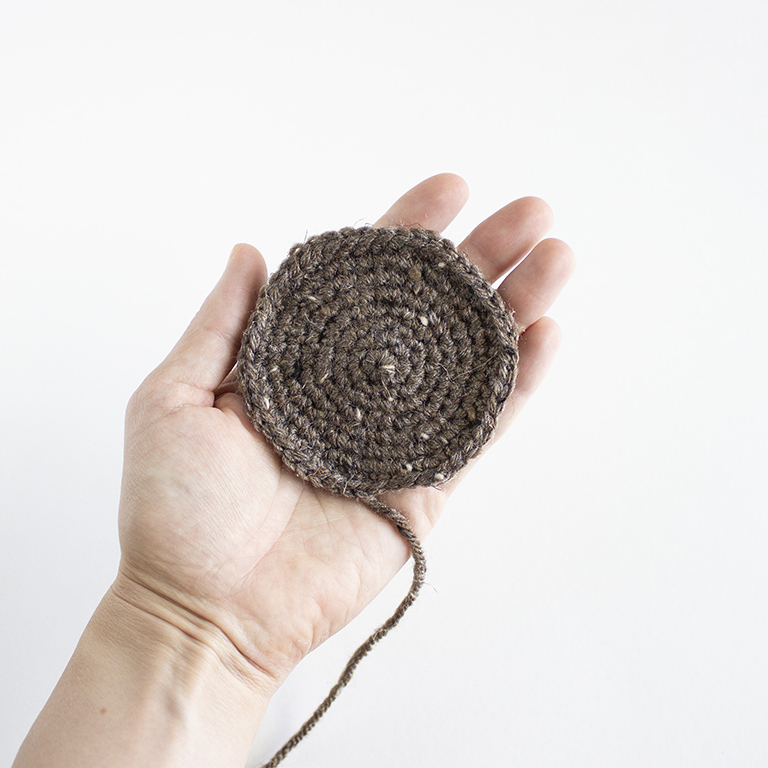
Dirt
Using brown yarn,
R1: 6 sc in magic ring. (6 sts)
R2: Inc in each st around. (12 sts)
R3: *Sc 1, inc* 6 times. (18 sts)
R4: Sc 1, inc, *sc 2, inc* 5 times, sc 1. (24 sts)
R5: *Sc 3, inc* 6 times. (30 sts)
R6: Sc 2, inc, *sc 4, inc* 5 times, sc 2. (36 sts)
R7: *Sc 5, inc* 6 times. (42 sts)
R8: Sc 3, inc, *sc 6, inc* 5 times, sc 3. (48 sts)
Fasten off and leave a long tail for sewing.
Cactus
Main Piece
Using lime green yarn,
R1: 6 sc in magic ring. (6 sts)
R2: Inc in each st around. (12 sts)
R3: *Sc 1, inc* 6 times. (18 sts)
R4: *Sc 2, inc* 6 times. (24 sts)
R5: *Sc 11, inc* 2 times. (26 sts)
R6-21: Sc 26.
R22: *Sc 11, inv dec* 2 times. (24 sts)
R23: *Sc 10, inv dec* 2 times. (22 sts)
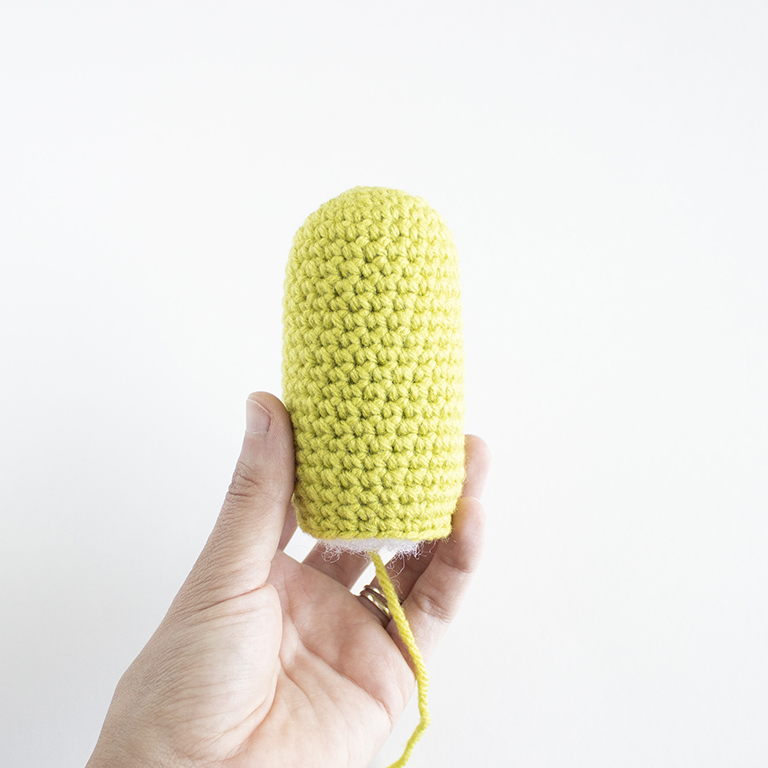
Fasten off and leave a tail for sewing. Add fiberfill.
Prefer an ad-free, printable PDF version?
Grab The Saguaro Cactus Crochet Pattern HERE.
Arms – Make 2
Using lime green yarn,
R1: 6 sc in magic ring. (6 sts)
R2: Inc in each st around. (12 sts)
R3-13: Sc 12.
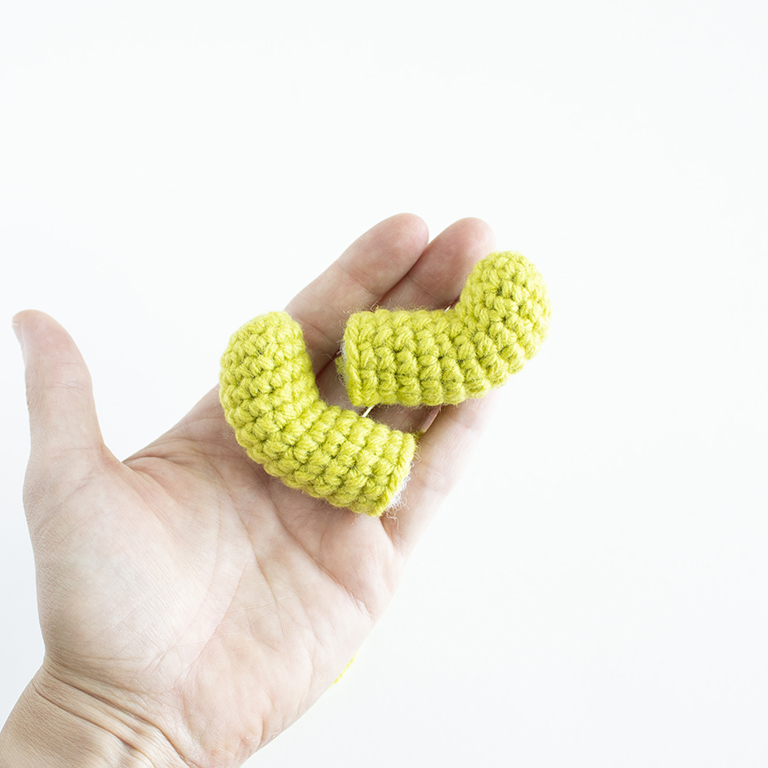
Fasten off and leave a tail for sewing. Add fiberfill, making sure to not overstuff.
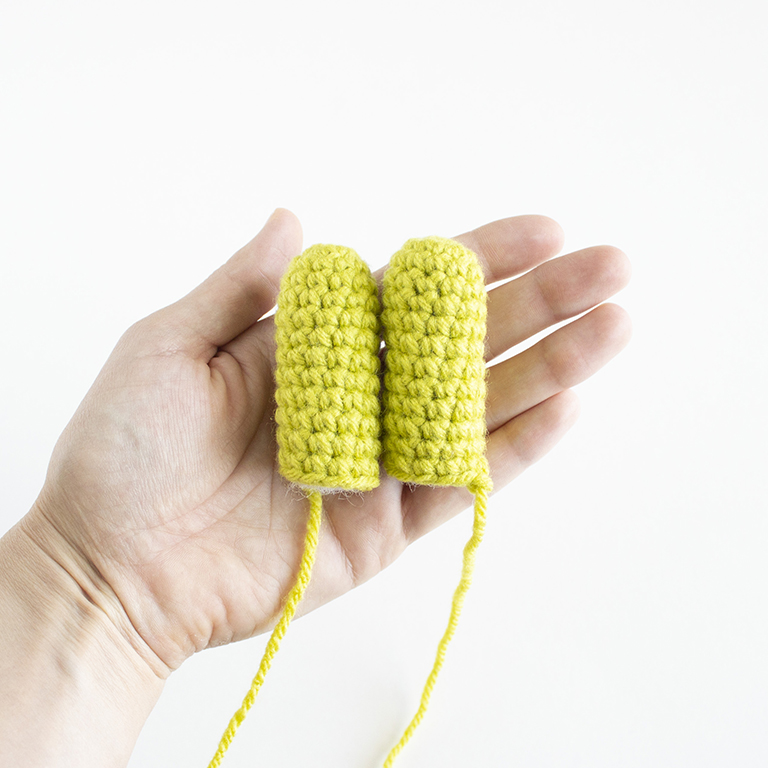
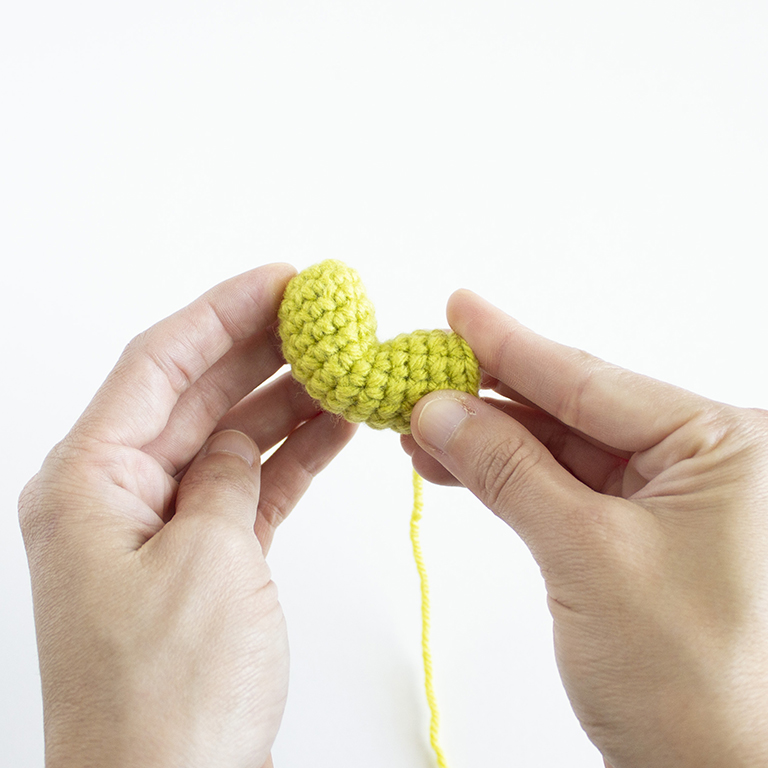
Bend each arm at rounds 7 and 8. If they are not overstuffed, the bend will hold its shape just fine. If you’re having trouble with them staying bent, just take a strand of yarn and weave through rounds 7 and 8 to make the bend stay.
Assembly
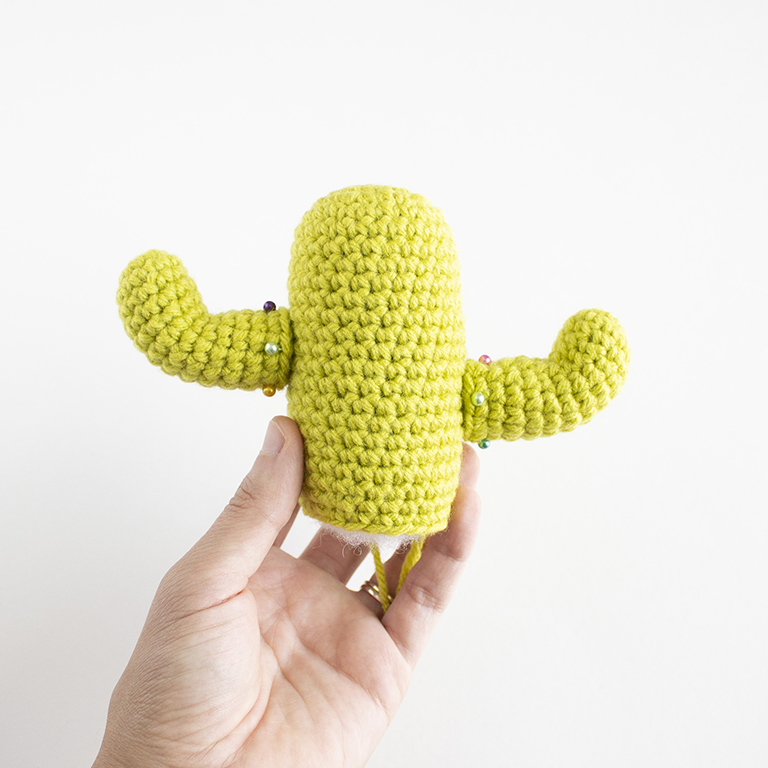
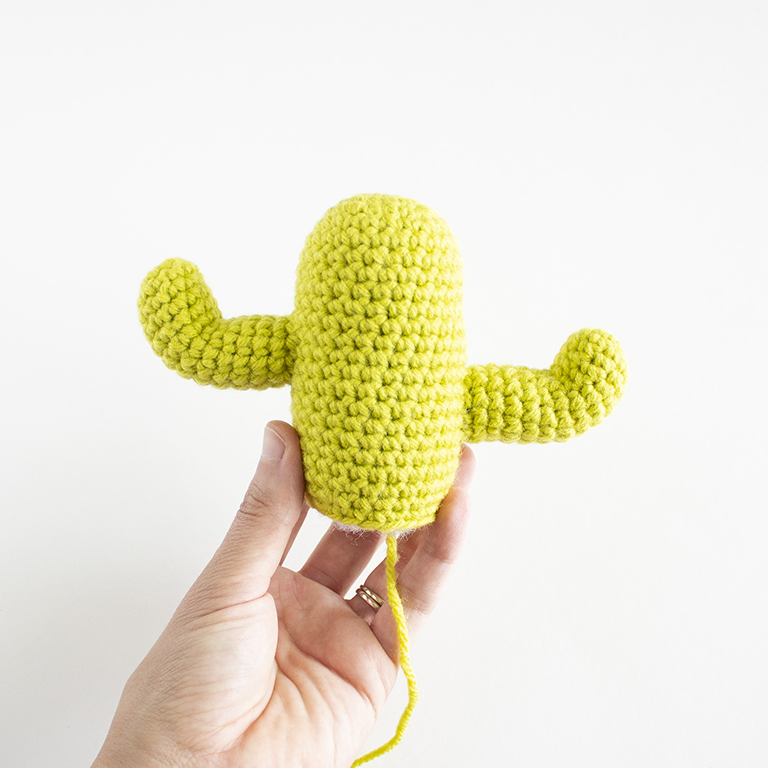
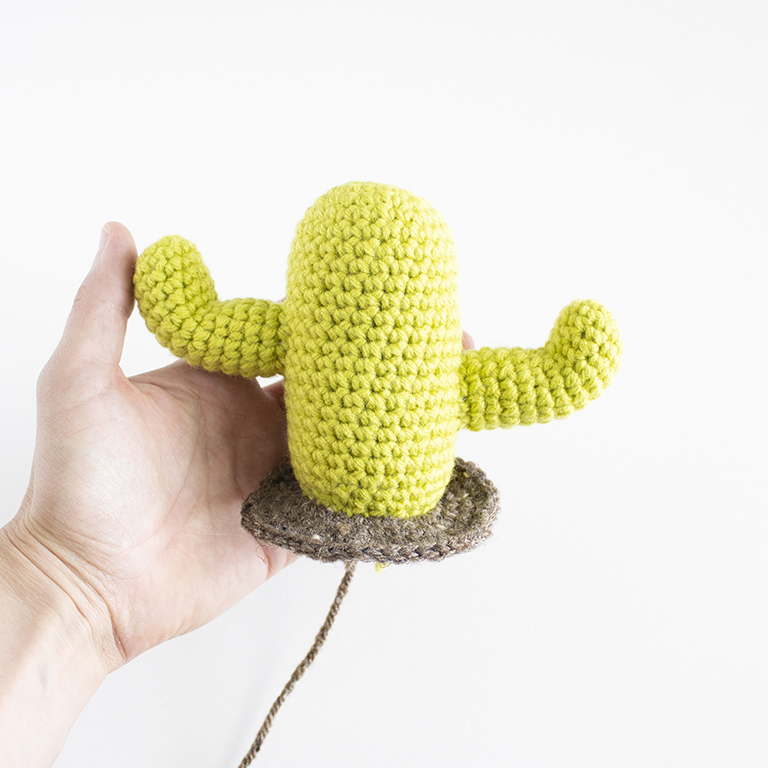
Using straight pins, pin the arms to the main cactus piece. Pin one arm between rounds 11-15. Pin the second arm between rounds 14-18. With the yarn needle and tail, sew each arm to the cactus. Secure with a knot and hide inside the cactus.
Sew the cactus to the middle of the dirt. Secure with a knot on the underside of the dirt.
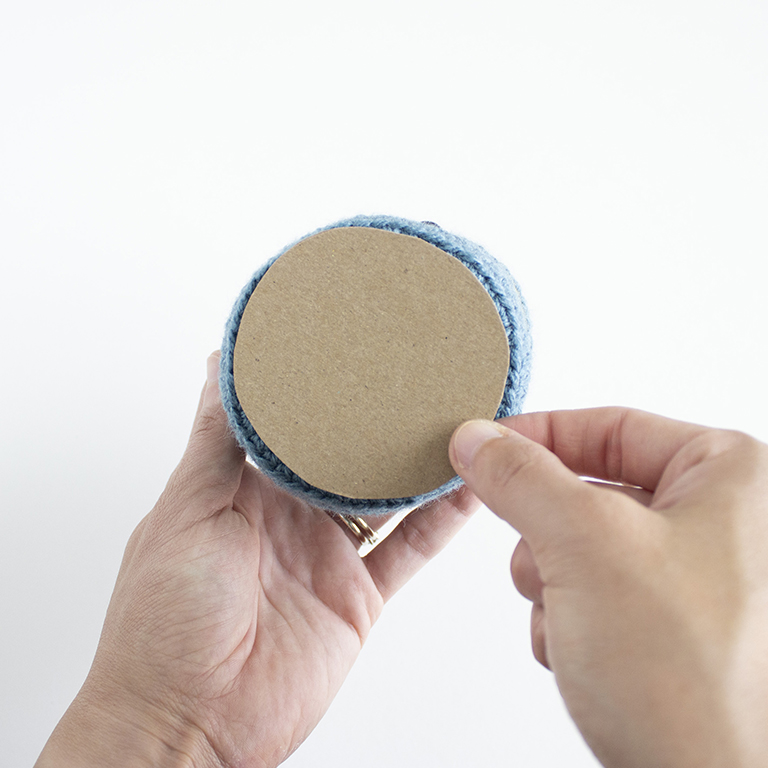
Finally, trace the base of the pot onto the cardboard and cut out. You’ll want this to fit perfectly into the bottom of the pot so you may have to trim it down a little. Place the cardboard into the bottom of the pot and then add fiberfill. It’s okay to not add all of it at once since you can always add more as you sew the pieces together.
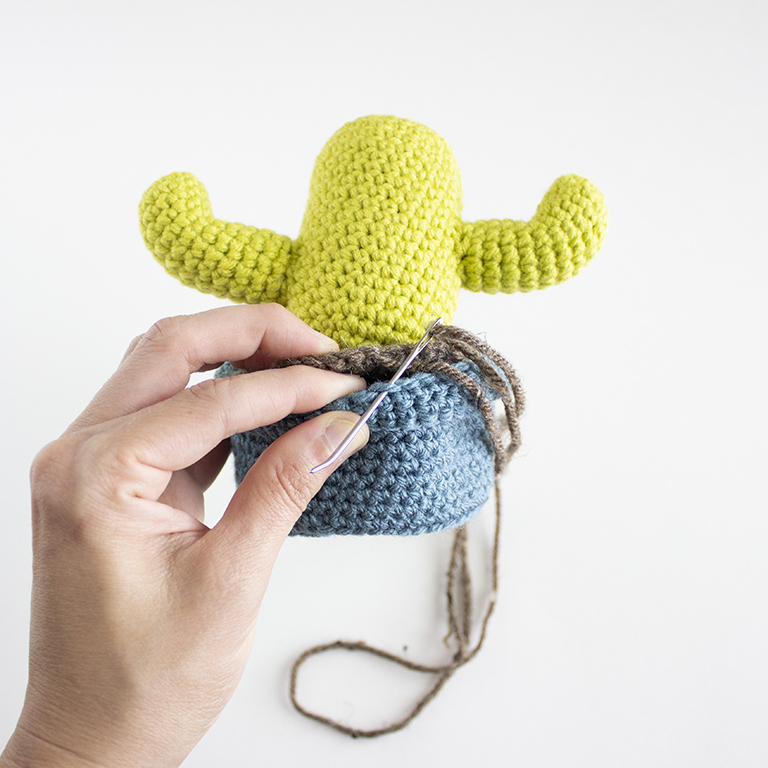
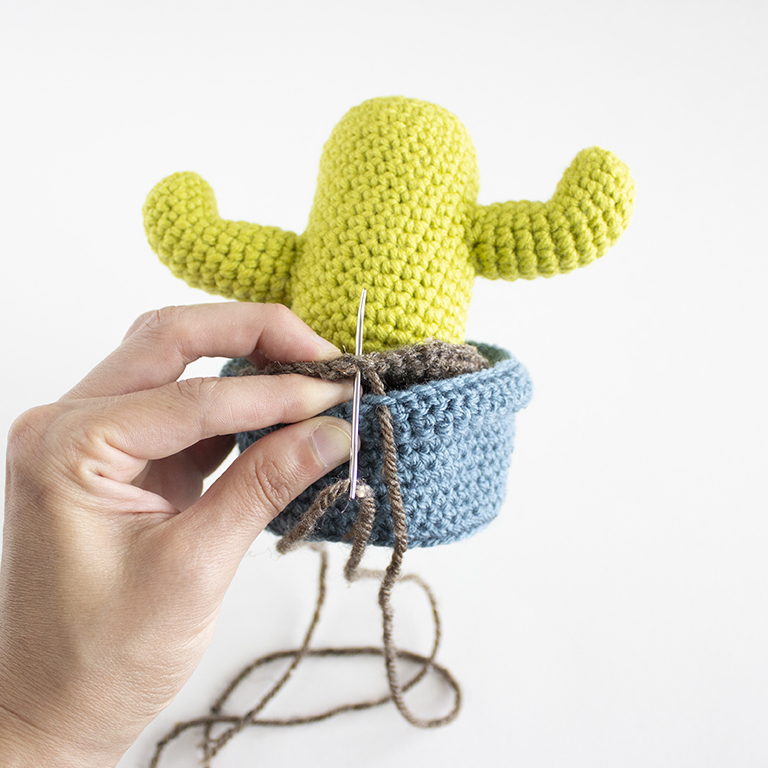
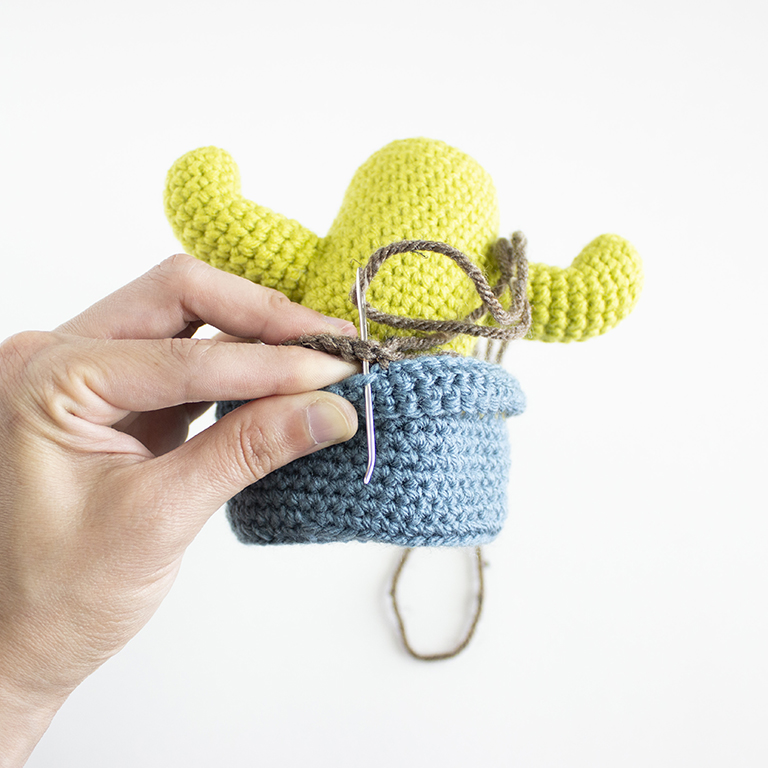
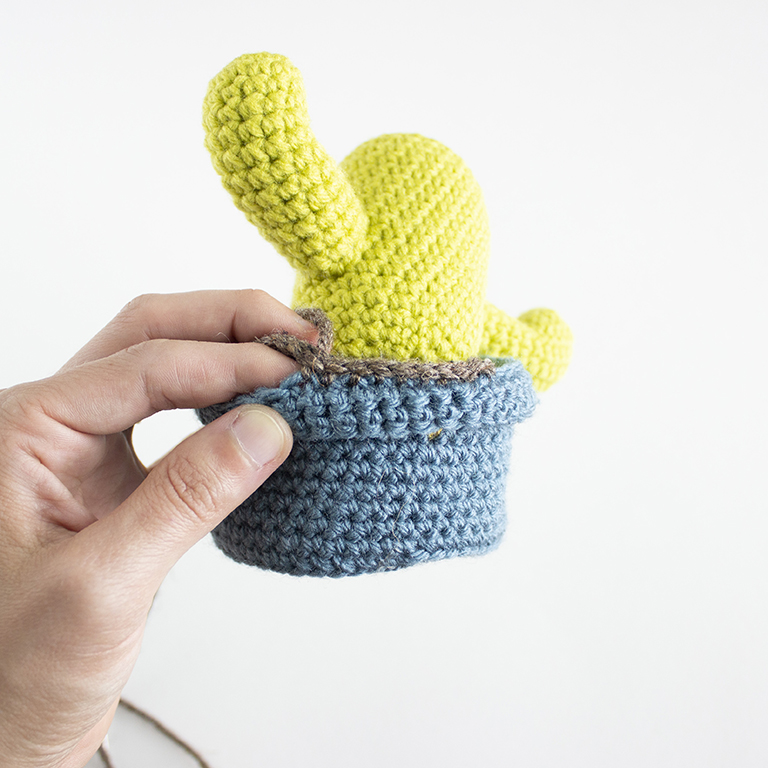
For attaching the dirt to the pot, you’ll want to make sure the cactus “arms” are positioned on either side of the pot. With a stitch marker, attach it to both the dirt and the back loop on the pot to hold it in place.
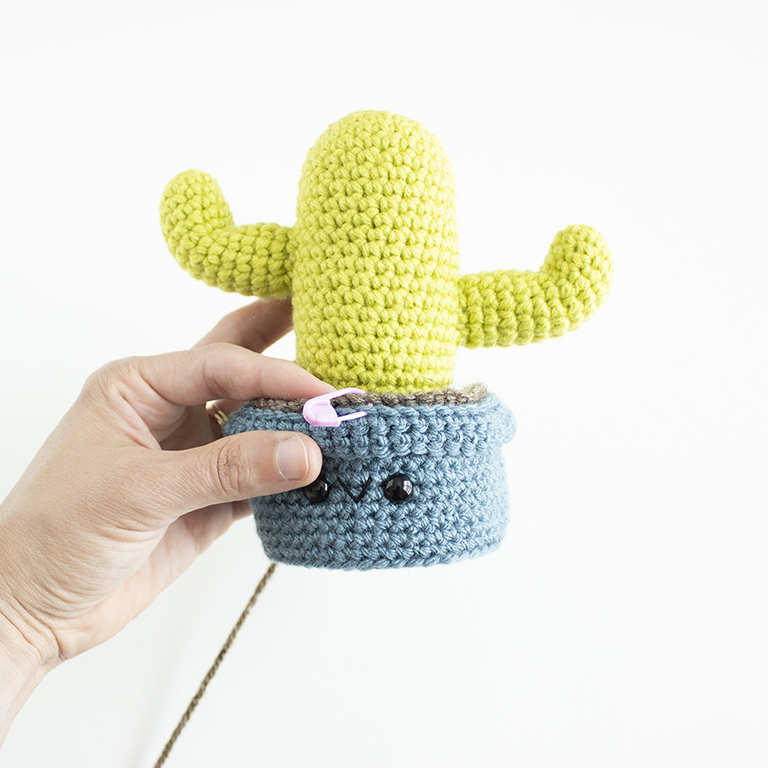
Using the yarn needle and yarn tail, weave the needle through the back loops left over from R19 of the pot and between the stitches from R8 of the dirt. To do this, weave the needle under the back loop of the pot then go up and under the stitch (the “V”) on the dirt. Next, move over to the next stitch on the dirt. Go down and under
the next stitch (the “V”) and then under the back loop on the pot.
Prefer an ad-free, printable PDF version?
Grab The Saguaro Cactus Crochet Pattern HERE.
Repeat this technique all the way around. Make sure to go through the stitches, not over them, to create a clean finish on the pot. Add more fiberfill if needed. Secure and hide the tail inside the pot.
➤Make sure to check out all of my other free crochet patterns here!
And there you have it! A super cute and easy to take care of crocheted Saguaro Cactus! I hope you’ve loved this free amigurumi saguaro cactus pattern. I can’t wait to see all the adorable cacti you all make. Please be sure to tag me in your crochet cactus posts on Instagram @amenagerieofstitches and use the hashtag #amenagerieofstitches
CLICK TO PIN THIS POST NOW!
Happy Crocheting!
Lauren
If you have any trouble with this amigurumi crochet saguaro cactus pattern, please don’t hesitate to reach out!
If you would like to make even more free amigurumi cuties check others out here!
This crochet saguaro cactus pattern is an original crochet pattern by Lauren Espy of A Menagerie of Stitches. Please do not claim this amigurumi pattern as your own. If you’d like to share this crochet pattern, you may provide a link to this post but please do not reprint it on your website.
You may sell products made from this crochet saguaro cactus pattern but please credit me, Lauren Espy of A Menagerie of Stitches, and provide a link to My Blog. Absolutely no mass production or manufacturing of any kind is allowed. Thank you for understanding.
Disclaimer- This crochet post contains affiliate links. By clicking these links, you help support me and my business at no cost to you.
