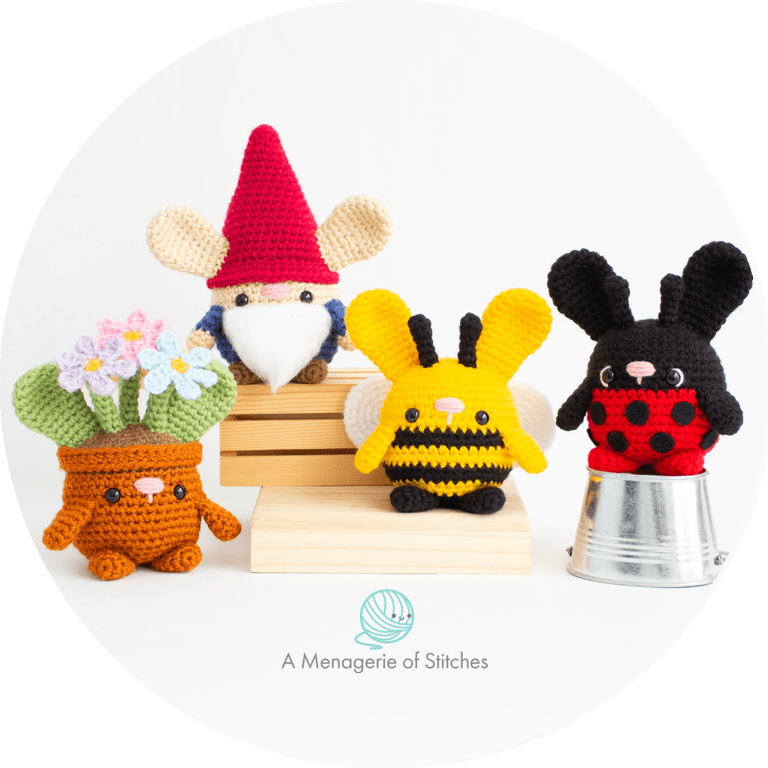
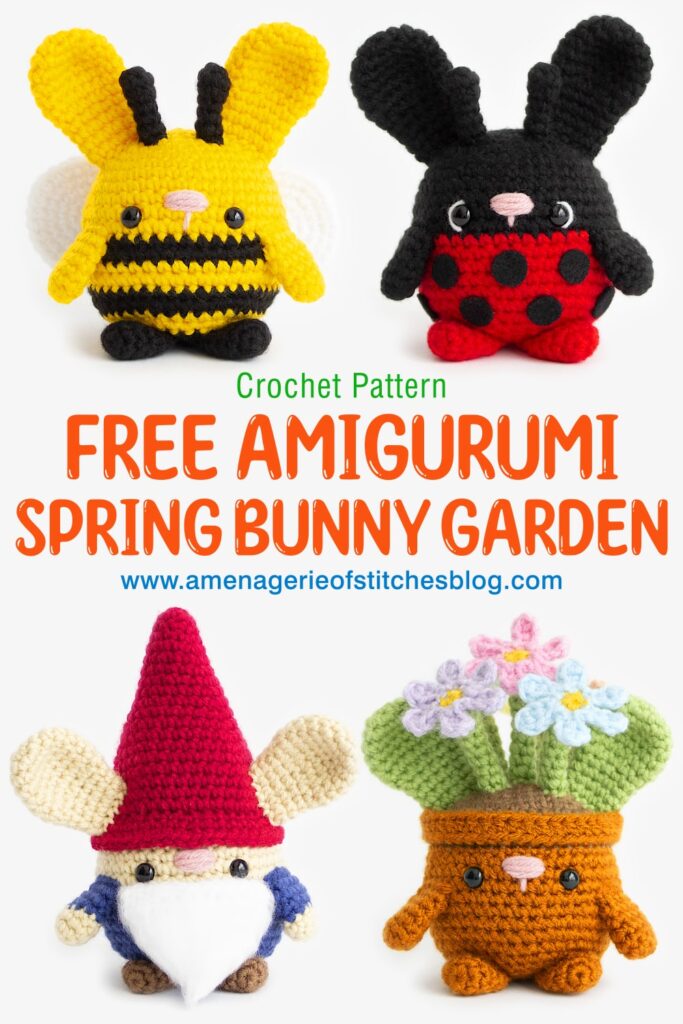
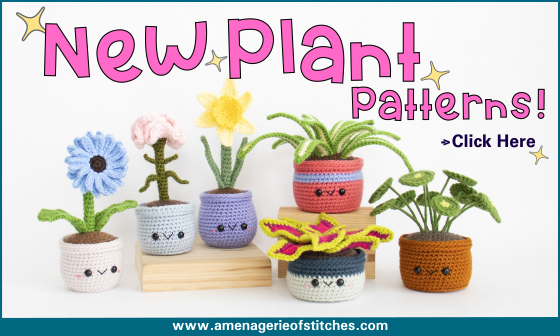
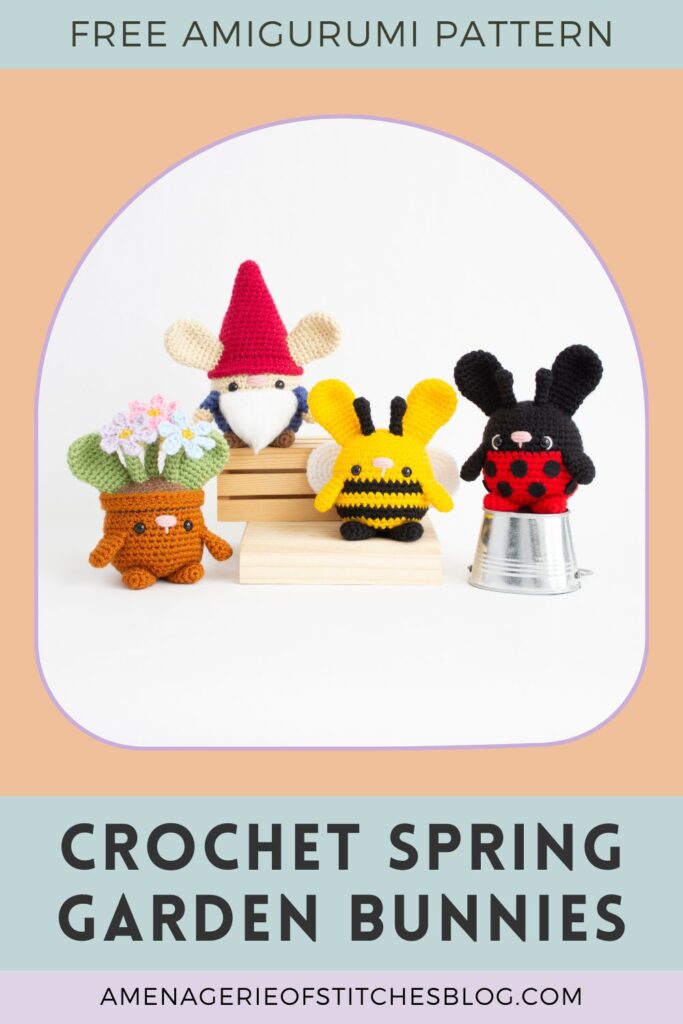
April showers have brought May flowers, along with a couple bugs and a gnome! Our next collection of crocheted Chubby Bunnies are here and they are ready to spend their time out in the garden. This warmer weather we’re having was my inspiration behind this new set of Spring garden bunnies and to say I’m smitten would be an understatement. We have everything from a bumblebee and ladybug, to a pot of pastel colored flowers and a gnome keeping watch over the garden.
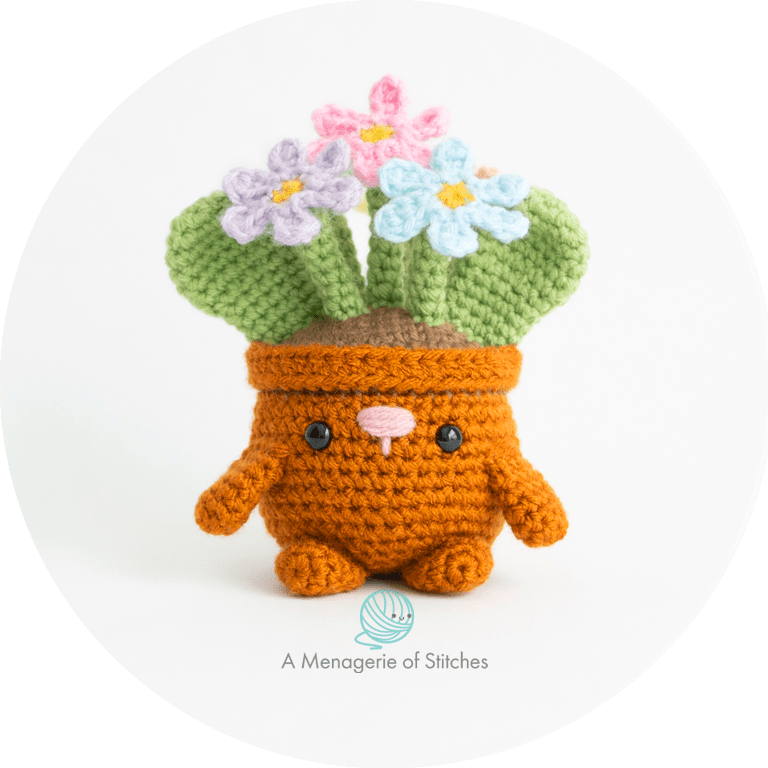
With Mother’s Day right around the corner, this set, especially the pot of flowers, would be the perfect gift! You could easily change up the colors of the flowers to match her favorite flowers. And what’s even better, these flowers won’t wilt so she can enjoy them all year long!
The base for the Spring garden bunnies is the same as the one that can be FOUND HERE. This post is only sharing the modifications needed to make each character. You will need to reference back to the original Chubby Bunny Crochet Pattern when crocheting each piece. Under each character I have listed the specific materials needed to complete each Spring garden bunny design.
I hope you enjoy crocheting these amigurumi spring garden bunnies!
I hope you have fun making these Spring Bunnies!
Let’s get crocheting!
CLICK TO PIN THIS POST NOW!
Abbreviations and Terms Used:
Crochet pattern is written using U.S. crochet terminology.
Crochet technique video & photo tutorials can be found here.
R- Round/Row
Mr- Magic Ring
Sc- Single Crochet
Inc- Increase
Inv Dec- Invisible Decrease
Dec- Decrease
FLO- Front Loops Only
BLO- Back Loops Only
Hdc- Half Double Crochet
Dc- Double Crochet
Tr- Treble Crochet
Ch- Chain
Sl St- Slip Stitch
Sk- Skip
St/s- Stitch/es
* – Repeat the directions in between * and * as many times as stated.
( ) – The number inside will indicate how many stitches you should have at the end of each round.
Pattern Notes:
- Below is a full how to video tutorial for the original amigurumi chubby bunny from my Youtube channel, A Menagerie of Stitches. Please consider subscribing 🙂
- Tutorial for how to brush your amigurumi is embedded below or can be found HERE.
Prefer an ad-free, printable PDF pattern?
Grab the Seasonal Bundle of Chubby Bunny Crochet Patterns HERE
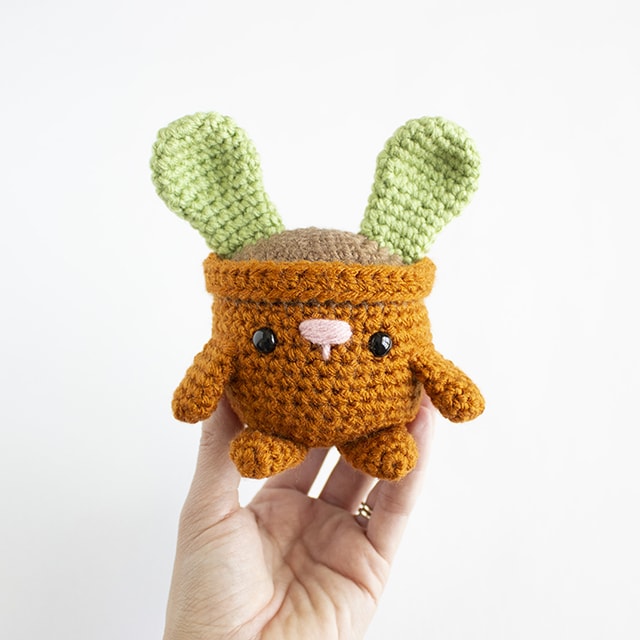
Flower Pot Bunny
- Yarn- I used Michaels Loops & Threads Impeccable in the colors Fern, Blue Haze, and Soft Rose, Michaels Craftsmart in the color Toasted Almond, Lion Brand Vanna’s Choice in the colors Mustard and Rust, Hobby Lobby’s I Love This Yarn in the colors Light Peach, Pink, Orchid, and Menthe, Joann Big Twist in the color Pale Yellow
- Size E/3.5mm Crochet Hook
- 1 pair of black 9mm safety eyes
- Optional- Hot glue gun
- Plus all other materials listed in the original pattern
Ears- Follow the pattern and make 2 ears in Fern.
Arms and Legs- Follow the pattern and make all 4 in Rust.
Tail- Follow the pattern and make the tail in Rust.
Body
Follow rounds 1-9 of the original pattern, using toasted almond. Change to rust yarn, fastening off the toasted almond yarn.
R10: In BLO, Sc 42. (Mark the last FLO with a stitch marker- we’ll use this later when making the rim)
Follow rounds 11-24 of the original pattern to complete the body.
Add safety eyes between rounds 12 and 13, 6 stitches apart.


To make the rim:
R10A: With rust yarn, make a slip knot onto your hook. With the body held upright, insert your hook into the last FLO of R10, yarn over and make your first single crochet. Then in the remaining FLO of R10, sc around. (42 sts)


R10B: Ch 1, then in the BLO, Hdc around. (42 sts)
Make a clean fasten off (see pattern notes) to make the rim of the pot even and clean. If there is a little gap in between, simply use the tail to sew it closed. Weave in all ends.


Ears- Sew the ears between rounds 3+8.
Arms- Sew the arms between rounds 13+14.
Assemble legs and tail as pattern states.
Flower Stems

Large- Make 1
Using fern yarn,
R1: 5 sc in magic ring. (5 sts)
R2-11: Sc 5. Fasten off and leave a tail for sewing. Leave stem unstuffed.
Medium- Make 5
Using fern yarn,
R1: 5 sc in magic ring. (5 sts)
R2-9: Sc 5.
Fasten off and leave a tail for sewing. Leave stems unstuffed.
I found it easier to sew the stems onto the body first, then attach the flowers afterwards.
To assemble the stems to the body- Take the 1 large stem and place it on top of the magic ring. Place 2 stems in front of the one we just attached, near rounds 3-5. Place the remaining 3 stems behind the center stem, near rounds 3-5. Using the yarn needle and leftover yarn tail, sew the stems to the body. Secure all the ends with a knot and hide inside the body.


Prefer an ad-free, printable PDF pattern?
Grab the Seasonal Bundle of Chubby Bunny Crochet Patterns HERE
Flowers- Make 6
Use a variety of colors or make them all in one color. Use mustard yarn for the centers.
Using mustard yarn,
R1: 6 sc in magic ring. On the last sc, change to flower color. (6 sts)
R2: *Sc 1, ch 4, then starting in the 2nd ch from hook, dc, hdc, sc, then sl st into the first sc (the one made before making the 4 chs) to complete the petal* Repeat 6 times.
Fasten off and weave in all the ends.


Using hot glue, glue the center of the flowers to the stems, on top of the magic ring.


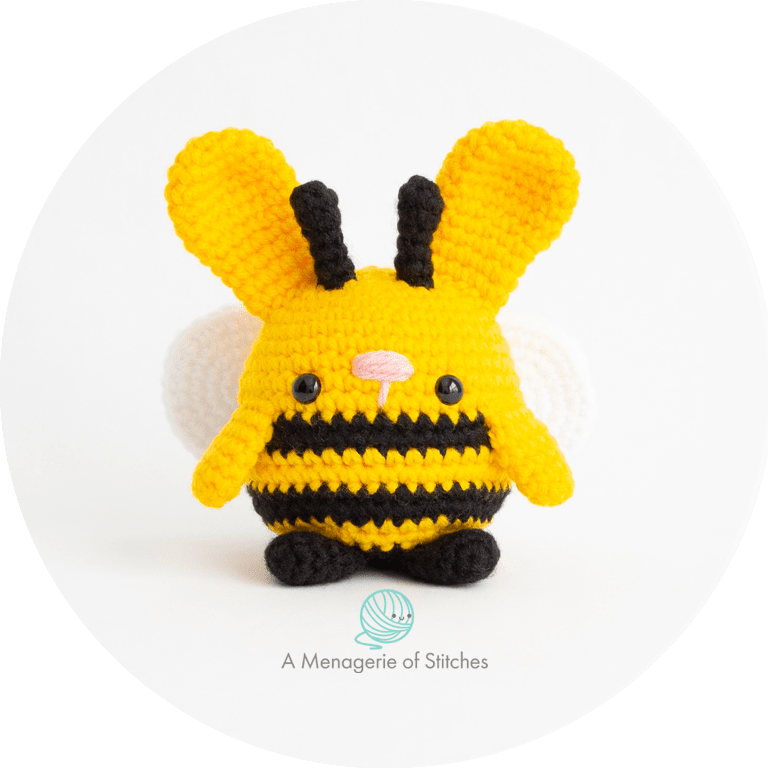
Bumblebee Bunny
Materials Needed:
- Yarn- I used Michaels Loops & Threads Impeccable in the colors Sunny Day, Black, White, and Soft Rose
- Size E/3.5mm Crochet Hook
- 1 pair of black 9mm safety eyes
- Plus all other materials listed in the original pattern
Ears- Follow the pattern and make 2 ears in Sunny Day.
Arms and Legs- Follow the pattern and make 2 arms in Sunny Day and 2 legs in Black.
Body
Follow rounds 1-12 of the original pattern, using sunny day yarn. Change to black yarn after completing round 12.
R13+14: Sc 42.
Add safety eyes between rounds 12 and 13, 6 stitches apart. Stitch on the nose with soft rose yarn.
Change to sunny day yarn,
R15+16: Sc 42.
Change to black yarn,
R17+18: Sc 42.
Change to sunny day yarn,
Follow rounds 19+20 of the original pattern. Change to black yarn. Fasten off the yellow yarn.
Follow rounds 21-24 of the original pattern to complete the body.
Assemble the ears, arms, and legs exactly as the pattern states.


Tail
Using black yarn,
R1: 6 sc in magic ring. (6 sts)
R2: Sc 6.
R3: *Sc 1, inc* 3 times. (9 sts)
R4: Sc 9.
R5: *Sc 2, inc* 3 times. (12 sts)
Fasten off and leave a tail for sewing. Add a little bit of fiberfill.
With straight pins, pin the tail between rounds 17-20. Then with the yarn needle, sew the tail into place. Secure with a knot and hide inside the body.


Prefer an ad-free, printable PDF pattern?
Grab the Seasonal Bundle of Chubby Bunny Crochet Patterns HERE
Antenna- Make 2
Using black yarn,
R1: 5 sc in magic ring. (5 sts)
R2: Inc in each st around. (10 sts)
R3: Inv dec around 5 times. (5 sts)
R4-6: Sc 5.
Fasten off and leave a tail for sewing. Leave antennas unstuffed.
Pin the antennas between rounds 3-5. With the yarn needle, sew into place. Secure the ends with a knot and hide inside the body.


Wings- Make 4
Using white yarn,
R1: 6 sc in magic ring. (6 sts)
R2: Inc in each st around. (12 sts)
R3: *Sc 1, inc* 6 times. (18 sts)
R4: Sc 1, inc, *Sc 2, inc* 5 times, sc 1. (24 sts)
R5: *Sc 3, inc* 6 times. (30 sts)
Fasten off, weaving in the ends on two pieces. Leave a long tail on the other two pieces for sewing. Make sure to do the clean fasten off method (see pattern notes) for a clean finish on the wings.
To make the wings- Take one piece with the ends woven in and one piece with a long tail. Place the “wrong sides” facing each other. Then with the yarn tail and yarn needle, sew the two pieces together.


Weave the needle under the “V” of the stitches from R5 on both pieces. You’ll insert the needle under the stitch, then go to the second piece and weave under the stitch. Then move over to the next “V” and weave under, coming back to the first piece. When coming back to the first piece, you’ll weave the needle under the same stitch we started with. Then you’ll move over to the next stitch and weave under to go to the second piece, going under the previous stitch.


You’ll go back and forth like this until you reach the end. Do this on both wings. Do not secure the yarn tail as we’ll use this to sew the wings onto the body.
Once the piece is fully sewn together, pin into place on the back of the body near rounds 10-15, about 5 stitches apart. With the same yarn tail, sew the wings to the body.


Secure the end with a knot and hide inside the body.


Prefer an ad-free, printable PDF pattern?
Grab the Seasonal Bundle of Chubby Bunny Crochet Patterns HERE
Lady Bug Bunny

Materials Needed:
- Yarn- I used Michaels Loops & Threads Impeccable in the colors Black, White, and Soft Rose, Michaels Craftsmart yarn in the color Tomato
- Size E/3.5mm Crochet Hook
- 1 pair of black 9mm safety eyes
- Black felt
- Hot glue gun
- Plus all other materials listed in the original pattern
Ears- Follow the pattern and make 2 ears in Black.
Arms and Legs- Follow the pattern and make 2 arms in Black and 2 legs in Tomato.
Tail- Follow the pattern and make the tail in Tomato.
Body
Follow rounds 1-12 of the original pattern, using black yarn. Change to tomato yarn after completing round 12, fasten off the black yarn, and follow rounds 13-24 of the original pattern to complete the body.


Add safety eyes between rounds 11&12, 6 stitches apart. Use white yarn to outline the outside of the eyes so they stand out.
Assemble the ears, arms, legs and tail exactly as the pattern states.
Antenna- Make 2
Using black yarn,
R1: 5 sc in magic ring. (5 sts)
R2: Inc in each st around. (10 sts)
R3: Inv dec around 5 times. (5 sts)
R4-6: Sc 5.
Fasten off and leave a tail for sewing. Leave antennas unstuffed.


Pin the antennas between rounds 3-5. With the yarn needle, sew into place. Secure the ends with a knot and hide inside the body.
With black felt, cut out 13 dots. They can be however big you’d like, mine were about ½ inch in diameter.
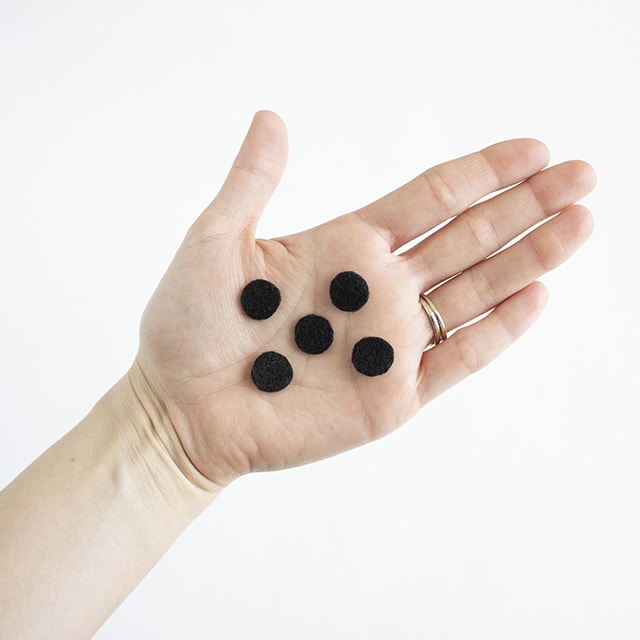
Use hot glue to attach them all over the red part of the body.


Prefer an ad-free, printable PDF pattern?
Grab the Seasonal Bundle of Chubby Bunny Crochet Patterns HERE
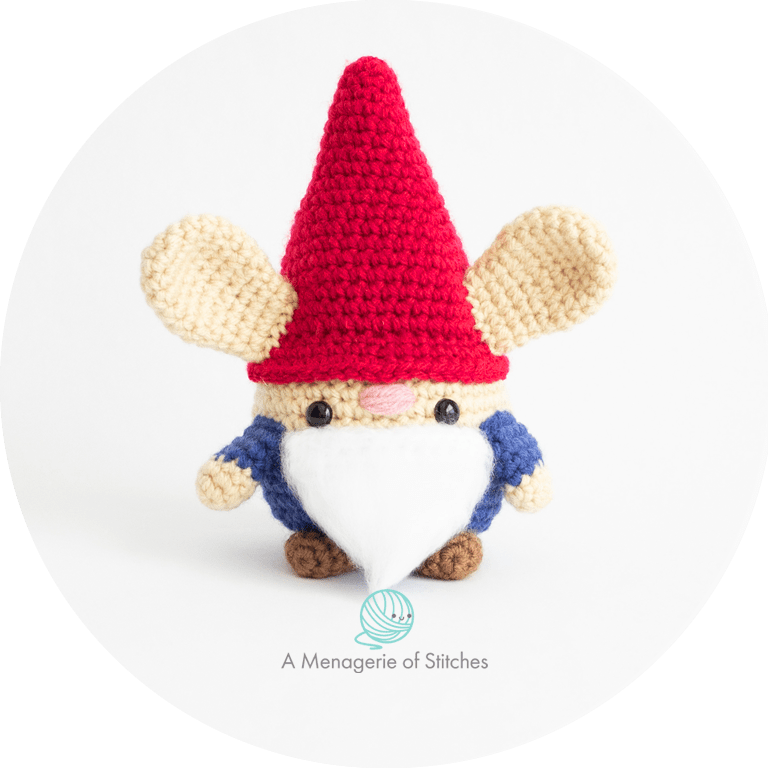
Gnome Bunny
Materials Needed:
- Yarn- I used Michaels Loops & Threads Impeccable in the colors Heather, Cherry, White, and Soft Rose, Michaels Craftsmart yarn in the color Toasted Almond, Lion Brand Vanna’s Choice in the color Colonial Blue
- Size E/3.5mm Crochet Hook
- 1 pair of black 9mm safety eyes
- Pet slicker brush
- Optional- Hot glue gun
- Plus all other materials listed in the original pattern
Ears- Follow the pattern below and make 2 ears in Heather.
Arms and Legs- Follow the pattern and make 2 legs in Toasted Almond. For the arms, follow the pattern listed below.
Tail- Follow the pattern and make the tail in Colonial Blue.
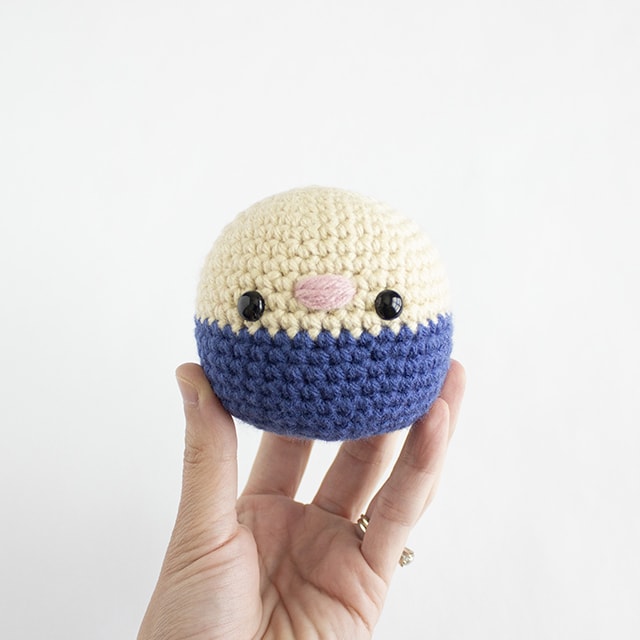
Body
Follow rounds 1-12 of the original pattern, using heather yarn or any other skin tone. Change to colonial blue yarn after completing round 12, fasten off the heather yarn, and follow rounds 13-24 of the original pattern to complete the body.
Add safety eyes between rounds 11&12, 6 stitches apart. For the nose, omit the vertical line in the center.
Arms
Using heather yarn or any other skin tone,
R1: 5 sc in magic ring. (5 sts)
R2: Inc in each st around. (10 sts)
R3: Sc 10.
Change to colonial blue yarn,
R4-6: Sc 10.
R7: Sc 4. Do this by lining up the stitches on both sides of the arm then inserting the hook under both stitches. Sc as normal.
Fasten off and leave a tail for sewing. Leave arms unstuffed.
Assemble the arms, legs and tail exactly as the pattern states.


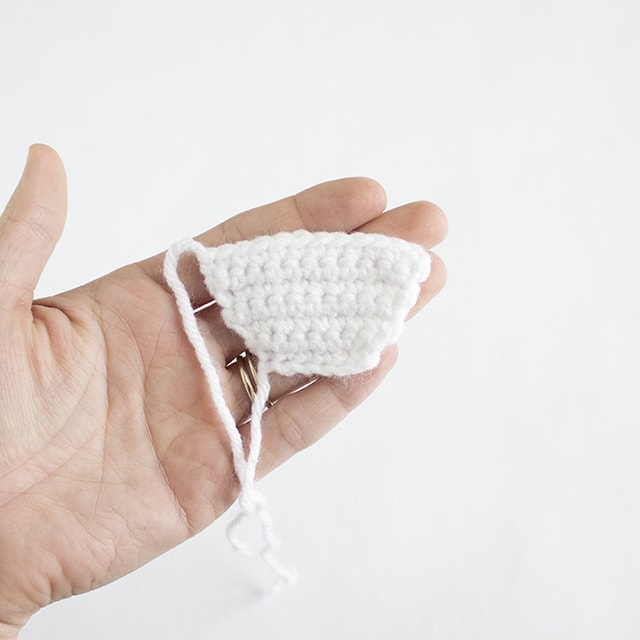
Beard
Using white yarn,
R1: Ch 7, then starting in the 2nd ch from hook, sc across 6 times. (6 sts) Ch 1 and turn.
R2: Inc, sc 4, inc. (8 sts) Ch 1 and turn.
R3: Inc, sc 6, inc. (10 sts) Ch 1 and turn.
R4+5: Sc 10. Ch 1 and turn.
R6: Inc, sc 8, inc. (12 sts) Ch 1 and turn.
R7: Sc 12.
Fasten off and weave in the ends.
If you’ve never brushed a crocheted piece before, check out the video tutorial below. Step by step photos are under the video.
Using a pet slicker brush, brush the beard piece until you’re happy with how fuzzy it is. Use sharp scissors to trim and shape the beard, if needed. Using either a strand of white yarn, or hot glue, sew or glue the beard to the body at round 13, right below the safety eyes. Only sew the longest part of the beard into place, leaving the pointier part to hang.


Prefer an ad-free, printable PDF pattern?
Grab the Seasonal Bundle of Chubby Bunny Crochet Patterns HERE
Hat
Using cherry yarn,
R1: 6 sc in magic ring. (6 sts)
R2: *Sc 1, inc* 3 times. (9 sts)
R3: Sc 9.
R4: *Sc 2, inc* 3 times. (12 sts)
R5: *Sc 3, inc* 3 times. (15 sts)
R6: Sc 15.
R7: *Sc 4, inc* 3 times. (18 sts)
R8: Sc 18.
R9: *Sc 5, inc* 3 times. (21 sts)
R10: Sc 6, inc* 3 times. (24 sts)
R11: Sc 24.
R12: *Sc 7, inc* 3 times. (27 sts)
R13: *Sc 8, inc* 3 times. (30 sts)
R14: *Sc 9, inc* 3 times. (33 sts)
R15: Sc 33.
R16: *Sc 10, inc* 3 times. (36 sts)
R17: Sc 36.
R18: *Sc 11, inc* 3 times. (39 sts)
R19: Sc 39.
R20: In FLO, Sc 6, inc, *Sc 12, inc* 2 times, sc 6. (42 sts)
R21: *Sc 13, inc* 3 times. (45 sts)
R22: Sc 7, *Sc 14, inc* 2 times, sc 7. (48 sts)
Fasten off and weave in the end.


Add fiberfill to the hat, filling only until R20. With hot glue, attach the hat to the body, lining it up with round 10, right above the nose. If you prefer, you can always sew the hat into place. If sewing, use the back loops left over from round 20 to attach the hat to the body.
Ears
Using heather yarn or any other skin tone,
R1: 6 sc in magic ring. (6 sts)
R2: Inc in each st around. (12 sts)
R3: *Sc 1, inc* 6 times. (18 sts)
R4-7: Sc 18.
R8: *Sc 1, inv dec* 6 times. (12 sts)
R9-11: Sc 12.
Fasten off and leave a tail for sewing.


With straight pins, pin the ears to the hat between rounds 17-22. Using the yarn needle and tail, sew the ears into place on the hat. Secure the ends with a knot and hide inside the hat.


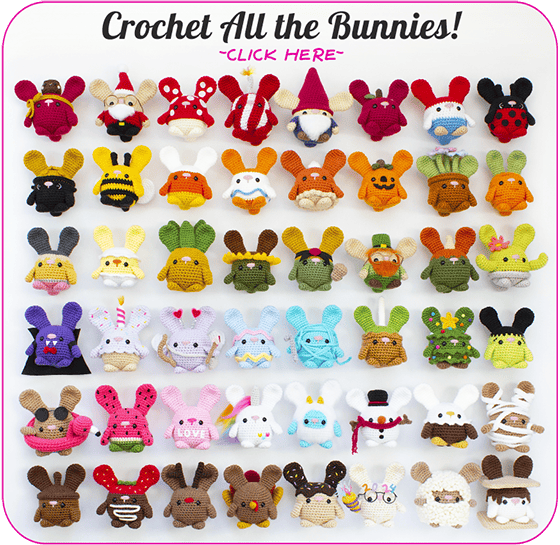
➤Make sure to check out all of my other free crochet patterns here!
CLICK TO PIN NOW:
CROCHET SPRING GARDEN BUNNIES!
I hope you enjoyed and loved making these Crochet Spring Garden Bunnies! I’m thrilled to offer these free crochet patterns and love seeing all the things you make from my amigurumi patterns. If you make these crochet Spring garden bunnies, please tag me in your posts on Instagram @amenagerieofstitches and use the hashtags #amenagerieofstitches and #seasonalchubbybunnies
Happy Crocheting!
Lauren
If you have any trouble with these crochet Spring garden bunnies, please don’t hesitate to reach out! If you would like to make even more free amigurumi crochet cuties check others out here!
These crochet Spring Garden Bunnies are original patterns by Lauren Espy of A Menagerie of Stitches. Please do not claim this amigurumi pattern as your own. If you’d like to share this crochet pattern, you may provide a link to this post but please do not reprint it on your website. You may sell products made from this amigurumi pattern but please credit me, Lauren Espy of A Menagerie of Stitches, and provide a link to my blog www.amenagerieofstitchesblog.com Absolutely no mass production or manufacturing of any kind is allowed. Thank you for understanding.
Disclaimer- This free crochet Spring Garden Bunnies post contains affiliate links. By clicking these links, you help support me and my business at no cost to you.
I love your free bunnies collections! Thanks for sharing them with all of us. Congratulations
Aww I’m so happy you love them! I really enjoy making them all!
Super Cute. Thank you.
Thanks! I’m so glad you like them!